Auto Updater component contains the service for installing and updating your endpoints. The Auto Updater is deployed as a separate service to your endpoint, and it allows you to keep your Proofpoint ITM Agents up to date from the console without the need for 3rd party tools to perform the updater.
When this service is installed, you can set up and use endpoint update policies to update endpoints from Proofpoint Data Security & Posture. (See Endpoint Update Policies.)
Auto Updater Update
Once installed, the Auto Updater continually (once every 10 minutes) checks which Endpoint Update Policies it should run. If there are multiple policies, with the same conditions, by default, the Auto Updater will run the last created policy.
Once it is initially installed, if there is at least one active policy, the Auto Updater self updates. So any future updates are automatically installed and you do not need to download and install new versions.
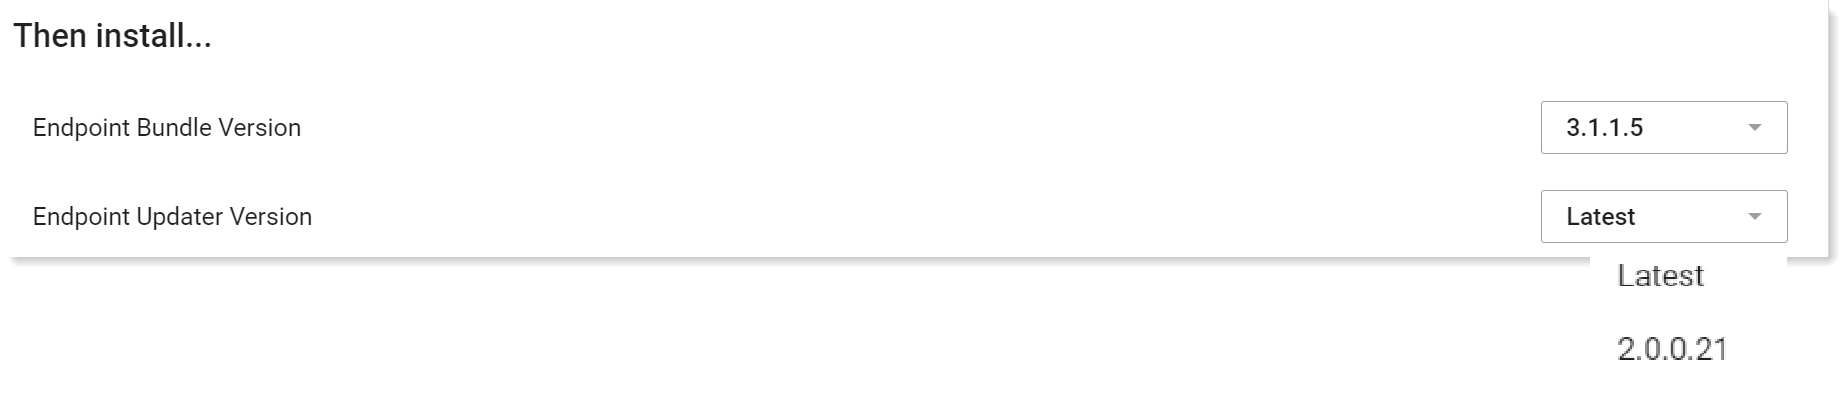
From Updater version, 2.0.0.x, On-Demand Update is supported. On-Demand Update lets you control target Updater versions and allows you to test new Updater versions before deployment. When adding an Endpoint Update Policy, you can select the Endpoint Updater Version that you want. In the Update Policies, a new field, Endpoint Updater Version is now available.
You can select the latest version or any other version from the list.
Auto Updater checks which version is currently installed on the endpoint and whether it matches the target version in the policy. If the versions do not match, the Auto Updater updates the endpoint with the target version. If the endpoint is already updated to the target version, Auto Updater does not try to update it again.
Auto Updater Installation
The first time you install the Auto Updater, you install the latest version from Administration > Endpoints >Downloads. (See Windows Auto Updater Installation and Mac Auto Updater Installation.)
Before you install the Mac Auto Updater, you must download the Configuration Profile. (See Management Tools.)
Once installed, the Auto Updater will update itself when it updates the endpoints. This way, you do not need to install new versions of the Auto Updater. You are always using the latest version.
You can also install the Auto Updater using SCCM for Windows or other Windows management solution. (See Windows Auto Updater Automated Installation.)
When downloaded and installed, by default, all its files are stored in C:\Program Files\Windows Client Utility\Updater Utility\.
You can use JAMF for Mac mass deployment. (See Mass Deployment to Install/Uninstall the Mac Auto Updater (JAMF).)
You must Enable Endpoint Update in the Advanced Settings area of the Agent Realm.
When you install the Auto Updater, you are prompted for a configuration file. Make sure you download the configuration file from the Agent Realm assigned to the Agent. If you use a configuration file from a different Agent Realm, the Agent will be associated with that Agent Realm not the Agent Realm it was assigned to.
Make sure you download and use the Updater Configuration file option.
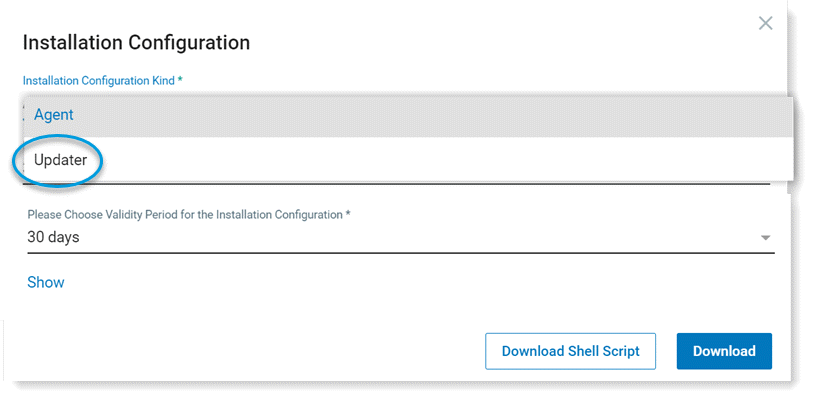
(See Installation Configuration File.)
Auto Updater Uninstall
For more information see:
Uninstalling the Windows Auto Updater
Uninstalling the Mac Auto Updater from the Command Line
Auto Updater Logs
Log files are stored in the logs folder with the naming convention updater-<log date>.log for example updater-2021-09-23.log. Logs are generated daily and moved to the archives folder when the next day's logs are generated. Logs are stored for 14 days and automatically deleted after that.
Log Levels
By default, logs are generated to contain errors only.
If you want to include additional information in the logs, you need to change the log level.
0 - None
1 - Fatal
2 - Error
3 - Warning
4 - Info
5 - Debug
6 - Trace
Changing the Log Level
To change the log level, you use the it-utility.exe utility.
-l is the log level
-i is the Updater ID
From the command line, run it-utility.exe as Administrator with the following commands:
cd C:\Program Files\Windows Client Utility\Updater Utility\
it-utility.exe log -l <log level> -i xxxxxx-yyyy-aaaa-bbbb-zzzzzzz
For example
it-utility.exe log -l error -i xxxxxx-yyyy-aaaa-bbbb-zzzzzzz
or
it-utility.exe log -l 2 -i xxxxxx-yyyy-aaaa-bbbb-zzzzzzz
If successful, a message is returned indicating that the log level has changed.
ITM / Endpoint DLP Basic Configuration
< Back Setting up Agent Realms | Endpoint Update Policies Next >