The Windows Agent Bundle includes IT Client Utility for the endpoint agent setup and IT Content Analyzer for the content scanning component.
You must install the IT Client Utility and you can optionally select to install the IT Content Analyzer if you want to include content scanning.
For more information, see Supported Platforms and System Requirements for ITM / Endpoint DLP.
From Windows agent version 1.2.2.4, Content Scanning is supported. You can opt to include Content Scanning when installing.
In addition, you can install the bundle via Proxy or as a Master Image.
Both Static Proxy and Dynamic Proxy are supported.
Use one of the following to install the Windows agent:
Prerequisites:
-
Windows Management Instrumentation (WMI) must be enabled.
-
The Run all Administration Admin Approval Mode setting must be enabled in the User Account Control settings (in the Local Security Policy) to successfully detect file upload via the Open dialog (AKA, File Picker).
This setting is critical. If disabled, the Win Agent will not detect file uploads.
- You must complete Installation Configuration File. You will need the name and location of the config.json file to continue the installation.
-
Before installing, select Run as Administrator.
-
If using a Proxy server, make sure it is set up and you have connectivity to it.
Self-signed certificate is required for Proxy setup.
-
For Dynamic Proxy:
It might take time for the Windows operating system to read changes to PAC file content or when a new or different PAC file is used. Restarting the endpoint will apply those changes immediately.
Authentication of Proxy (with User and Password) is not supported when using Dynamic Proxy.
-
Dynamic Proxy requires that Proxy Auto-Configuration (PAC) resides on an accessible Web server.
-
This feature is based on proxy settings defined at the Operating System level. The Operating System must be configured to use dynamic proxy for applications running under the System account (not the user account). In order to set it or to find out if it’s already set you can run the following commands as Administrator in CMD or PowerShell:
To set it:
-
bitsadmin /util /setieproxy localsystem AUTOSCRIPT http://test.com/proxy.pac
To find out if it’s already set:
bitsadmin /util /getieproxy localsystem
-
-
Valid Root Certificate
For the installation to succeed, you must make sure that the endpoint has a valid root certificate.
Proofpoint signs the Agent with this valid root certificate. Proofpoint signs the Agent with a certificate to ensure that the customer knows that the Agent is from Proofpoint. The certificate has an expiration date. The certificate is renewed annually and is dependent on a valid root certificate.
Downloading the Agent Bundle Installation Files
-
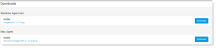
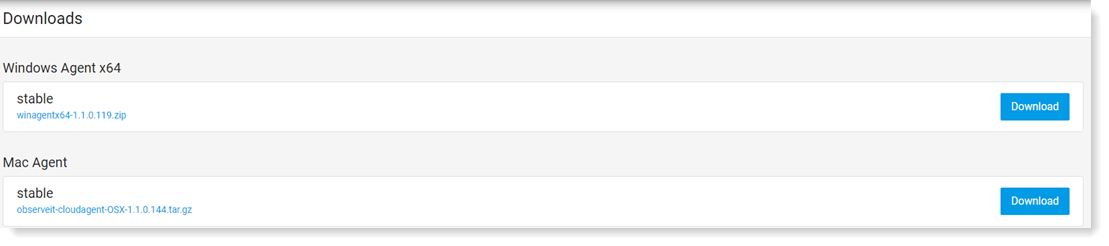
From Proofpoint Data Security & Posture, select the Administration app. Select Endpoints > Downloads.
-
In the Windows area, from the Agent Bundle section, select the latest-stable version and click Download..
-
Save the downloaded .zip file locally.
-
When you extract the contents of the .zip file, you'll have the following files:
- ITMSaaSBundle-<version>.exe: Agent Setup file
- WinagentInstall.cmd: Executable installation file
- WinagentUninstall.cmd: Executable file for uninstall
Installing the Agent Bundle using the Wizard
This describes how to install the Proofpoint Windows Agent / Bundle for ITM /Endpoint DLP using the Installation wizard. The wizard always installs the IT Client Utility module and optionally the IT Content Analyzer.
-
From the files you extracted, run ITMSaaSBundle-<version>.exe and the wizard opens. (Make sure you Run as administrator.)
-
Select the components you want to install and then click Install.
-
IT Client Utility installs the Windows agent. This option is selected and must be installed.
-
IT Content Analyzer installs the Content Scanning utility. (For more information about Content Scanning, see Content Scanning.)
-
-
Click Next and accept the license agreement. Click Next.
-
Enter the location for:
- Installation folder: this is the location where you want to install the IT Client Utility module.
- Installation configuration folder: this is the config.json file you previously downloaded from Realms and saved locally.
If you are using a master image, select Install for a master image. For more information, see Windows Agent and Auto Updater VMs and VDI Support.
Click Next.
-
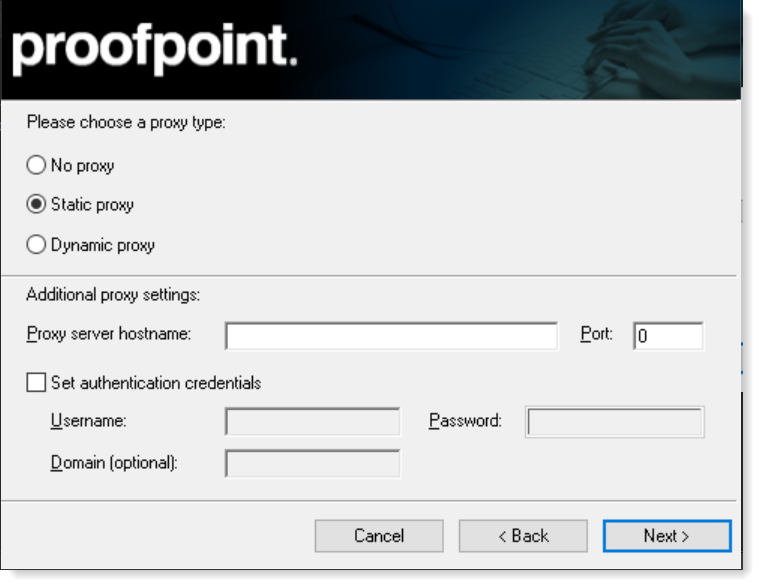
If you are using a Static Proxy server, complete the details.
Select Static proxy.
Provide the Proxy Server Hostname and Port.
Optionally, if you want to set default credentials, complete the Domain, Username and/or Password fields.

Click Next.
-
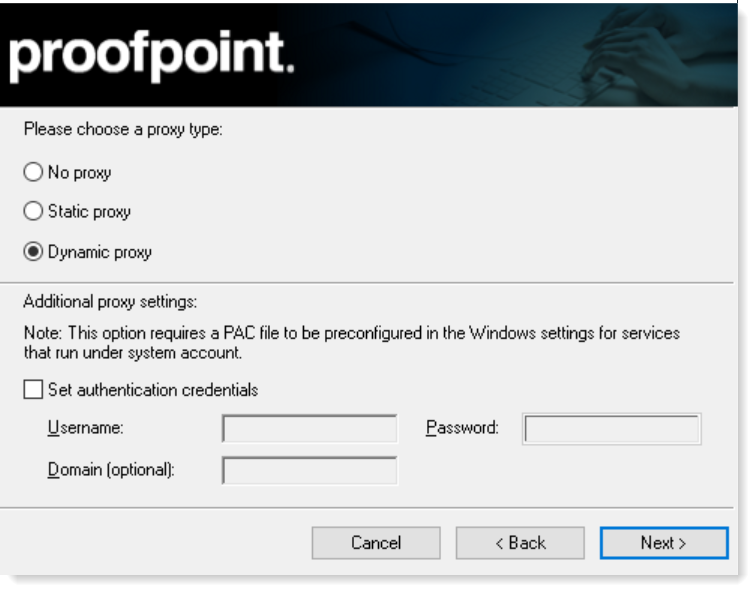
If you are using a Dynamic Proxy servers, complete the details.
Dynamic Proxy requires that a PAC file is preconfigured to select the appropriate proxy server.
Select Dynamic Proxy.
If you want to set authentication credentials, select Set authentication credentials and provide the Username, Passowrd and Doman (optional).

Click Next.
-
The Windows SaaS agent Setup runs and when complete a success message displays. Click Close.
Installing the Agent Bundle from the Command Line
You can install the Agent Bundle components by running WinagentInstall.cmd as administrator. The IT Utility Client will be installed by default. You can set contentdetection parameter to install/not install the IT Content Analyzer content scanning component.
From Windows agent version 1.2.x.xxx, a new command line replaces the previous one. Parameters are no longer uppercase only. Copy/paste according to the list below.
-
Open WinagentInstall.cmd with a text editor.
msiexec /i "winagent.msi" TARGETDIR="%ProgramW6432%\IT Client Utility\Client Utility" /quiet /norestart PRECONFIGPATH="C:\Temp\preconfig.json" /leo "ClientUtility_setup.txt"-
Define the parameters below for your installation:
Required Parameters
TargetDir: Installation directory (default: "%ProgramFiles%\IT Client Utility\Client Utility")
PreConfigPath: Full path for the Pre-Configuration file downloaded from the server, for example <config>.json
Optional Components Parameters
contentdetction is the component that includes content scanning:
-
contentdetection=0:Do not install content detection component
-
contentdetection=1:Install content detection component
ItxMstrImage=True: Install as Master image
Proxy Settings
Dynamic proxy is supported from version 2.0.0.57. Make sure to use the ProxyType parameter. EnableProxy parameter is no longer valid.
ProxyType=0 No proxy (default)
ProxyType=1 Static proxy
ProxyType=2 Dynamic proxy
ProxyServerHostname="<URL/IP>" This field is required if ProxyType = 1 (Static Proxy is on ).
ProxyServerPort="<Proxy Port>" This field is required if ProxyType = 1 (Static Proxy is on).
ProxyAuth_Credentials=1 to use authentication credentials
ProxyDefault_Credentials=1 to set to true. To disable, do not send this parameter.
ProxyDomain="<Domain Login>" (Optional)
ProxyUsername="<Proxy Username>" *This field is required if ProxyAuthCredentials = 1(authentication credentials is on).
ProxyPassword="<Proxy Password>" *This field is required if ProxyAuthCredentials = 1 (authentication credentials is on).
Installation Log
/log [Path_To_Log_File] – by default will be create in %TEMP% directory
-
-
-
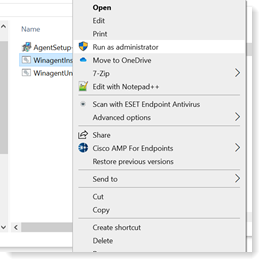
Left-click WinagentInstall.cmd and select Run as administrator.

Installing the Windows Agent and Proxy from the Command Line
You set proxy configuration from it-utility.exe.
-
Stop Windows service IT Cloud Service (it-servicecontroller.exe)
-
Use CMD or Powershell as administrator and from the command line.
it-utilty.exe proxy -h <proxy host> - p <proxy port> -e
For example:
it-utilty.exe proxy -h <MyProxyServer> - p <500> -e
where the Proxy Server Host is MyProxyServer and the Proxy Port is 500.
Use these parameters with the command:
-
-h, --host (Default: ) Proxy host (-h). This parameter is required.
-
-p, --port (Default: 0) Proxy port (-p). This parameter is required.
-
-c, --dcred (Default: false) Proxy use default credentials (-c)
-
-e, --enabled (Default: false) Proxy enabled (-e)
-
-r, --reset (Default: false) Reset proxy to default values (-r)
-
-u, --user (Default: ) Proxy username (-u)
-
-x, --pass (Default: ) Proxy password (-x)
-
-d, --domain (Default: ) Proxy domain (-d)
-
-
Start Windows service.
Related Topics: