Custom Access Policies
Custom access policies are a list of capabilities that you assign to users/groups. Using if-then logic, you define the restrictions on which activities and alerts the user can access in Proofpoint Data Security.
Custom access policies are useful to assign specific capabilities to users or to a group of users within your organization. For example, you could create a custom access policy that restricts what data a user can view.
Based on your company's entitlements, the capabilities can be defined to access criteria across multiple channels, such as endpoint and cloud.
Creating a Custom Access Policy
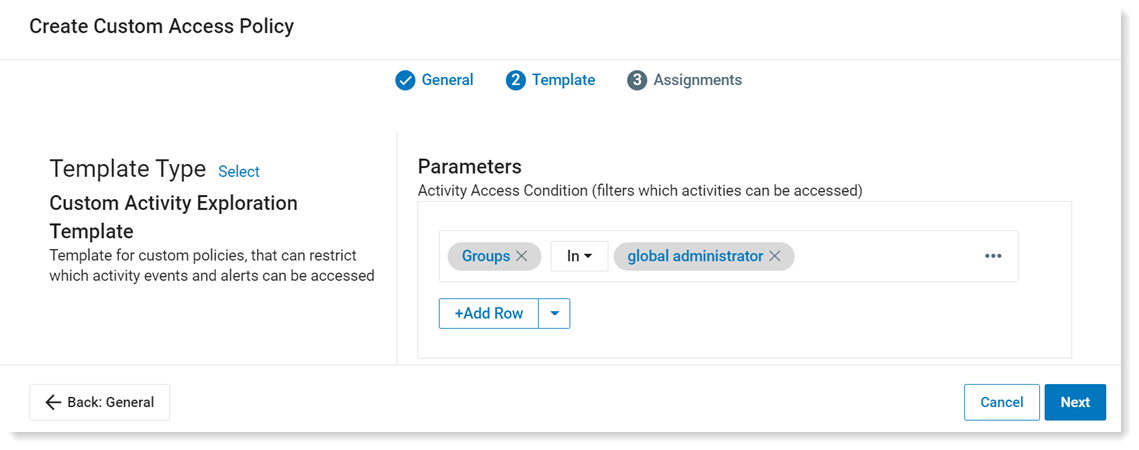
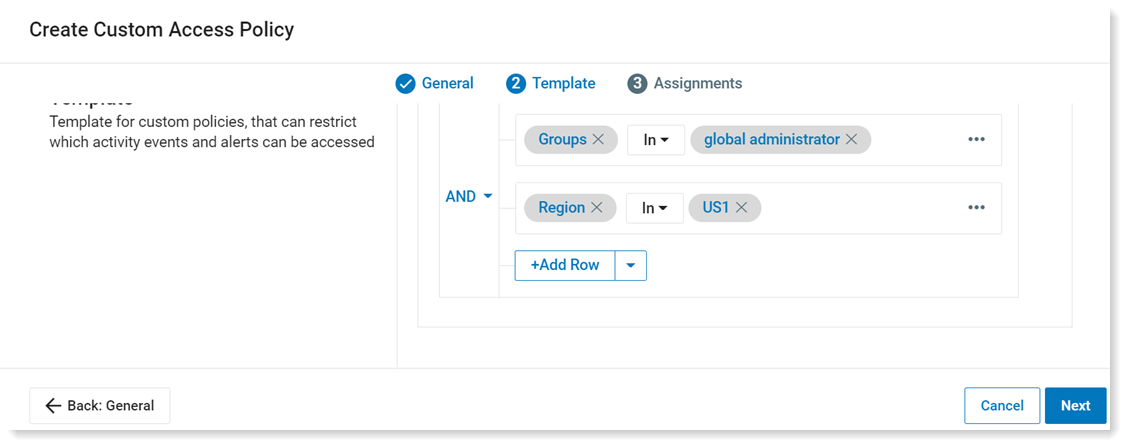
In this example a custom access policy is created that restricts access to activity by users in the global administrator group and activity in the US1 region. Once this policy is assigned to a user, that user can only see activity for users in the global administrator group and only their activity in the US1 region.
-
From the Administration app in the Proofpoint Data Security, select User Management > Access Policies. Click New Custom Access Policy. The General tab of Create Custom Access Policy displays.

-
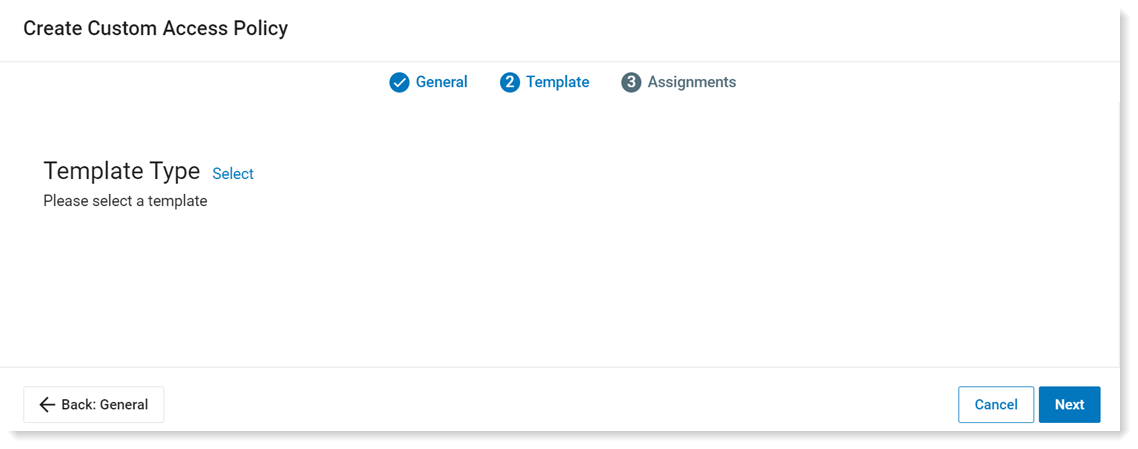
In the General tab area, complete the Name, Alias fields and optionally the Description field. Click Next and the Template tab displays.
The Name field displays in the relevant Proofpoint Data Security views. Alias used by the system.
-
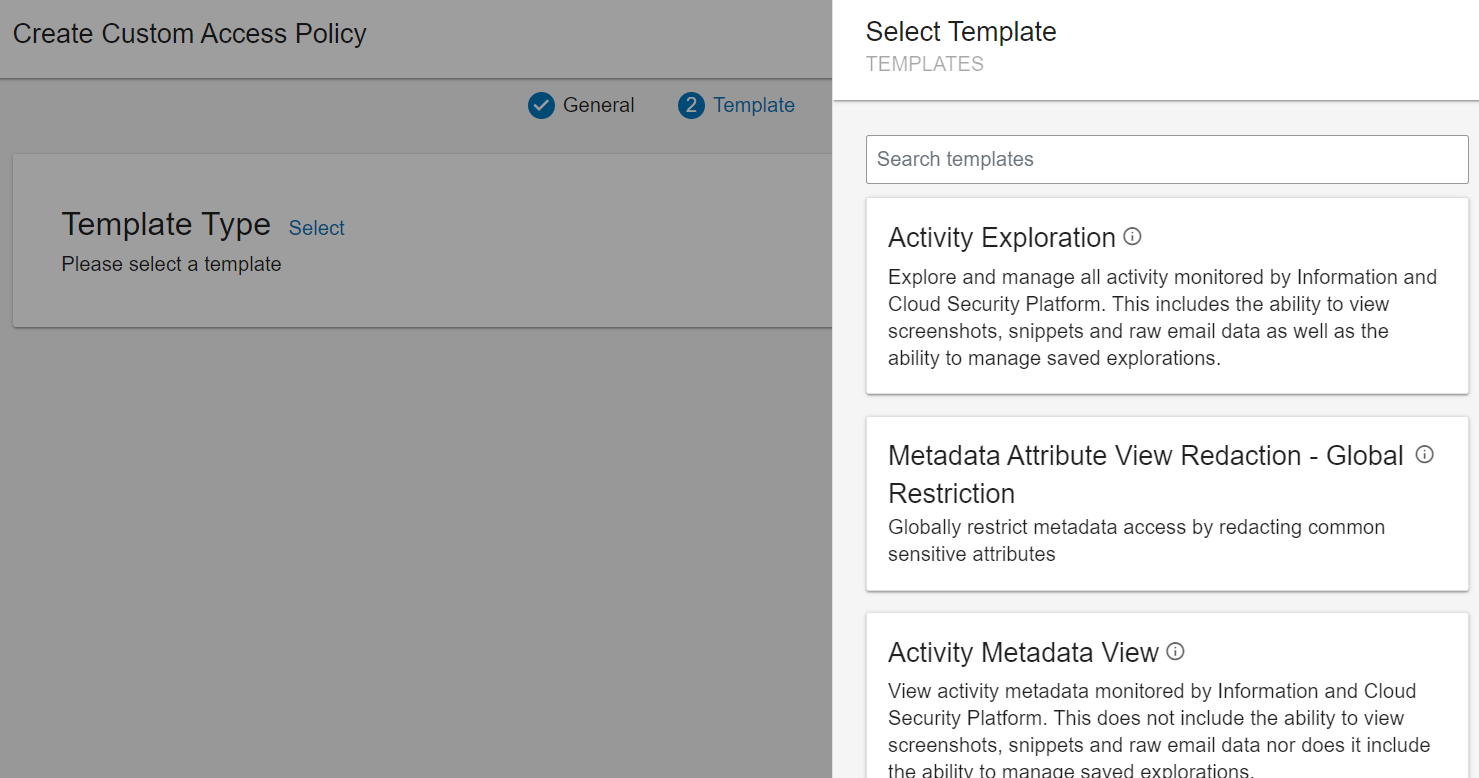
In the Template tab, define the criteria. Select the Template Type by clicking Select.
The Select Templates list displays.
-
Select the template you want.
-
Define the Parameters. Select Field from the Select dropdown. The Select Field list displays.
-
For this example, select User > Groups from the Select Field list. Click Done.
-
Select Select Values to see the groups. Select the group you want, in this example global administrator is selected. Click Done.
The first condition is defined.
-
To add the next condition, click Add Row.
-
Select Select Field from the Select dropdown. The Select Field list displays.
-
Select Feed > Region from the Select Field list. Click Done.
-
Select Select Values to see the regions. Select the region you want, in this example US1 is selected. Click Done.
-
Click Next.
-
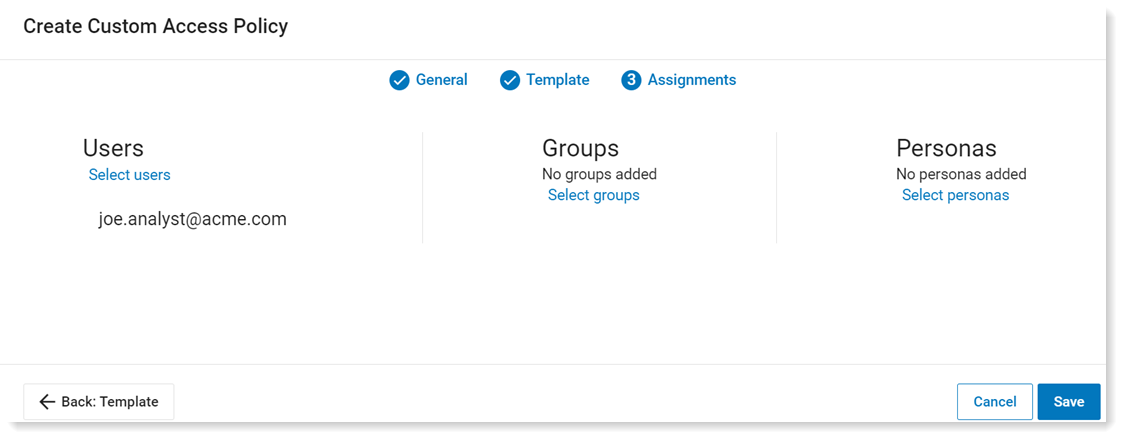
In the Assignments tab, you can select which users/groups/personas will be assigned this policy. In the example, this policy is assigned to joe.analyst@acme.com.
-
Click Save.
Related Topics:
Predefined Access Policies Descriptions
Access Policy Cloud DLP Tenant Segregation
Metadata Redacted View Restriction Access Policies (Anonymization)