Assigning Access Policies
Depending on what you are doing, you can assign access policies either from the Access Policies view by selecting the policy and assigning users, groups or personas to it or from the Users, Groups or Personas view by selecting the user, group or persona and then assigning the access policy to them.
You can assign access policies from the Proofpoint predefined access policies and Custom Access Polices you create.
Assigning Access Policies from the Access Policy View
Use this option when you want to assign access policies to users, groups or personas.
For example, your company has 2 access policies, executives have full access, and the administration staff has view only access. From the Access Policy view, you can select the policy and then assign it to the specific employees. When there are changes in personnel, you can simply add/remove the relevant employees.
-
From the Administration app in Proofpoint Data Security, select User Management > Access Policies.
-
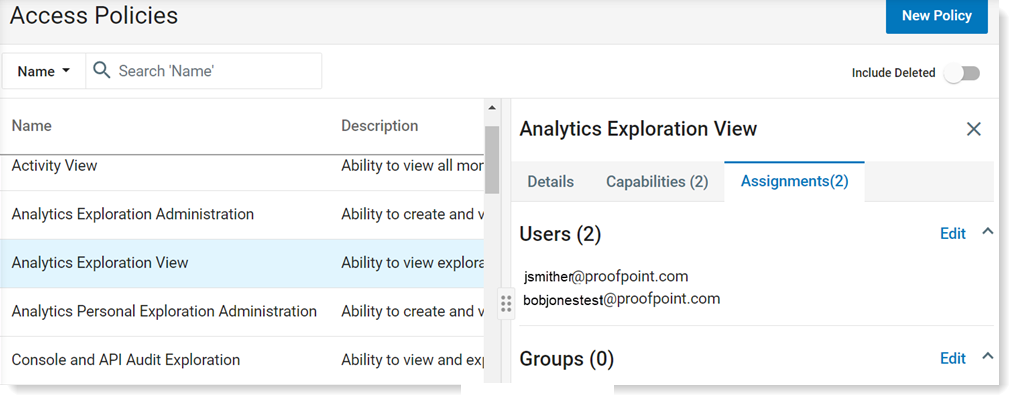
From the list of access policies, click the access policy you want, and the Details window appears.
-
In the Assignments tab, click Edit in the Users, Groups or Personas area.
-
Select the Users, Groups or Persona you want the access policy assigned to. Click Done.
Any selected User, Group or Persona is now assigned to this access policy.
Assigning Access Policies from User/Groups/Persona Views
Access policies can be assigned to users, groups or personas from the Users and Groups and Personas views.
For example, from the Users view, you could assign an access policy to a new employee. From the Groups view, you could assign a policy to a group that contains all your analysts.
-
From the Proofpoint Data Security, select the Administration app. Depending on what you want to do, select User Management > Users or select User Management > Groups or select User Management > Personas.
The Users or Groups or Personas view displays.
-
Click the user or group you want, and the Details window appears.
-
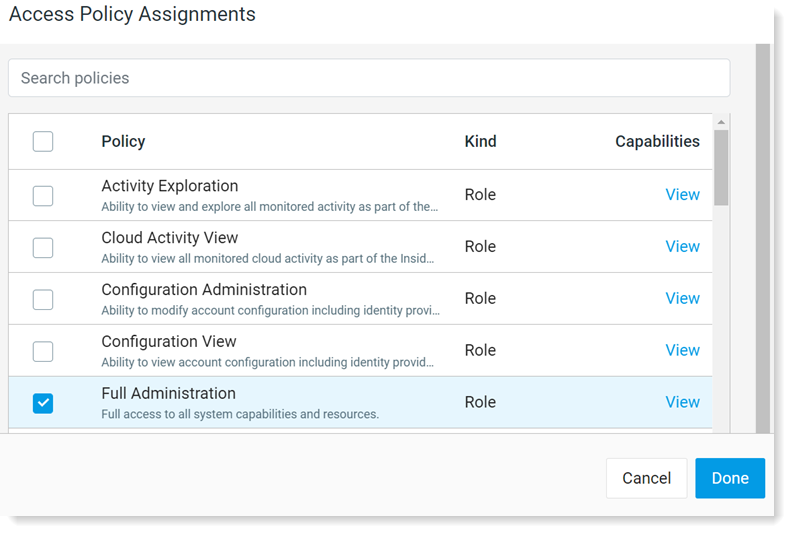
In the Access Policies tab, click Edit and assign the policies you want.
-
Optionally, to set an active time range, in the Expiration column, click Edit next to the access policy.
By default, the time range is set to Never expire.
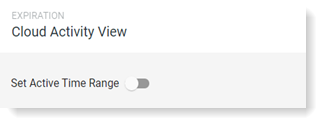
Toggle on Set Active Time Range and set the dates.

- Click Done to save.
Assigning Access Policies for Proofpoint Cloud DLP Users
Proofpoint Cloud DLP application privileges can be managed by assigning one of the following policies:
-
Cloud Activity View: Grants Basic User read-only privileges within the Proofpoint Cloud DLP application across all Cloud DLP tenants.
-
Cloud DLP Application Full Administration: Grants Full Administration privileges within the Proofpoint Cloud DLP application across all Cloud DLP tenants.
Proofpoint Console history does not include the user actions from the Proofpoint Cloud DLP application.
Related Topics:
Predefined Access Policies Descriptions
Metadata Redacted View Restriction Access Policies (Anonymization)