Customized Email Notifications for Rules
Notification Policies can be set up to send notifications via customized emails. These customized email notifications allow you to send as many notifications as needed to multiple defined users with your specified text.
This feature is available for Endpoint ITM detection rules and Cloud DLP rules. You create the notification policy and then select it from the Detection rule or Cloud DLP rule. When an alert is triggered, the custom email is sent.
For suggested Cloud DLP email templates, see Notification Policies for Cloud DLP\ATO Protection.
(See Notification Policies.)
Adding Customized Emails
Customized emails are managed in Integrations > Notification Policies.
The customized email is created from a template. You define the Recipients, Subject and Body of the email.
-
From the Administration app, select Integrations > Notification Policies to access the Notification Policies. Click New Notification.
-
Select For Rules from the New Notification options, click Create.
-
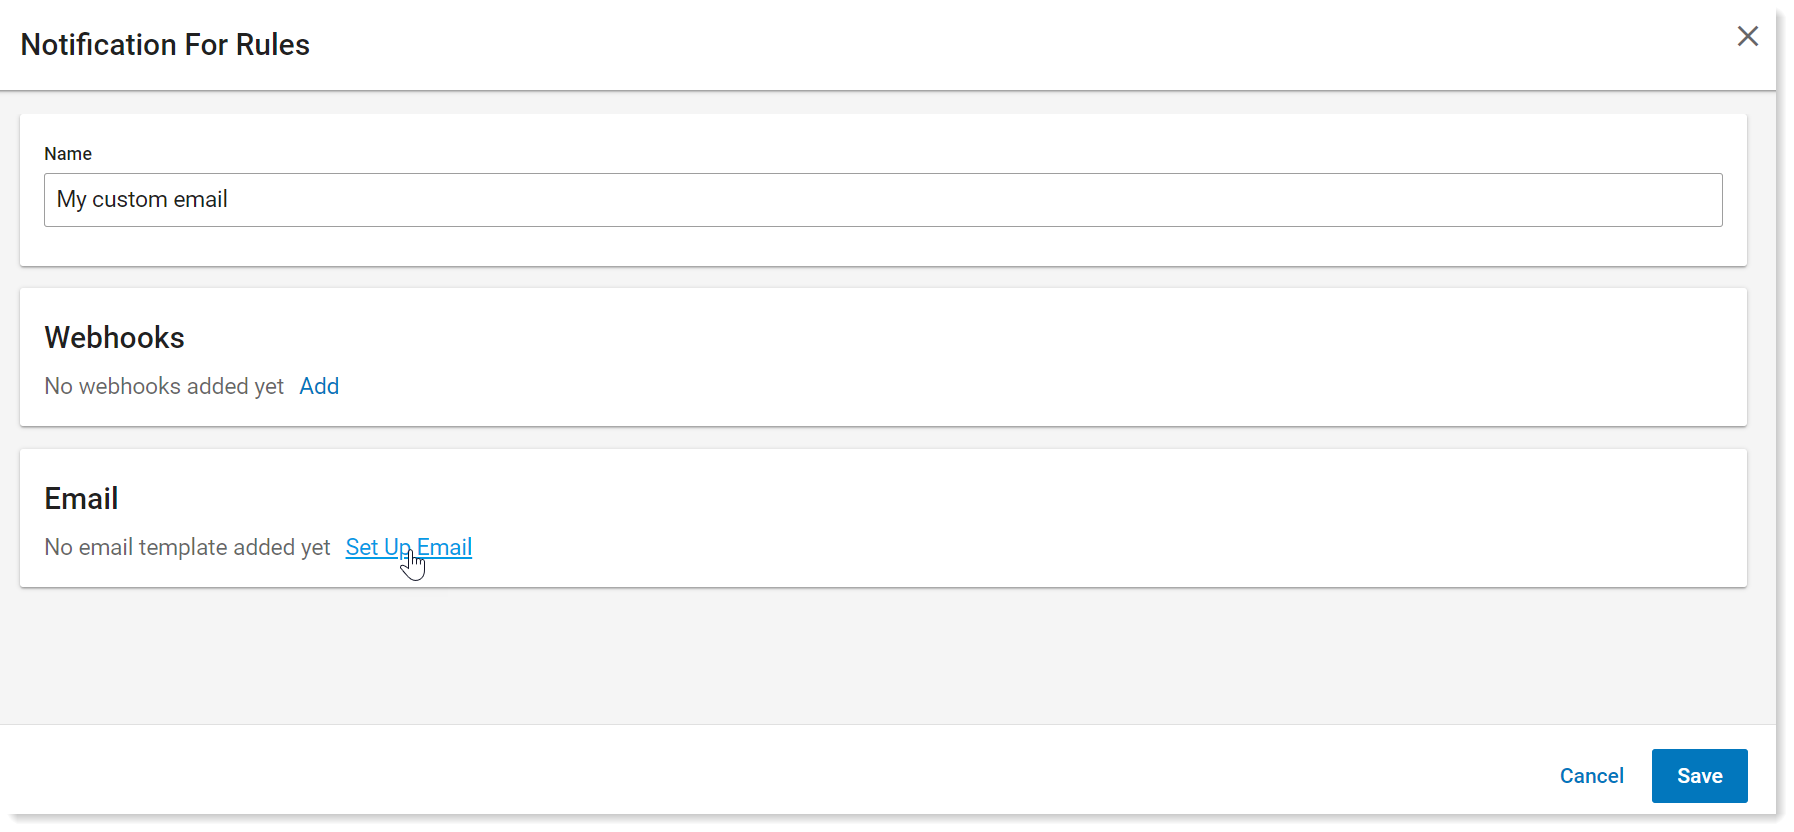
Provide a name for the email notification and in the Email area, click Set up Email.
-
Complete the message template.
Template Styling
You can add styling to the template. This includes formatting, images and links to other urls. The table describes the available styles.
| Use Case | Headers |
|---|---|
| Bold | <b>Your Text</b> |
| Italic | <i>Your Text</i> |
| Underline | <u>Your Text</u> |
| Link | <a><href=https:\\yoururl.com>Link Text</a> |
| Color | <font color='blue'>Your Text </font> |
| Embedded Image | <img src="data:image/png;base64,{image-content-base-64} "> |
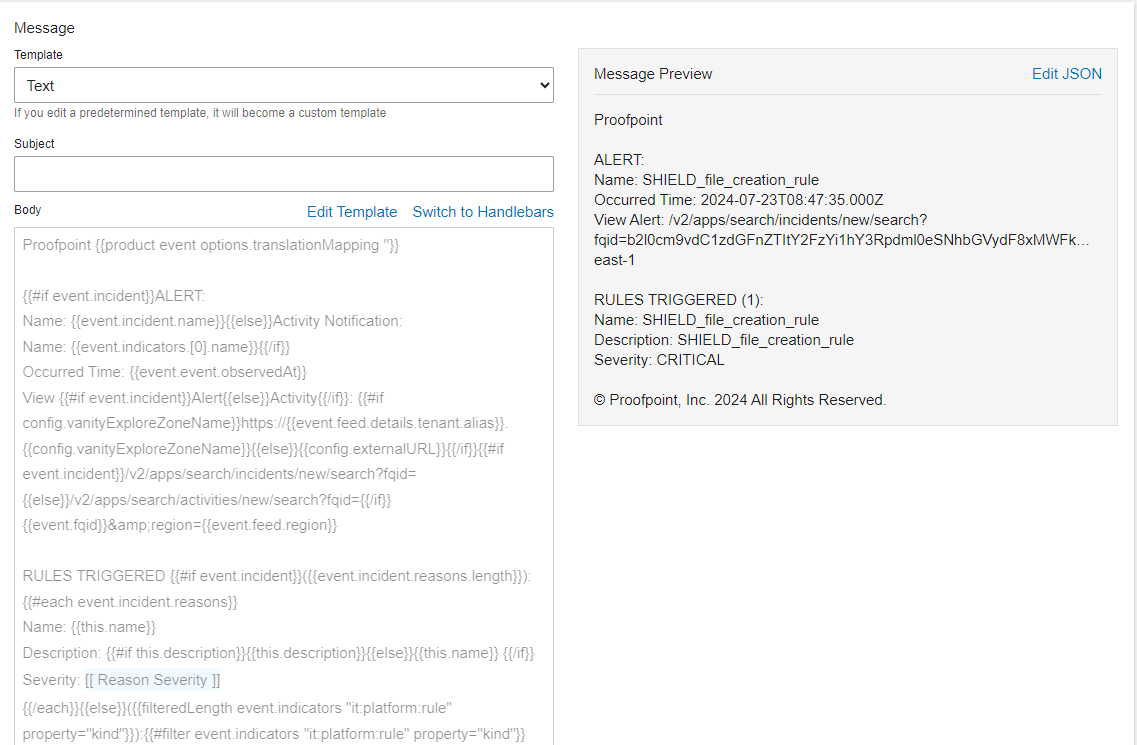
Customized Email Body
By default, a body template is provided. You can send emails using this or modify the template to customize as you want. You should customize the email based on your organization's needs.
As you design your email, you can preview it in the Message Preview window on the right.
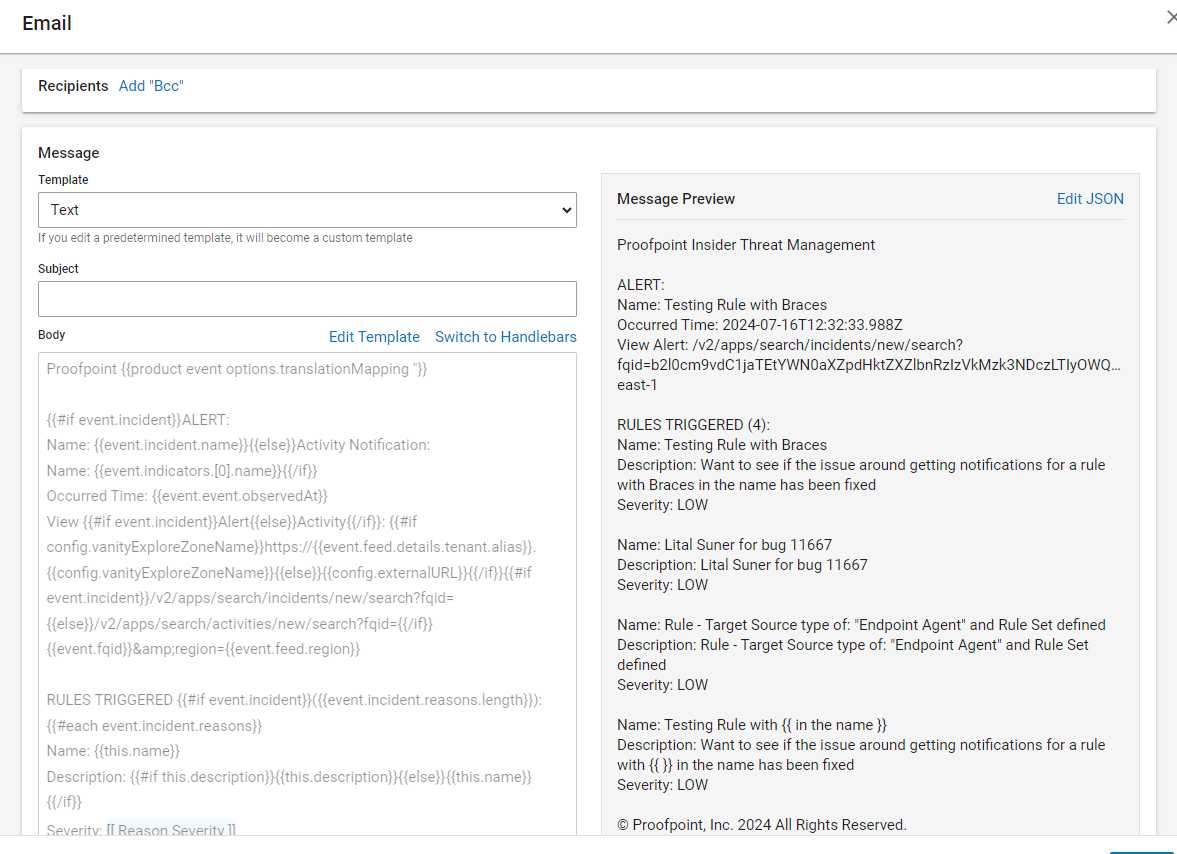
Select Edit Template or Switch to Handlebars to customize the body of the template.
Customized Recipients
In the Recipient area, define who you want to receive the email. You can define a static or dynamic recipients list.
-
Static recipient: Use this option when you want to send the email to recipients who will always receive the email when the alert is triggered. If you want to change the user, you will need to modify the list.
-
In the Recipient area of the email template, add recipients in the following fields:
-
To
-
Cc
-
Bcc:
-
From Bcc, you can include:
-
Observed User's Manager
-
Observed User (the user who created the alert)
-
-
-
-
Select the users you want from the list of Observed Values.
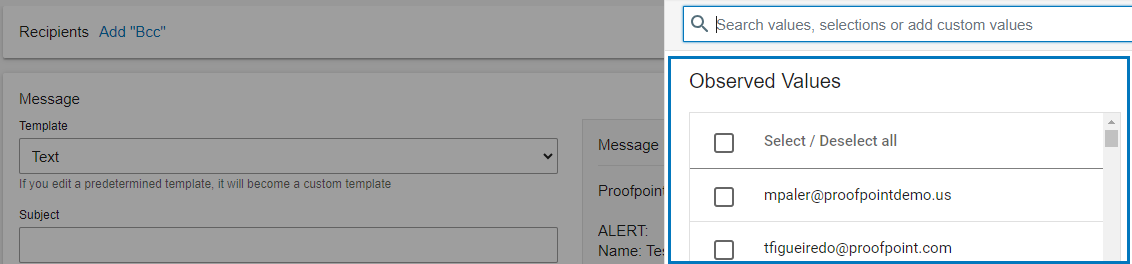
When the alert triggers, the email is sent to the selected users.
-
-
Dynamic recipient: You can configure the recipient field to be dynamic, allowing it to change based on the data rather than using a fixed list of recipients. For example, if you want to send an email to any user who triggers a specific alert, you can use the field
{{event.user.email}}in the Recipient area. Each time the alert is triggered, an email is sent to the relevant user.You can identify which fields you want to use by looking at the Alert JSON file.
Email Body Modification with Template Editor
Template editor lets you modify the email you send.
The template editor lets you modify the text and use the available variables. The variables are included in the template and displayed at the bottom of the template for your use.
Currently the following variables are available: Event, Fqld, Incident, Incident Name, Number of Reason, List of Rule Triggered, End of List, Reason Severity, Reason Name and Reason Description.
-
Templates
When creating your customized email, you select one of the Out-of-the-Box notification policies are created by Proofpoint.
Available Templates
-
Default - Text Format: Sends an email notifying that an alert was triggered.
-
End User Notification: Notifies the end user who triggered the alert by their action. (This template is for Cloud DLP alert notification, see Notification Policies for Cloud DLP\ATO Protection.)
-
Manager Notification: Notifies the manager about an end user who triggered the alert by their action. The template uses
event.user.directory.manager.emailevent to define the manager. (This template is for Cloud DLP alert notification, see Notification Policies for Cloud DLP\ATO Protection.) -
Admin Notification: Notifies the administrator notifying that an alert was triggered. (This template is for Cloud DLP alert notification, see Notification Policies for Cloud DLP\ATO Protection.)
-
File Owner Notifications: Notifies file owners about a security incident involving a file they own. (This template is for Cloud DLP alert notification, see Notification Policies for Cloud DLP\ATO Protection.)
Template Customization
For each option you can choose to use the default text or customize the text.
From the Template Customization dropdown, select one of the options.
-
Customize Text: Lets you customized the text you want for the alert, using the variables from the Add Variables area. Currently you can choose, Event, Fqld, Incident, Incident Name, number of Reasons, List of Rules Triggered, end of list, Reason Severity, Reason Name, Reason Description. This is the recommended option for ITM/Endpoint DLP notification.
-
Use Default Text: Lets you send the default email notifying that an alert was triggered. (This template is for Cloud DLP alert notification, see Notification Policies for Cloud DLP\ATO Protection.)
Email Body Modification with Handlebars
When you switch to Handlebars, you can use the Handlebar templating language in the template. For more information about Handlebars, see Handlebars documentation.
You can use expressions and change the text.
In the example, the text What is the source of this alert? and the expression
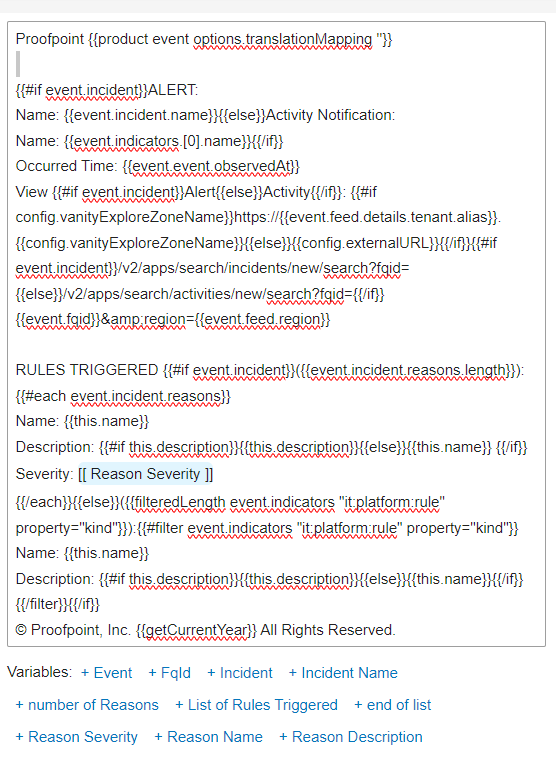
{{event.feed.product}}were added to the email.Field Names and Notification Parameters for the Template
The template editor lets you modify the text, using the field names and notification parameters described
Field Name Notification Parameter Alert Name {{event.incident.name}} Alert Severity {{stringLastElementByDelimiter event.incident.severity delimiter=':'}} Alert Time {{event.event.createdAt}} Event Time {{event.event.occurredAt}} Event Name {{stringLastElementByDelimiter event.activity.primaryCategory delimiter=':'}} User Email {{event.user.email}} User Name {{event.user.displayName}} User’s Manager (for M365 only) {{stringLastElementByDelimiter event.user.directory.manager.aliases.value delimiter=':'}} File Name {{event.resources.[0].name}} File Host {{event.resources.[0].container.name}} File Path {{event.resources.[0].path}} File Owner {{event.resources.[0].owner.user.name}} File’s Share Level {{stringLastElementByDelimiter event.resources.[0].permissions.share.level.designation delimiter=':'}} Third Party App Name
(CASB only)
{{event.activity.api.resources.[0].name}} Suspicious Login Severity
(CASB only)
{{#filter event.indicators "pfpt:cloud:threat" property="kind"}}{{stringLastElementByDelimiter this.risk.level delimiter=':'}} {{/filter}} Intelligence Findings Types
(CASB only)
{{#if event.intelligence.findings}}{{#each event.intelligence.findings}}{{#if @index}}, {{/if}}{{translateEnumValue this.kind "intelligence:findings:kind" ../options.translationMapping}}{{/each}}{{/if}} Email Notification Alert Validation
You can tailor the email body to a specific alert by including fields such as the alert name, time of the alert, and alert severity.
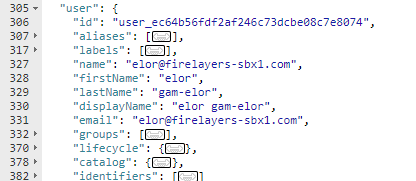
You can use the JSON from an existing alert to identify the expressions you need for the handlebar template.
Copy the JSON of the triggered alert to the Notification template. The fields are automatically replaced.
-
From Data Security Workbench > Alerts, select the alert you want from the Alerts view. The details for the alert display.
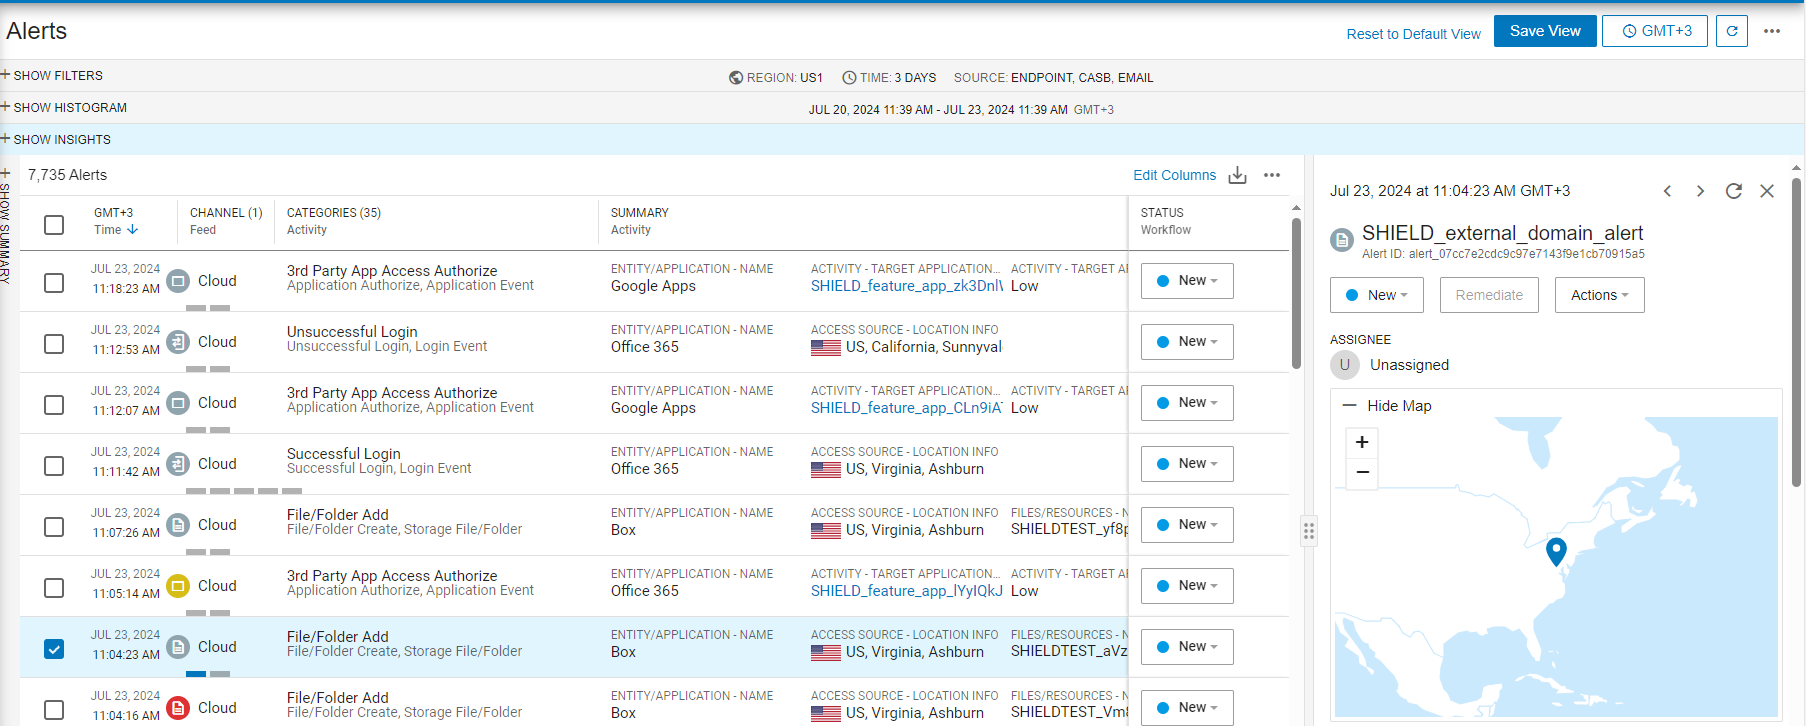
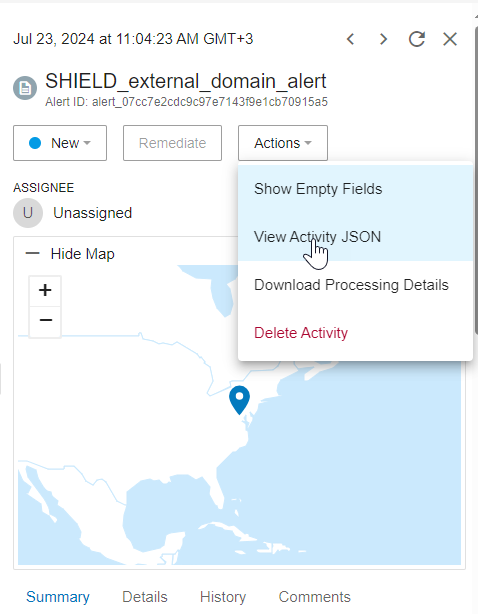
-
From the Activity dropdown, select View Activity JSON.
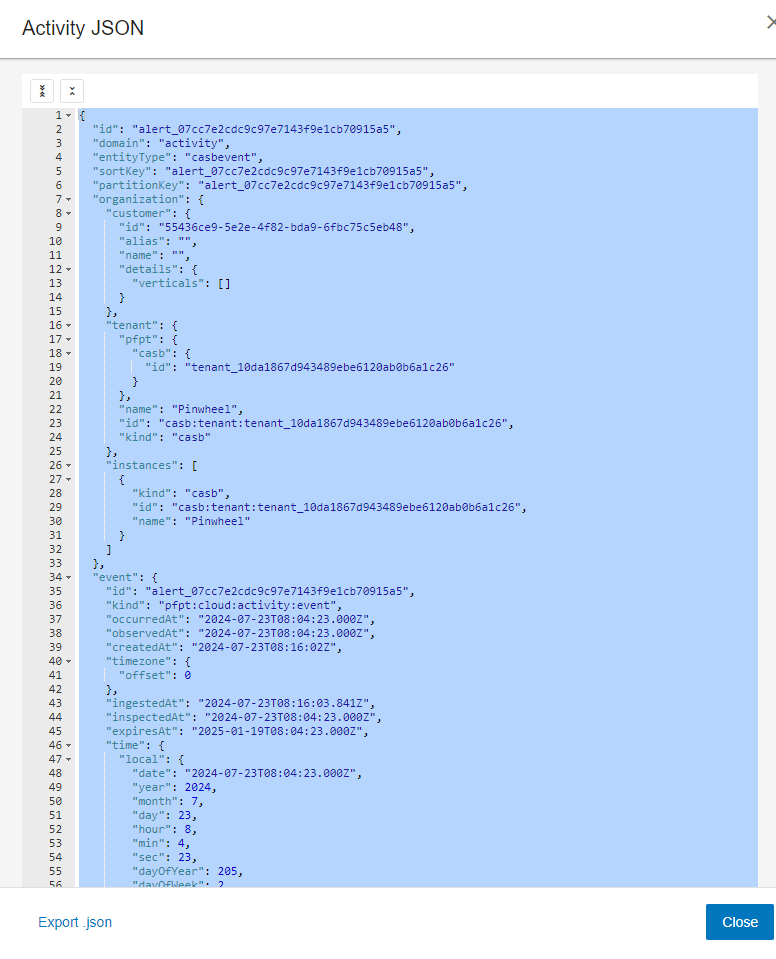
-
Select and copy the JSON file.
-
From Administration > Integrations > Notification Policies > For Rules, in Message Preview of the email template, click Edit JSON.
-
Replace the preview with the JSON file and click Save.
-
The fields are parsed and used in the template. An email that validates the specific rule is now available.
-