Account
Account Settings and Product Entitlements
Account area displays information about your account and includes the account settings and entitlements.
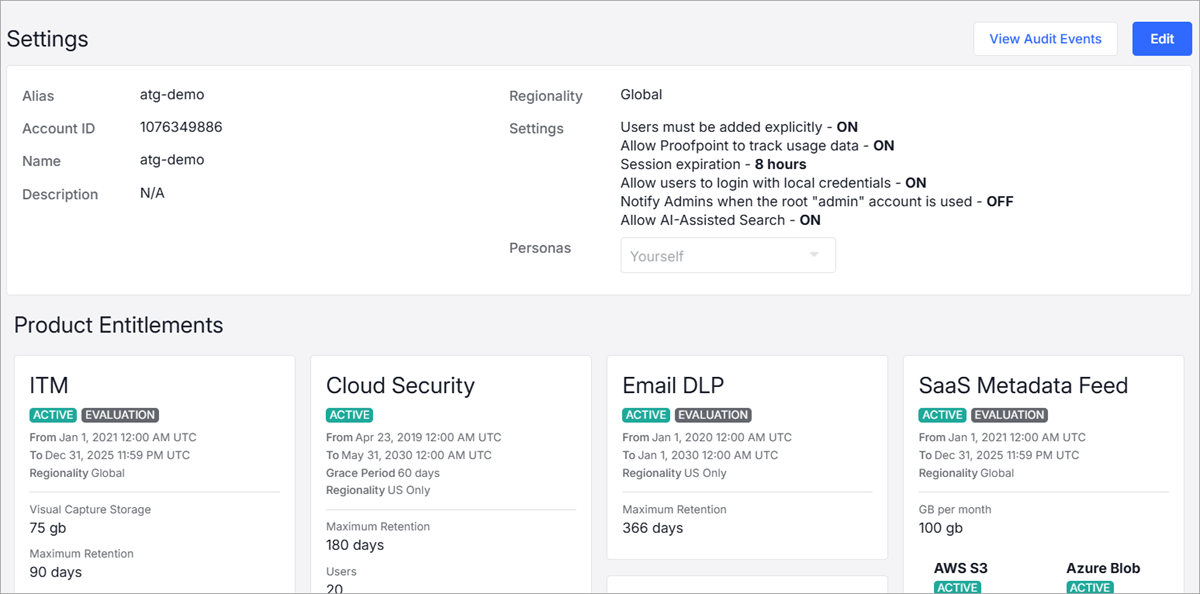
In the Entitlements area, you can see what your organization has purchased. Your account is configured according to your entitlements. (See Entitlements.)
From the Settings view, you can see the details of your account including the Name, Account ID, Alias regionality, any description and more.
This describes how to set up an account and configure the account settings which include:
-
Account identity provider(s) (IdP): set up your account with the IdPs users can choose to access the account (most IdPs are supported including, Google IdP and OneLogin, see Account Settings - IdP Configuration)
Proofpoint UserCenter: Users must be registered with Proofpoint and can then log in with their username and password
- List of email domains with access to the
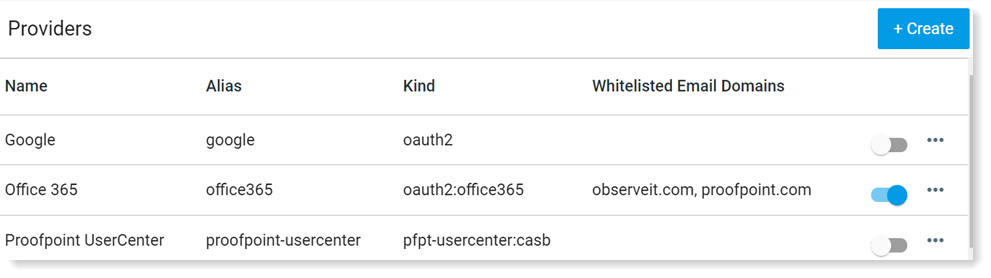
Providers
You can assign the Provider as an Admin or End User.
Providers area, all the IdP providers available for the tenant are listed. By default, the IdP is enabled for the Admin.
You can also enable an IdP for a end user by toggling the End User option. When enable, you can configure supported email domains for end users in your organization.
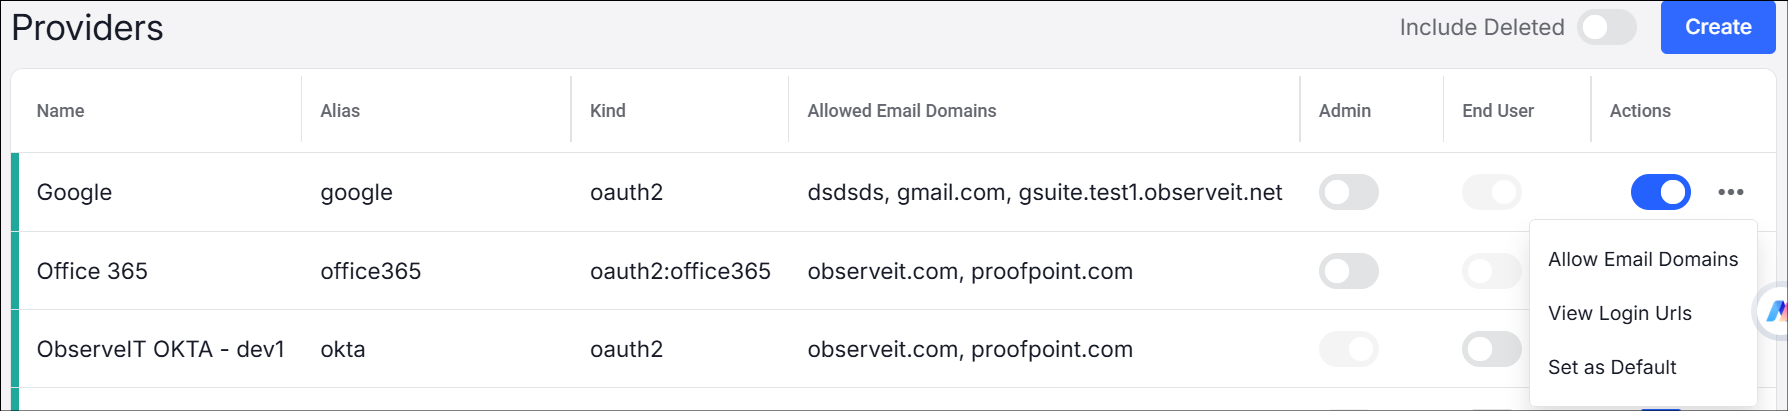
Provider Actions
Allow Email Domains
Only users whose email domains are allowed, can be added. For information about adding a user.
-
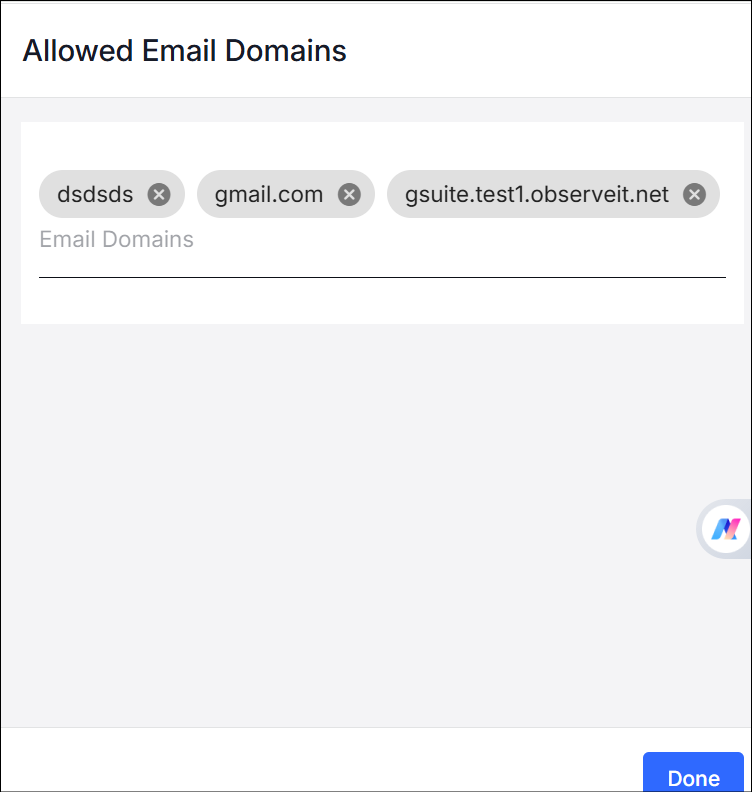
From the dropdown list by Actions, select Allow Email Domains and the dialog box opens.
-
Allowed Email Domains, list the domains you want to add, separated by a comma (,). For example, observeit.com, proofpoint.com. Click Done.
Other Provider Actions
-
Sync Users: Sync the tenant user to Proofpoint userStore service, this will allow the tenant user to use Usercenter as Identity Provider
-
View Login URLs: Lists Callback and Initiate Logins
-
Set as Default: Set the selected provider as the default
Editing Your Account
To edit your account settings, click Edit at the top of the page.
-
From Proofpoint Data Security, select the Administration app. From the Administration menu, select Account > Settings.
-
Click Edit.
The Edit Account dialog box displays.

-
Edit the settings and click Save

When your account is set up, it is configured with an Alias (used by the system), Name and Description.
From the Edit Account dialog box, you can do the following:
-
Users must be added explicitly
When this option is on, a user must be added from the: Users area of the Admin app. The user's email domain must also be included in the list of Allowed Email Domains which are defined per IdP.
When this option is off, any user whose email domain has been allowed in the list of Allowed Email Domains which are defined per IdP, can access Proofpoint Data Security console. For users to access information however, an access policy must be assigned.
-
Allow Proofpoint to track usage data
This allows some basic information about your activity to be collected when you log into the application. The data collected includes your login account, the names of the pages you navigate to, and the links you click within the pages. Data pertaining to the users being monitored is not collected.
A megaphone announcement icon appears when this feature is enabled.
-
Session expiration
By default, this is set to 4 hours. You can adjust this setting to a minimum of 15 minutes and a maximum of 8 hours. When the session expires, a pop-up will appear prompting you to continue. If you do not respond, you will be logged out automatically. To change this setting, contact Proofpoint support.
-
Threat Research:
When this is enabled, it can allow using customer data in AI/ML research requiring manual data access by Proofpoint threat research teams.
-
Session expiration
You can set an expiration time for the session.
-
Allow AI Autonomous Custom Classifiers
The system trains and maintain tenant-specific classifiers that are uniquely tailored to your environment. Only numerical representations used by AI to understand and compare data are processed in the U.S.
View Audit Events
Selecting the View Audit Events option, takes you to the Explorations view where you can see the Audit Events. Audit events provide visibility when changes are made to your settings and configurations. Audit logs include information about the time, actor, resource and settings changed. This allows you to monitor and investigate recent administrative changes in your environment.
This view is available for all customers to manage accounts. (This includes ITM / Endpoint DLP, Cloud DLP and Email DLP.)
Editing your Account Settings
Related Topics: