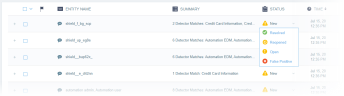
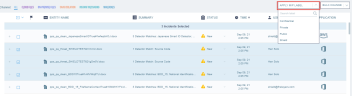
The DLP Discover Forensics table displays all data violations (DLP incidents or incidents), as defined by the Detectors in the DLP Policy
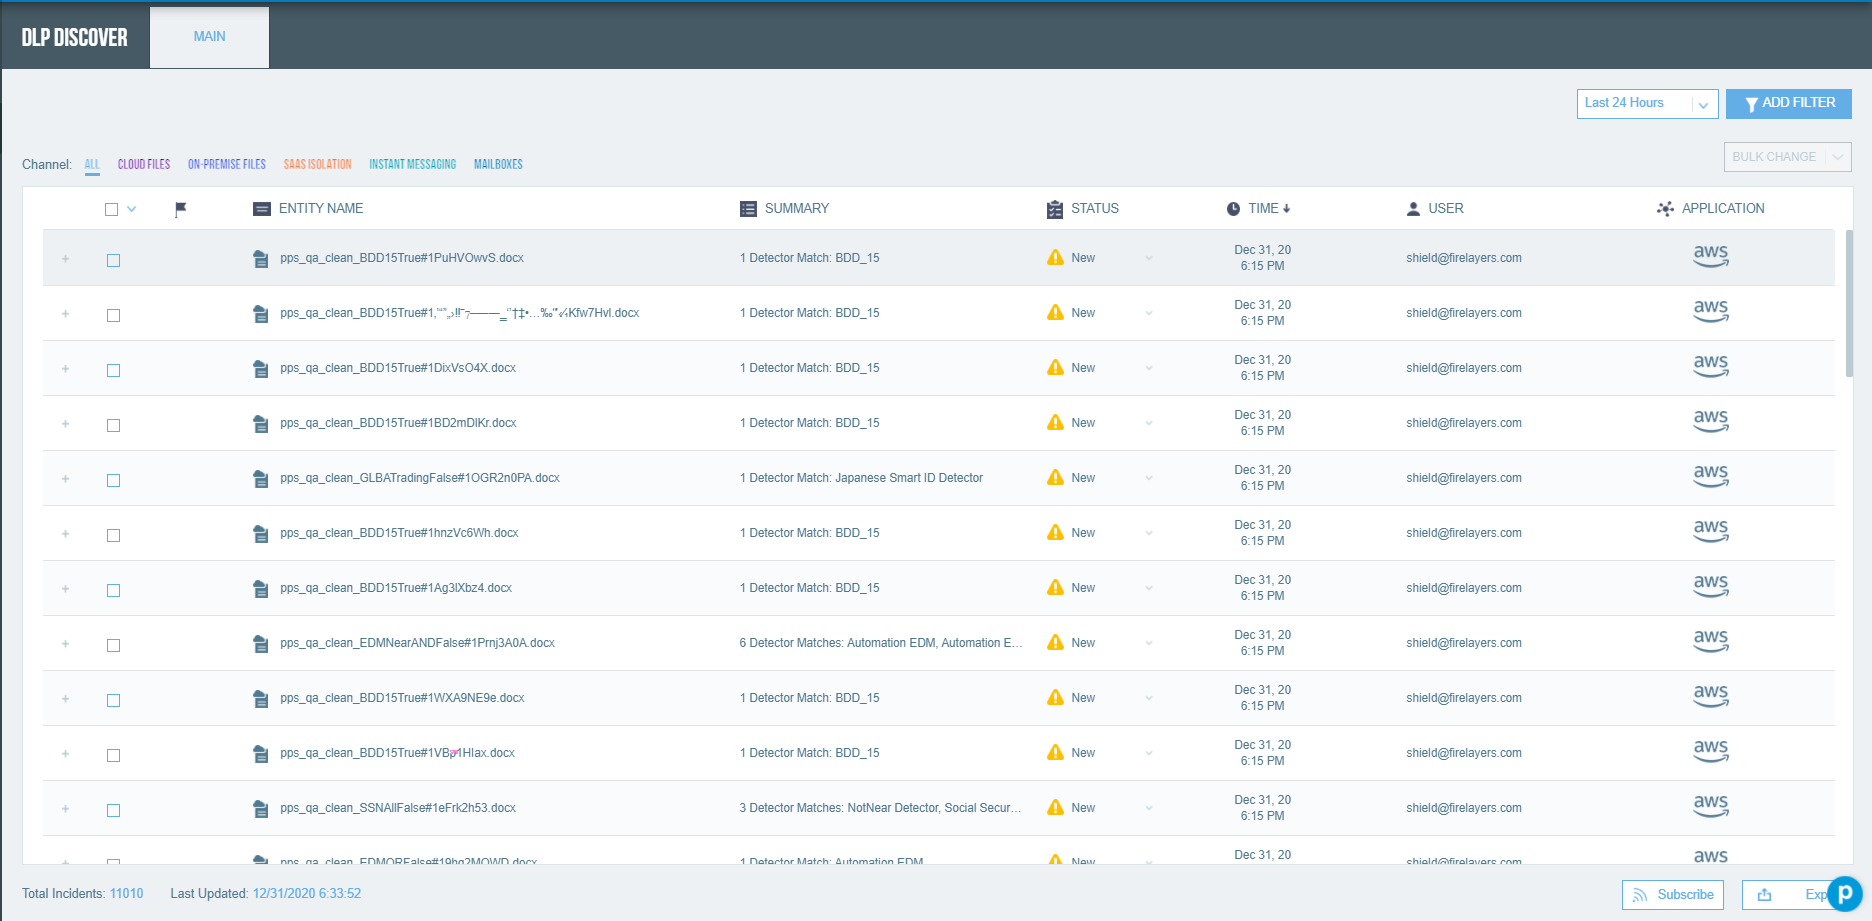
The DLP Discover Forensics table displays the following information for each incident:
-
 : Whether the incident is flagged (see Flagging Incidents). Flagging is managed manually and has no system-related impact.
 -
Entity Name: The name of the entity (for example, the file or instant messaging channel) where the incident occurred.
-
Summary: An overview of the data violations: the number of Detector matches and the names of the Detectors.
-
Status: The status of the incident (for example, New or Opened). Statuses are assigned manually and have no system-related impact.
-
Time: The date and time of detection of the incident.
-
User: The user associated with the incident.
-
Application: The application associated with the incident.

Viewing Incident Information
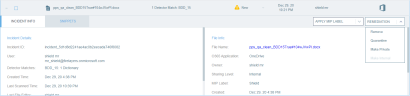
You can view additional information about each incident by expanding the table entry (see ). The expanded area contains two tabs.
Incident Info tab
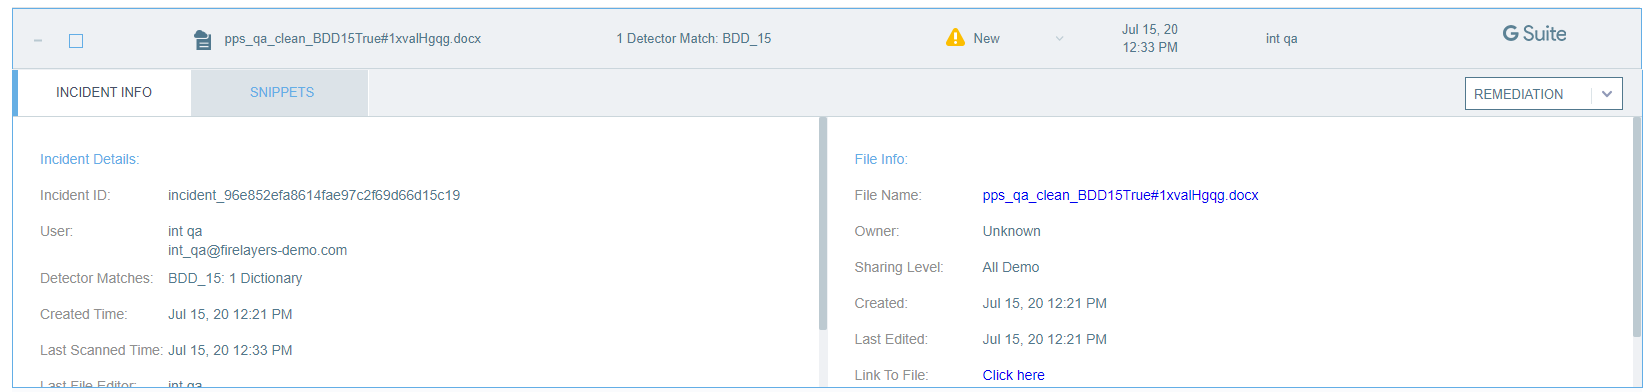
The Incident Info tab contains incident parameters. Some parameters are listed for all incident types (for example, user, location, and Detector matches). Other parameters change depending on the incident type (for example, owner is listed only for incidents relating to cloud files).
If the incident is related to a file, the file name is a link to the Files Forensics table, where the relevant file listing is displayed.
If a remediation has been performed, either manually or automatically via a rule, the Remediation Information is also displayed.
Snippets tab
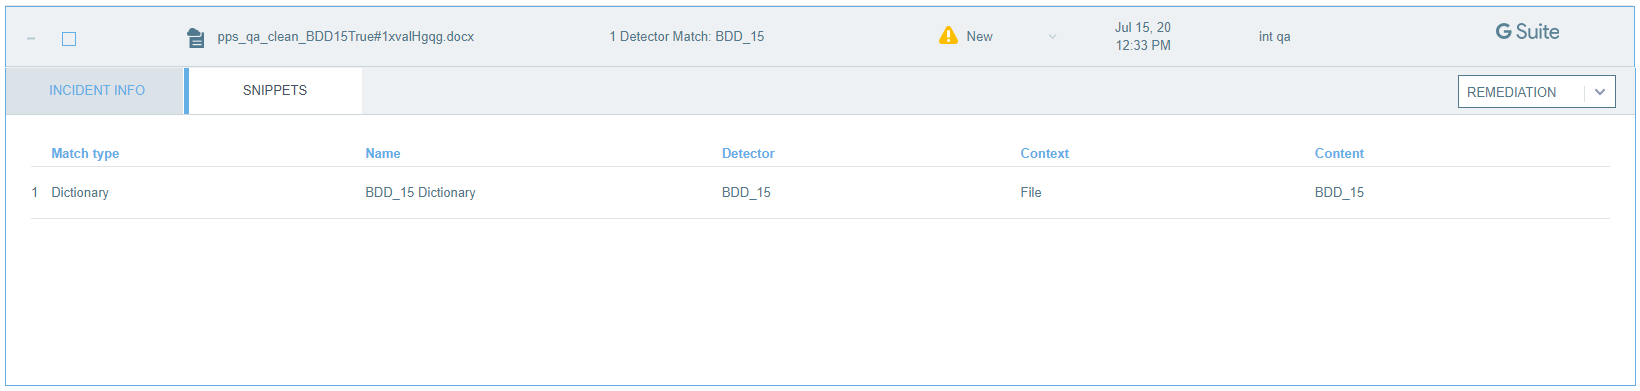
The Snippets tab displays the specifics of each DLP match. Each incident relates to a single entity and a single Detector.
Filtering Incidents
The DLP Discover Forensics table allows you to filter incidents by channel, by channel-specific filters, and by generic filters relevant to all DLP incidents.
By default, all incidents are listed; you can filter incidents by channel.
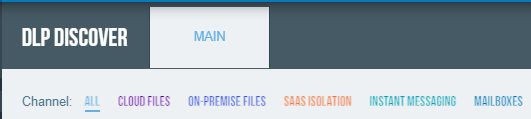
The following channels are available:
-
Cloud Files: Files hosted on a cloud service
-
On-Premises Files: Files hosted on an on-premises server
-
SaaS Isolation: Files uploaded or downloaded in an isolated session
This channel requires an integration with the Proofpoint SaaS Isolation product, and the Proofpoint CASB Adaptive Access Control (AAC) module must be enabled.
-
Instant Messaging: Instant messages and files shared via an instant messaging cloud service
-
Mailboxes: Archived emails, including incidents in the subject, body, or attachment
Filtering by Channel
-
In the toolbar, click the desired channel.
Only incidents belonging to the selected channel are displayed.
Filtering with Generic and Channel-Specific Filters
Some DLP Discover filters apply to all channels and some apply to only one channel. The filters are color-coded to indicate their relevant channel.
Managing DLP Incidents
You can manage your DLP incidents by flagging them, categorizing them by status, and manually performing remediation or applying an MIP label. You can change statuses and perform remediation in bulk.
Flagging Incidents
Flagging incidents allows you to mark incidents that you want to find later.
-
Access the DLP Discover page.
-
Hover over an incident in the
column.The
 icon appears in the column.
 -
Click the icon.
The icon switches to
 to indicate that the incident is flagged.


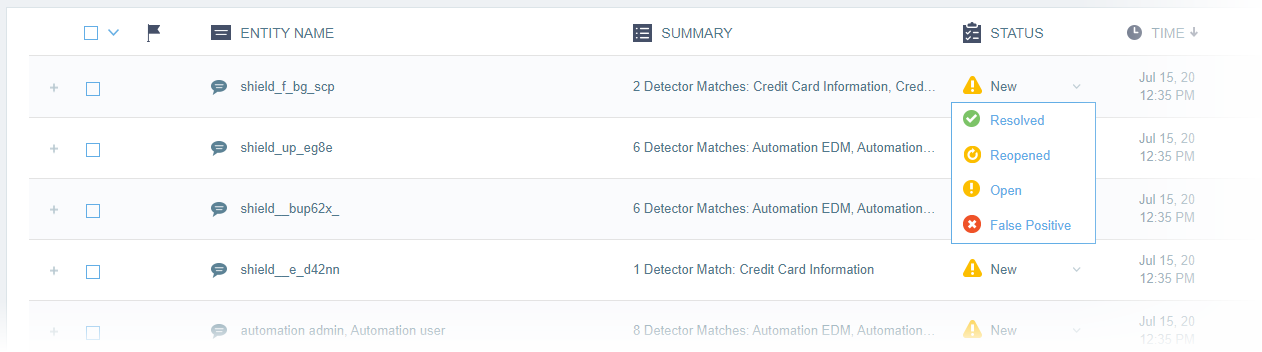
Modifying an Incident Status
Managing the statuses of DLP incidents allows you to keep track of incidents by categorizing them by phase.
-
Access the DLP Discover page.
-
Click on the incident’s Status column value.
-
Select the desired status from the drop-down menu.
The selected status is displayed in the Status column.
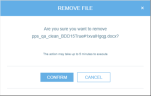
Performing Manual Remediation
You can manually perform remediation on some DLP incidents for Cloud Files to mitigate potential damage. For information about defining rules that trigger automatic remediation, see Rules and Remediations.
All remediations in the system can be disabled on request.
-
Access the DLP Discover page and select the Cloud Files channel.
-
Expand the desired cloud file incident and click Remediation.
-
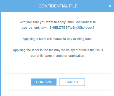
Select the desired file remediation.
A confirmation message appears.
-
Click Confirm.
The remediation is executed on the file and the remediation information is displayed.
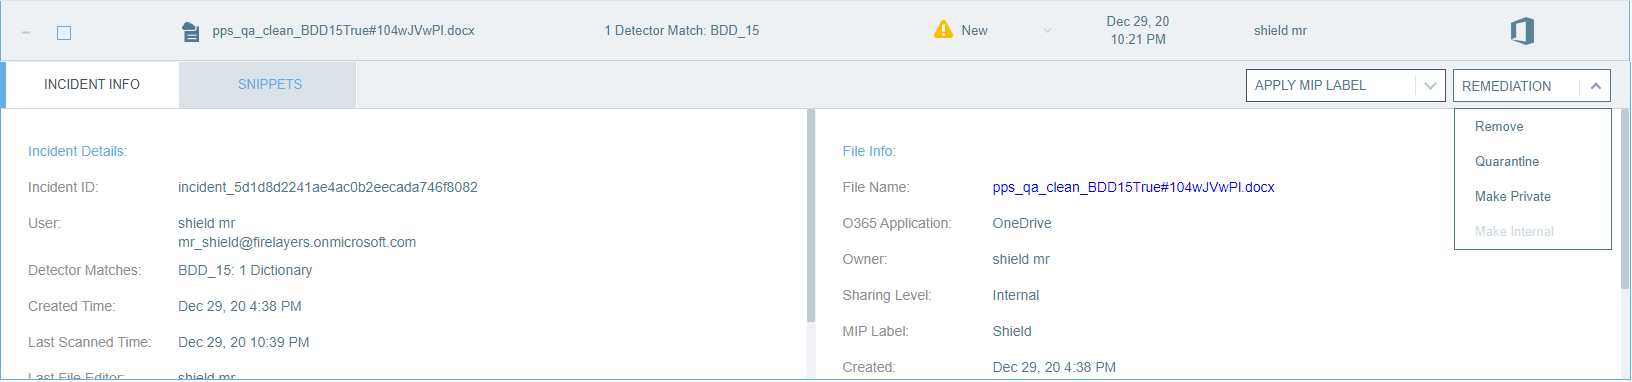

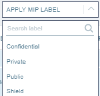
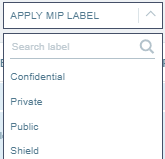
Manually Applying MIP Labels
You can manually apply an MIP label to a file (see MIP Labels). For information about defining rules that apply MIP labels automatically, see Rules and Remediations.
To manually apply MIP labels:
-
Access the DLP Discover page.
Expand the desired cloud file incident and click Apply MIP Labels.
-
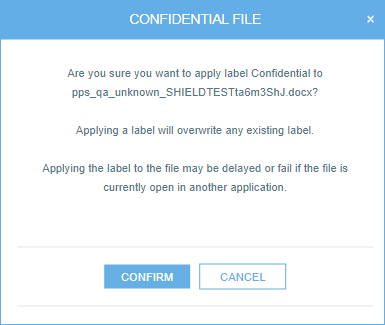
Select the desired label.
A confirmation message appears.
-
Click Confirm.
The MIP label is applied to the file and the remediation information is displayed.
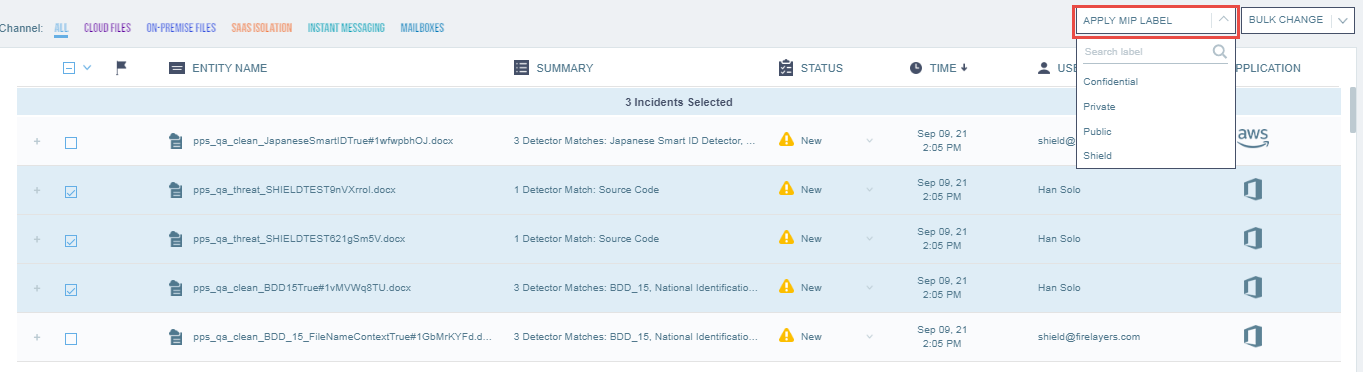
Performing Bulk Operations
You can change incident statuses in bulk. In the Cloud Files channel, you can also perform remediation in bulk. In addition, you can apply MIP labels in bulk.
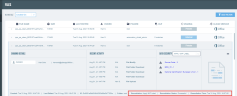
As with individual manual remediations, when you perform a bulk remediation, the remediation status is displayed in the individual incidents panel, as well as in the status bar in the expanded information for the relevant files.
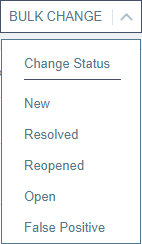
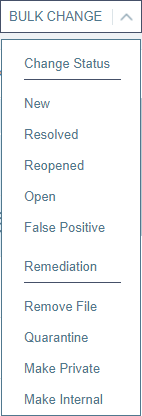
Bulk status change
-
Access the DLP Discover page and select the desired incidents.
The Bulk Change drop-down menu is enabled.
-
Click Bulk Change.

-
Select the desired status.
Bulk remediation
-
Select the Cloud Files channel and then select the desired incidents.
-
Click Bulk Change.

-
Select the desired remediation.
-
Select the Cloud Files channel and then select the desired incidents.
-
Click Apply MIP Label.
-
Select the desired MIP label.
Remediation Information
A remediation or applying an MIP label usually takes only a matter of minutes, but in some cases it can take up to 24 hours. Therefore as soon as you initiate a remediation or application of a MIP label, the remediation information is displayed in the expanded incident information in the DLP Discover page.
The remediation information includes:
-
Remediation: the specific remediation action
-
Remediation status: current status of the remediation operation: In Progress, Successful, or Failed
-
Remediation time: the time that the remediation was initiated

The remediation information is also displayed in the status bar of the expanded in formation of the relevant file:
