Overview:
- Configure ServiceNow for OAuth based authentication.
- Add ServiceNow credentials to a Secret in a designated AWS account to be used as a sidecar for scanning.
- Onboard ServiceNow application on DSPM using the AWS Secret.
Pre-requisites:
AWS should be onboarded on DSPM so that it can be used as sidecar while onboarding ServiceNow.
ServiceNow Configuration:
-
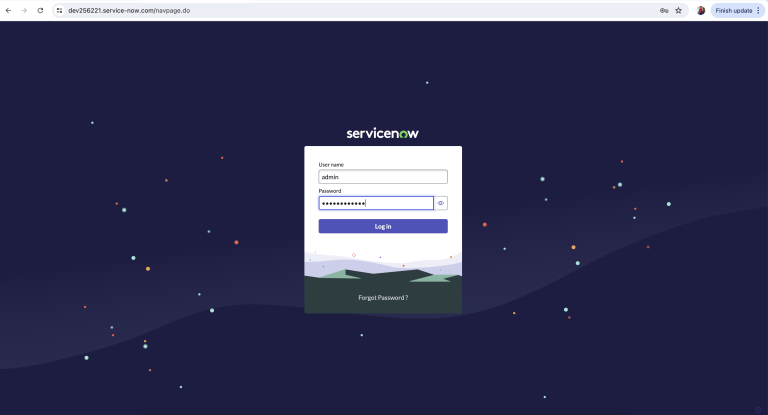
Launch ServiceNow instance which is to be onboarded on DSPM and login with the admin credentials.
-
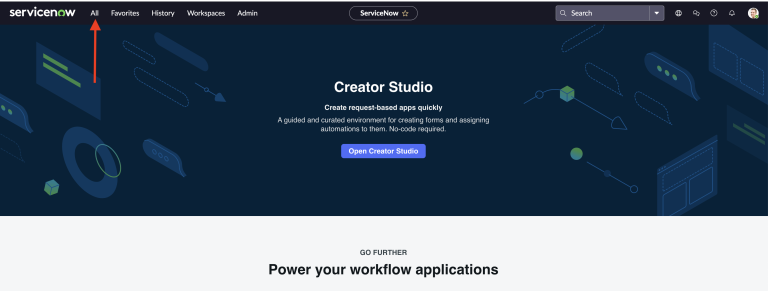
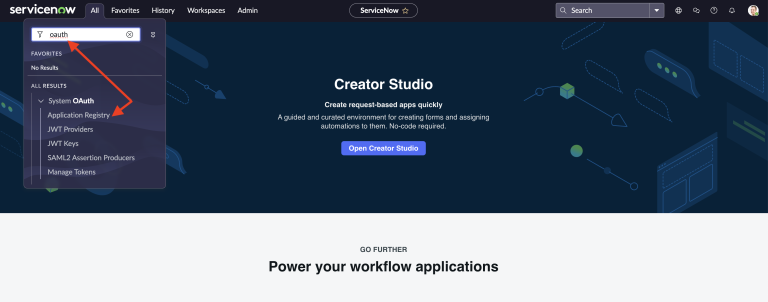
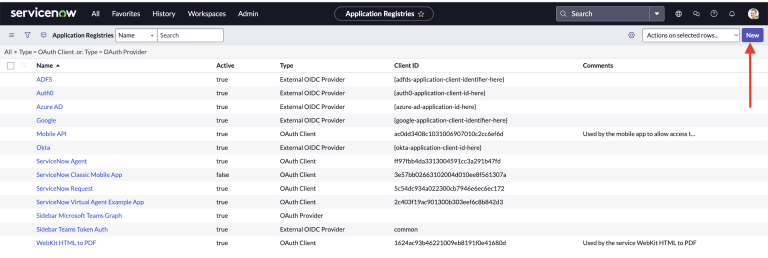
Navigate to “All” from the menu section and search for “Oauth”. From the results select “Application Registry” under “System OAuth”.
-
Select “New” from the top right corner to create the new profile for Application that will be used by DSPM to authenticate to ServiceNow.
-
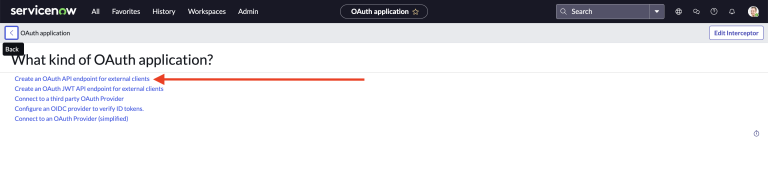
From the list showing Types of OAuth Application to create - select “Create an OAuth API endpoint for external clients” option.
-
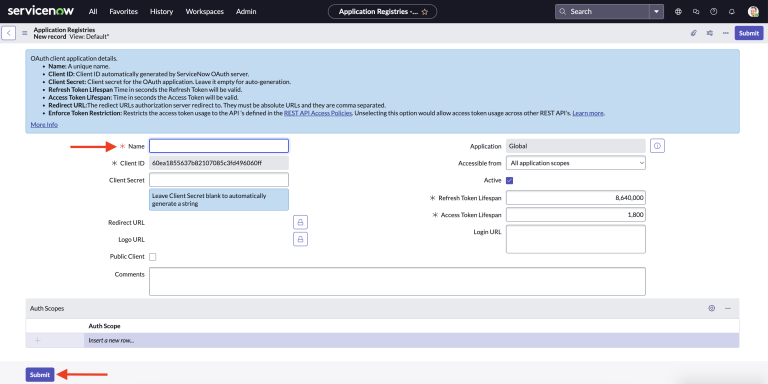
In this section - enter the value for “Name” field and leave all the other fields with the default values and select Submit.
-
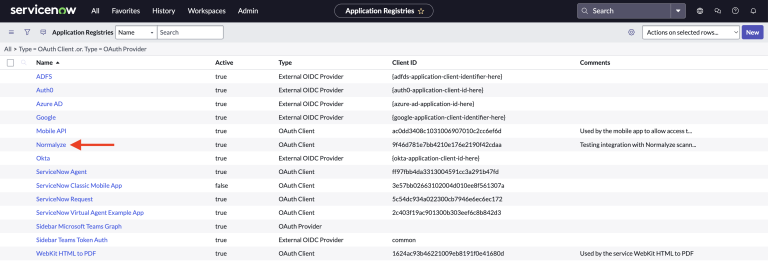
The new “Application Registry” will be available from the list of applications. Select the Application from the list to capture the relevant details.
-
From this section, copy the values for the following fields:
Client ID
Client Secret - To view the value, select the “Lock” icon which will toggle to display the value. After copying it, toggle the option to hide it.

-
From the instance url - copy the the first part of the url which is the instance Id. This will be used as one of the values for the AWS Arn.
For eg: if the instance url is https://abcd.service-now.com, copy the value “abcd”.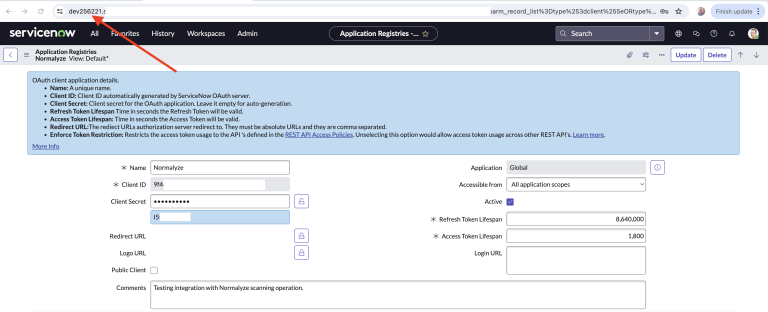
-
Create the following format for the details from ServiceNow to be used in the next section.
"grant_type" : "password"
"client_id" : "Value for Client Id from Step 7"
"client_secret" : "Value for Client Secret from Step 7"
"username" : "Admin Username used to login to instance in Step 1"
"password" : "Admin Password used to login to instance in Step 1"
"my_instance": "Value copied in Step 8"
This completes the configurations required on ServiceNow.
AWS as Sidecar:
Configure AWS Secrets Manager
The values copied in ServiceNow Configuration need to be added to the AWS Secret manager, which then is used by DSPM to connect to ServiceNow.
Add ServiceNow Credentials to AWS Secrets Manager
- Login to the AWS management console and navigate to Secrets Manager
- Select the option for ‘Store new Secret’
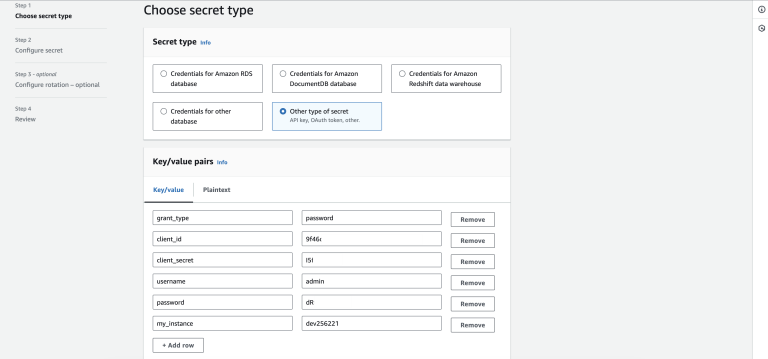
- Under Secret Type - select “Other Type of Secret”
-
Under Key / Value Pairs - add the values captured in Step 9 of ServiceNow Configuration as shown the below screenshot.
- Leave the Encryption key to default aws/secretsmanager and select Next.
- Set the name under Secret Name and some details under Description respectively.
-
Under Tags section, set the following values:
Key : Name
Value : Normalyze - Leave the other sections with the default values and select Next.
- Select default values for this and the Next section.
- Store the secret.
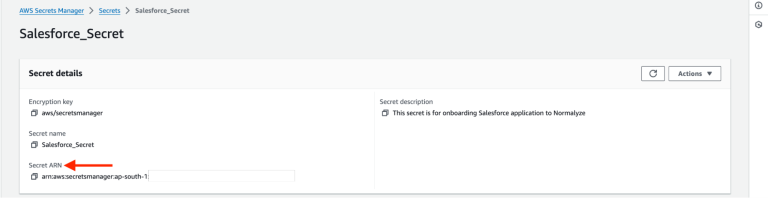
-
Select the “secret” from the list and copy the Secret ARN value for it. This is the value that will be used for onboarding from the DSPM platform.
Azure as Sidecar:
Configure Azure Key Vault Secret:
Pre-Requisites:
- The Azure account being used as sidecar should ensure that option “Use as Sidecar” is selected. If this has not been enabled on the Azure account which is already onboarded to DSPM then follow the steps detailed for account update viz Azure Onboarding Version Upgrade. Ensure that step 3 is completed from the aforementioned section that will mark the Azure account as sidecar enabled.
-
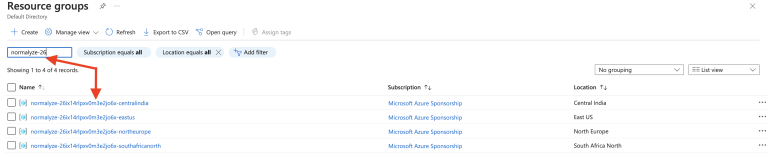
The Azure Key Vault must be created in the in the Resource Group created by DSPM during the onboarding of the Azure account. The resource group for the Azure account is in the following format: normalyze-<Onboarding-id>-<Region>. The <Onboarding-id> for the account onboarded on DSPM can be captured from the Account Details section as shown in the screenshot below:
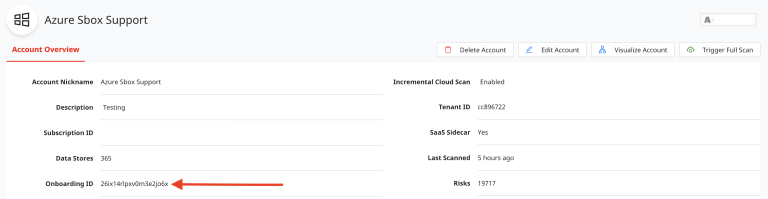
Make note of the <Region> being selected, this will need to be passed on the DSPM platform while onboarding the ServiceNow application.
Search for the Resource Group based on the aforementioned format to note the one to be used.
-
Use the key and values from Step 9 of ServiceNow Configuration section in the following format.
{
"grant_type" : "password",
"client_id" : "Value for Client Id",
"client_secret" : "Value for Client Secret ",
"username" : "Admin Username used to login to instance",
"password" : "Admin Password used to login to instance",
"my_instance": "Instance value"
}
Add ServiceNow Credentials to Azure Key Vault Secret
- Login to Azure Portal for the subscription which is enabled for sidecar use.
-
Search for Key Vault from the Azure search box and select “Key Vaults” from the result.

-
Select Create New from the Key Vaults section.

-
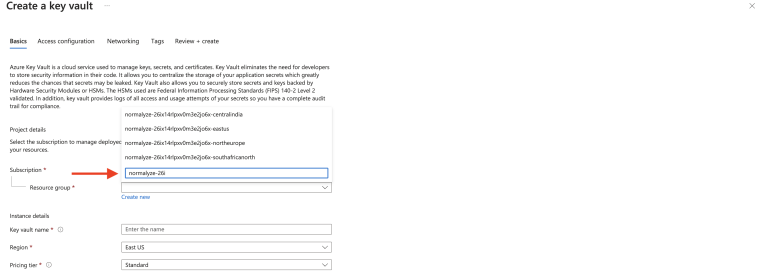
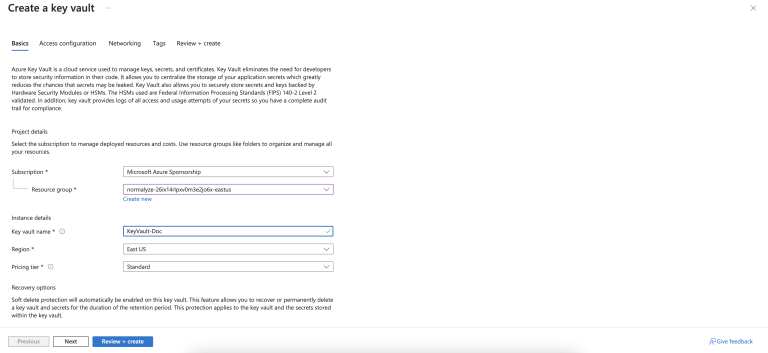
Search for the Resource Group pertaining for the Azure account’s onboarding id.
-
Provide a Name for the Key Vault, set the Region to the required one and the Pricing Tier to Standard respectively. Note the Region used in this step, it will be used later during the onboarding on DSPM platform.
Select Next after configuring the above mentioned details.
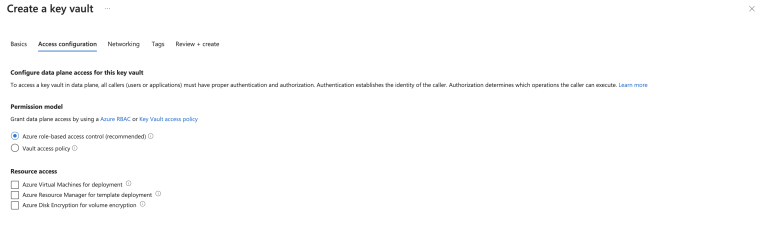
- Select Next on the Access Configuration section (no changes required in this section)
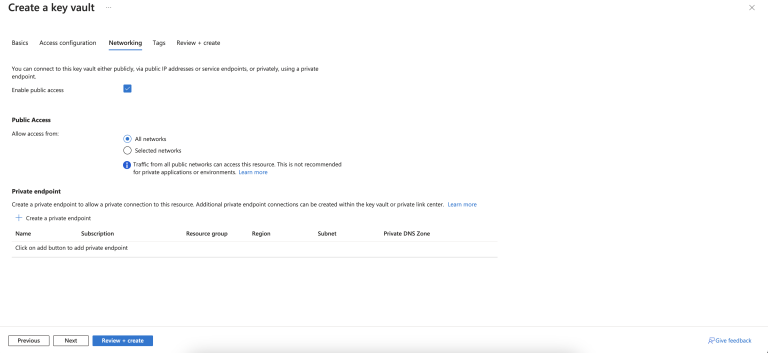
-
In the Networking section ensure that Enable Public Access is checked (selected) and the Allow access from is set to All Networks.
Select Next after the above configurations are completed.
- In this section adding a Tag is optional. Select Next.
- Review the configuration detail and once it is completed select “Create”. Wait for the creation task to complete.
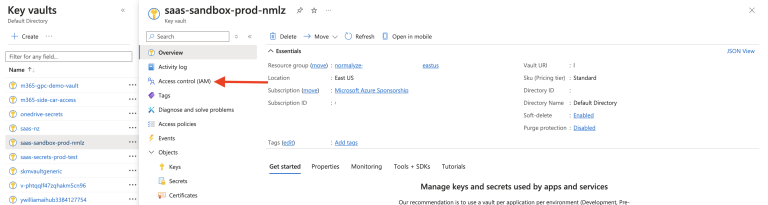
-
Select the Key Vault created and from the left fireblade, select “Access control (IAM)” and then “Role assignments” tab.
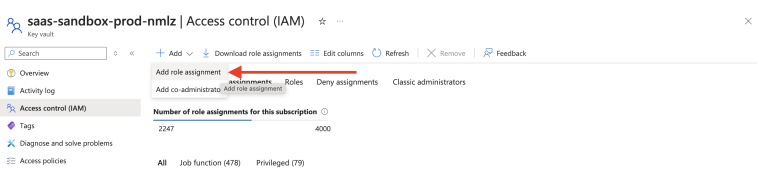
-
Click on “+ Add” drop-down and select “Add role assignment”.
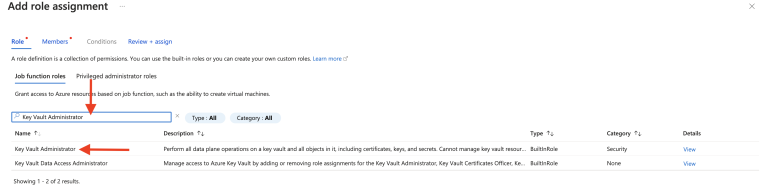
-
Search for the “Key Vault Administrator” option and select it (it gets highlighted). Click on Next.
-
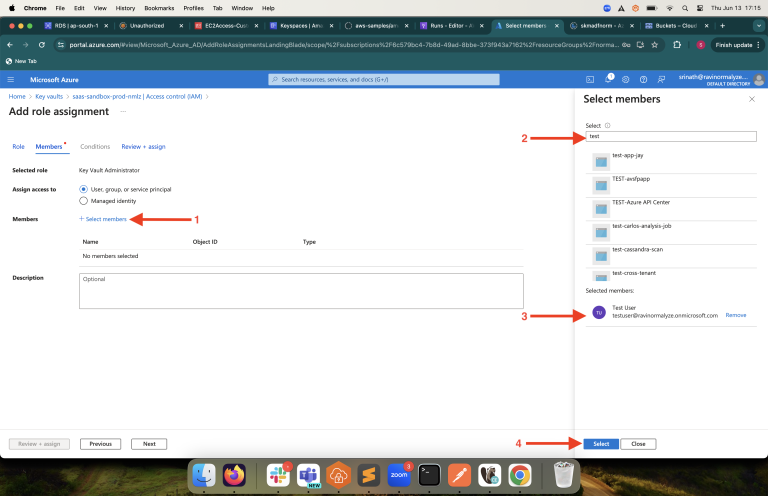
Under Members, click on “Select members” (marked 1 in the screenshot) and add the requisite user (same user who created the Key Vault) by selecting (marked 2 and 3 in the screenshot) and clicking Select (marked 4 in the screenshot) at the bottom.
- Click on “Review + assign”. This will assign the selected user with the “Key Vault Administrator” role.
-
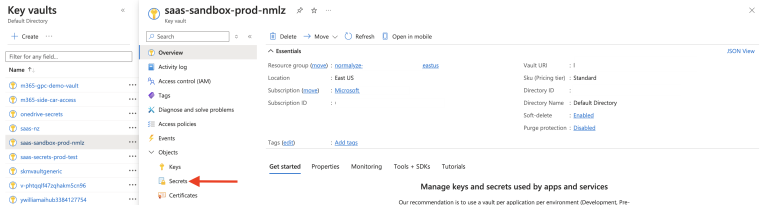
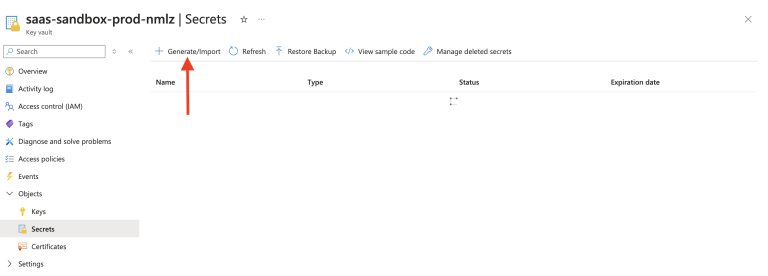
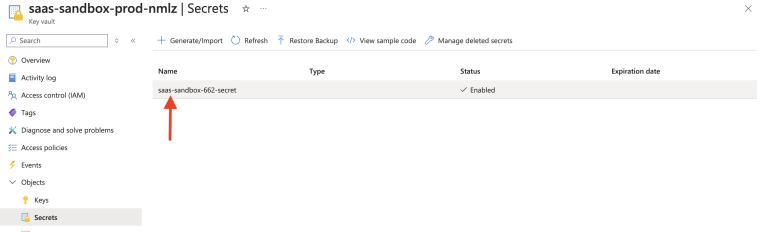
Select the Key Vault created in Step 9 and from the left fireblade - select “Secrets” and then select “Generate/Import”.
-
Enter the details for the respective fields as follows:
Name - Provide the name for the Secret as per the naming convention used for other entities.
Secret Value - Copy the key and values which was saved in step 3 from Configure Azure Key Vault section.Copy the entire value including the braces and input it in this field.
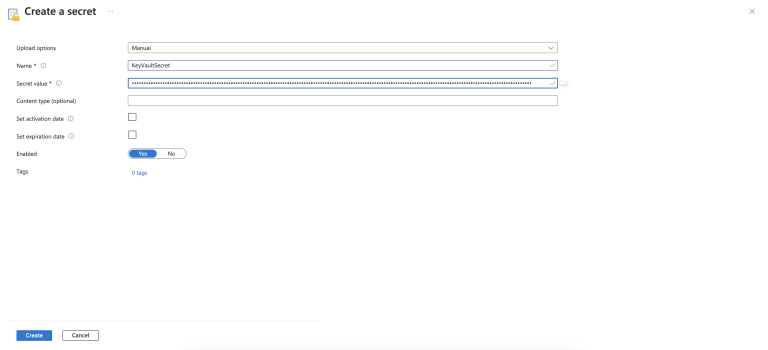
- Leave the rest of the values / options as default. Click on Create.
-
Once the Secret is created successfully, select it and Click on the value listed under column “Current Version”.
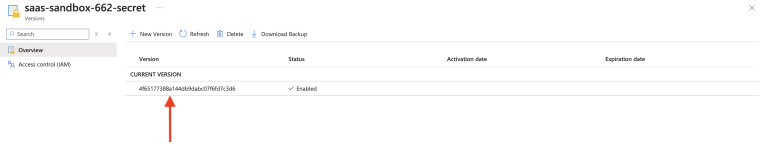
-
Copy the URL for the Secret Identifier column. This will be used as input for onboarding ServiceNow on DSPM.

Onboard ServiceNow to DSPM
-
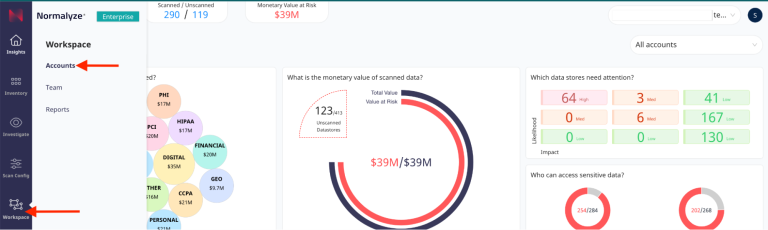
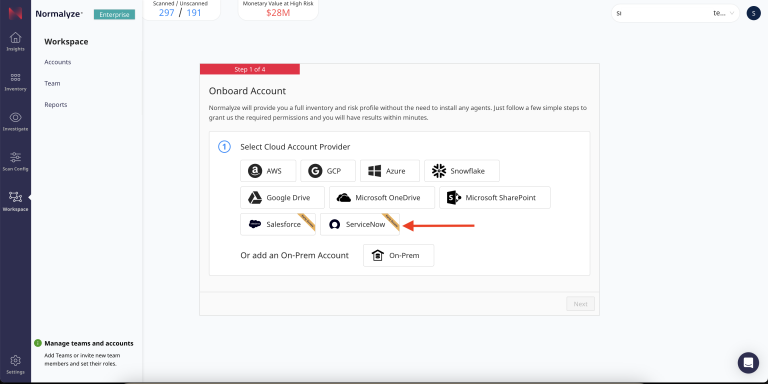
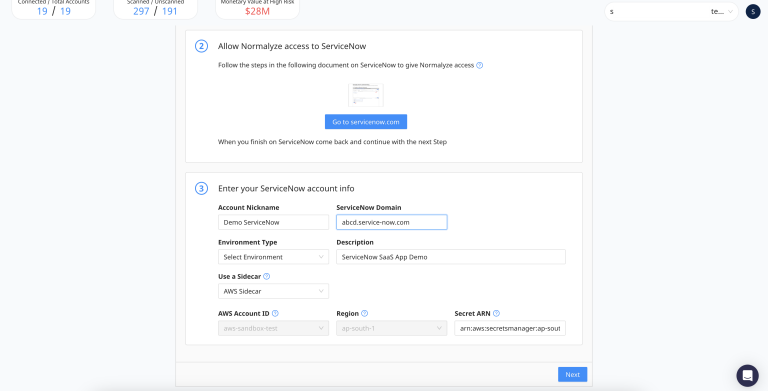
Login to DSPM and Navigate to Workspace - Account - select Onboarding and select ServiceNow.

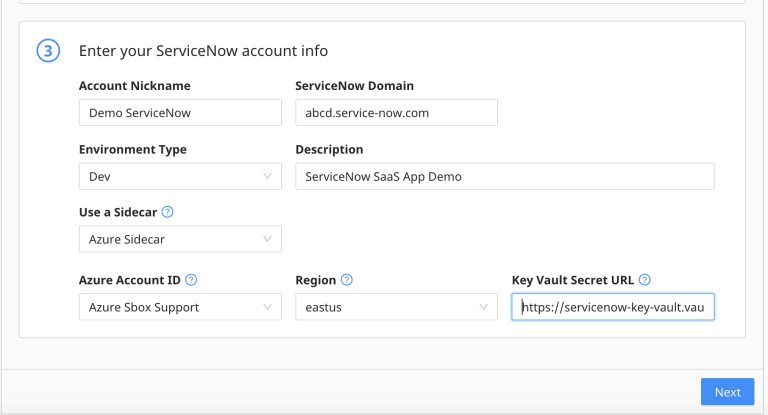
- Scroll down to the Section 3 - Enter the ServiceNow account details as follows:
- Account Nickname - provide the value to identify this as a ServiceNow account.
- ServiceNow Domain - This is the full domain of your ServiceNow instance. The value for this would be the fully qualified instance url without https. For eg: if the ServiceNow instance url is https://abcd.service-now.com then the domain value is abcd.service-now.com
- Environment Type - select the appropriate value from the dropdown.
- Description - Provide some additional information for the account.
- From the Use a Sidecar drop-down select the provider which will be used as sidecar viz AWS Sidecar or Azure Sidecar.
- Based on the selection done in Step 3, the details to be provided for the respective sidecar provider are as follows:
-
If Azure Sidecar is the option selected then provide the details as follows:
- Azure Account ID: from the drop-down select the Azure account which is configured to be used as sidecar. Step 1 of Pre-requisites under section Azure Key Vault configuration.
- Region: select the same Region (Step 5 under Azure Key Vault section) where the Key Vault is created on the Azure subscription.
- Key Vault Secret URL: paste the Secret url copied in Step 19 under Azure Key Vault section
-
If AWS Sidecar is the option selected then paste the Secret ARN copied in Step 11 of AWS Secrets Manager section into the “Secret ARN” field.
It will populate the Account ID and the Region fields from the Secret ARN value which is input.
- Select Next to complete the onboarding process on DSPM.
-
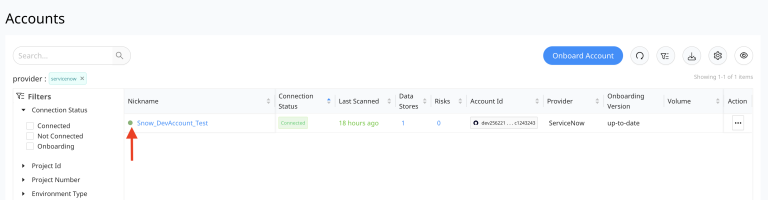
On selecting Next, the Cloud Scan operation is triggered which will discover the datastore on the ServiceNow domain configured. This is denoted with a “Green Dot” against the ServiceNow account onboarded on the UI.
-
Once the scan is completed successfully, the Connection Status column would show “Connected” and the “Scan Status” will show with a green tick mark The value under “Datastores” column would show 1 - denoting the data store is successfully discovered.
The value for “Provider” column would display ServiceNow.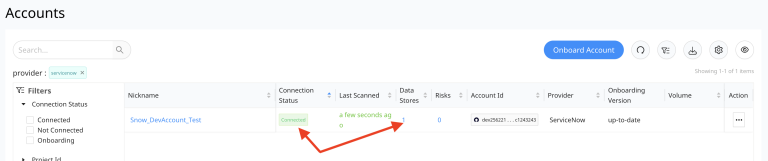
This completes the steps for Onboarding ServiceNow to DSPM successfully.
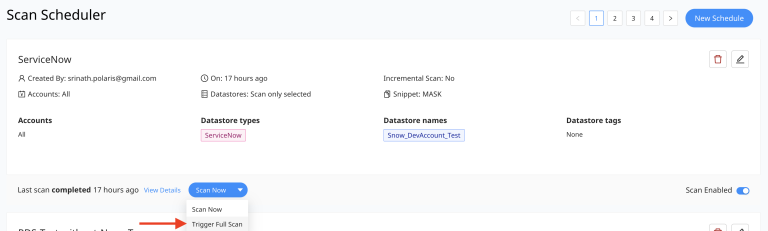
Configuring Data Scan for ServiceNow:
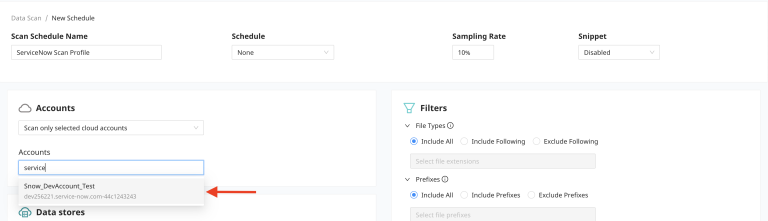
- Navigate to Scan Config - Scan Scheduler
- Provide the name for the Scan Profile - to identify it for the ServiceNow datastores.
- From the Account drop-down - select “Scan Only the Selected Accounts”
-
From the the Accounts selection box type the name of the ServiceNow Account which is onboarded.
-
Once the account is selected, scroll down to the Datastores section - Type of data store to scan - from the Drop-down select “ServiceNow”. On selecting the Type, the “Data stores by name” gets populated with the ServiceNow datastore name.
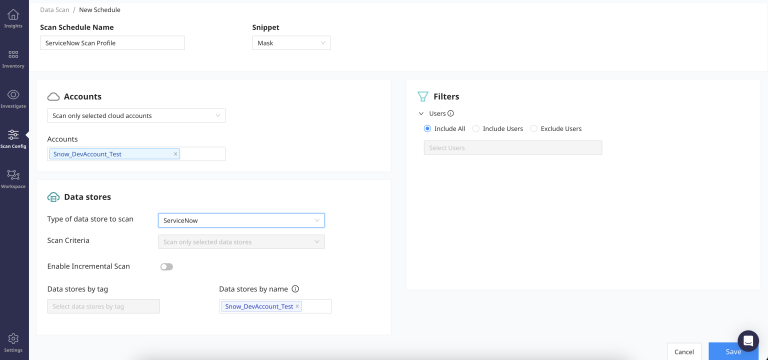
- This completes the data scan configuration. Save the configuration by selecting the “Save” button.
-
If the data scan has to be run for a targeted set of ServiceNow users then before selecting the “Save” option - navigate to Filters on the right hand side - Users and then Save.

-
From the Scan Profile - drop-down and select “Trigger Full Scan”.