Viewing Active Explorations
The exploration view lets you review user activity and you can modify the view so you can use the information.
This topic describes how to view active explorations. For more information about explorations, see Data Security Workbench - Explorations.
To access explorations so you can view, select the Data Security Workbench app. From the left-side-menu, select Activity > Explorations. Select Explorations.
Activity summary panel shows the “Top 100 items” for a single column, and the “first 100 combinations” if multiple columns are selected.
Graph and List Views
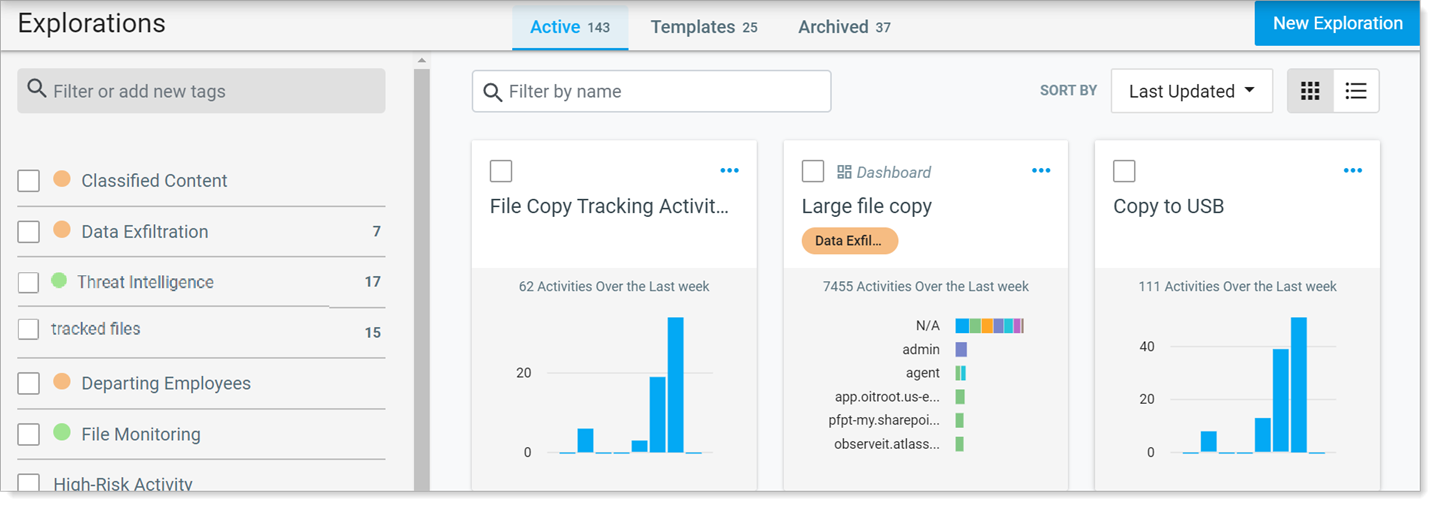
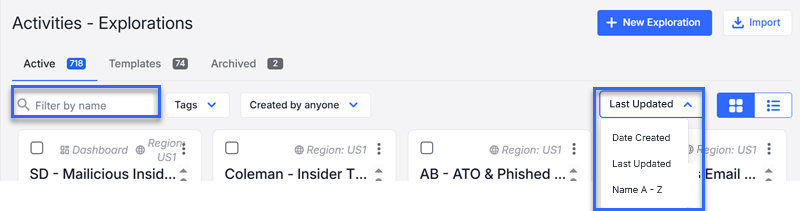
From Explorations, select the Active tab and you can see the active explorations as graphs or lists.
-
To see the graph view, click
 .
. -
To see the list view, click
 .
.
In the examples below, you can see the list and graph views.

Sort and filter your view
You can sort and filter your view.
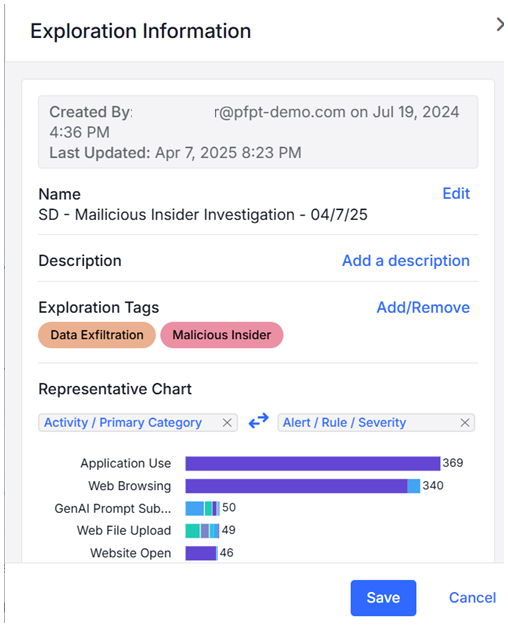
Exploration Information
For details about the Exploration, click the information icon ![]() at the top of the page.
at the top of the page.
Creating and Modifying Explorations Views
From this view you can create and modify explorations and see the results of the Explorations. For more information about how to create an Exploration, see Creating an Exploration.
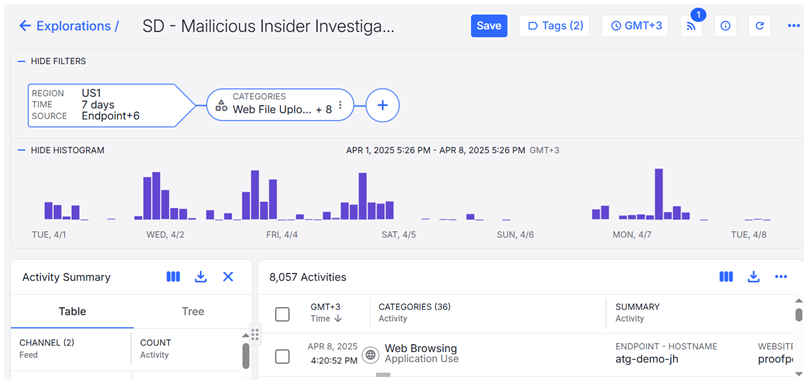
In the upper area of the view, you see the Exploration.
The Exploration is shown in ovals. You can edit, disable, and delete the contents of the oval to create and modify an Exploration.
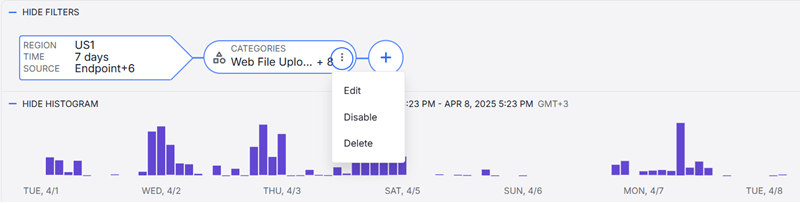
In the lower area of the view, you see the results of the exploration. The information is displayed as a histogram or in a table. You can change the columns of the view to see what you want.
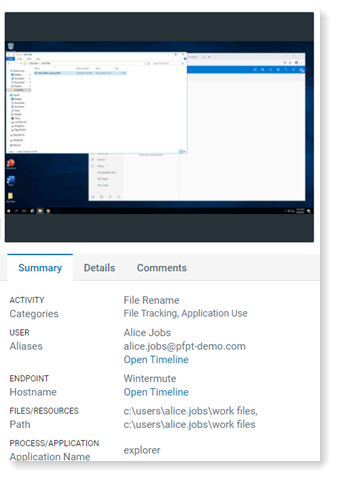
Viewing Activity Summary and Details
By clicking on a row, you can see the summary and details of the selected activity that includes:
-
Screen Recording: Provides a screenshot of the relevant activity.
In addition, you can view the Use Activity Player that provides a list of user activity shown in a chronological order aligned with the respective screenshots. When enabled, this feature captures a user's step-by-step activity so you can investigate user behavior, one activity at a time. (See User Activity Player.)
-
Workflow status: Refers to the status of an activity that is optionally assigned to it. You can assign/modify/remove the workflow status in an Exploration.
Workflow status includes New, Reopened, In progress, Escalated, On-hold, Resolved and Not an issue.
-
Summary tab: Summary of the activities. Click Timeline to see the activities in chronological order. You can also add tags to help you categorize the activities. (See Tag Management .)
-
Details tab: Details of each field.
Screenshots are not available for Endpoint DLP-only users.
Viewing alerts from the exploration
You can see alerts in the exploration view. The ![]() indicates an alert. For more information about alerts, see Alerts.
indicates an alert. For more information about alerts, see Alerts.

Viewing common activities
By default, common activities are grouped. This means that when the same exact activity happens consecutively, it is grouped with the previous activity.
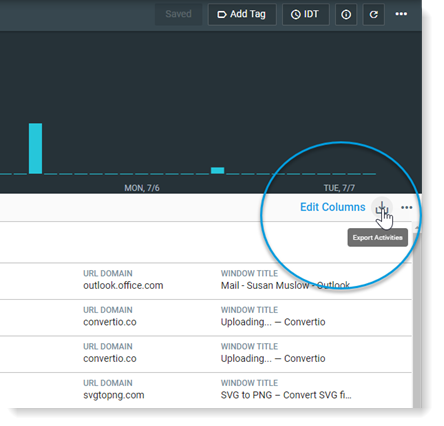
Below, the circled item is an example of a grouped activity.
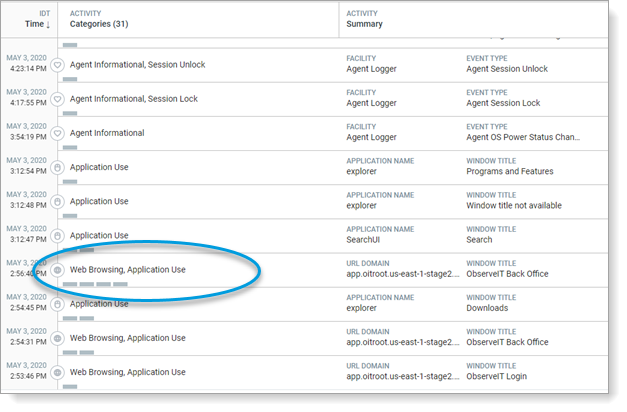
The ![]() indicates the number of activities that are grouped with this item. In the example, there are 4 activities. These 4 activities are exactly the same; that is, the same activity, the same users, the same URL domain, etc.
indicates the number of activities that are grouped with this item. In the example, there are 4 activities. These 4 activities are exactly the same; that is, the same activity, the same users, the same URL domain, etc.

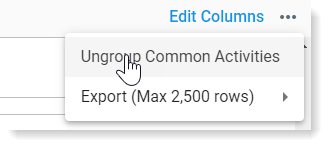
To ungroup the activity and see the other activities, select Ungroup Common Activities from the menu.
The list of common activities that were grouped together is shown below.

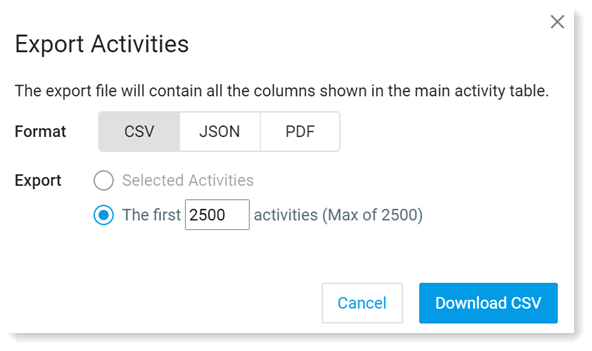
Exporting activities
You can select which activities you want to export. Export a specific number of activities (maximum of 5000 activities) or selected activities to CSV, JSON or PDF format.
You can choose either:
-
Quick Export: Export a specific number of activities (maximum of 5000 activities) or selected activities to CSV, JSON or PDF format.
-
Bulk Export: Schedule an export to JSON format. A task is created to generate the JSON export. You can download the export from the task console once it is completed.
When exporting to CSV and opening it in Excel (or similar tool) it is recommended that you set the input text to Unicode (UTF-8) so characters in special languages such as Japanese, Thai, Russia etc will be displayed correctly.
To export, click on the arrow above the columns.
Define the export details.