Allow Action on Prevention Rules
Allow Action feature lets you create prevention rules that allow certain files based on specific criteria by acting as an override/exclusion mechanism.
The Allow action does not block any traffic on its own. For a blockage to occur, a separate Block Rule must be configured alongside the Allow Rule.
Currently, the Allow action is supported for:
-
Copy to USB
-
Copy to Cloud Sync Folder
-
Web File Upload
-
Copy to Mobile Device
-
Send File using Bluetooth
Rules with Allow actions are evaluated by the Agent first, and only if there is no match, the Agent then evaluates other prevention rules with the Block or Prompt actions.
When an allow rule with a detector is configured on the realm, the agent processes the allow rule first and if the action meets a threshold the activity is allowed.
For example, an allow rule with a detector is configured. A file is copied that exceeds the file size threshold. threshold. The file is then copied.
Use Cases for Defining Prevention Rules with Allow Action:
- Complex Exclusion: Based on a complex combination of two or more fields.
For example, your organization has a rule that blocks uploading files with credit card number information. There are, however specific users who are allowed to upload files to specific websites even if these files contain the specific credit card information.
Exclusions based on a single field can still be managed and do not require the Allow action. Use a negative operator (such as NOT IN) with the original Prevention Rule with the Block/Prompt action.
-
Simplifying Multiple Rules Definition: Applies when there are several prevention rules with the same exit point (USB, file upload, copy to local sync folder, copy to network drive) and a simple exclusion is needed based on a single field, such as a list of users. Instead of repeating this exclusion (using a condition with a negative operator) in all prevention rules, this option lets you create a single prevention rule with the Allow action for the exit point.
-
Allowing File Movement via non-File-Explorer on Windows: On Windows, if Prevention Rules are enabled for USB, Sync Folder, or Network Drive, any file movement to these exit points is blocked when performed through applications other than File Explorer (e.g., CMD, PowerShell). To allow specific applications to bypass this restriction, you can create a Prevention Rule with the Allow action using the Executable Name (e.g., 'cmd.exe').
-
Mandatory Action -specifying one or more Executable Names: The Allow action for USB and Web File Sync requires specifying one or more Executable Names. This is a mandatory condition.
For USB, encrypted data may be considered safe exit points when used by specific users in your organization. Currently, Trellix and BitLocker encryption are supported.
When using the Prevention Rule with the Allow action for file movements to local sync folders (Web File Sync), the operation of moving a file (as opposed to copying) within the same partition will not be Allowed. However, this limitation does not affect file copy operations or file moves between different partitions.
Allow Action Filters
The table describes the available fields for specific exit points.
| Field | Available For |
|---|---|
| Detector > Indicator/Detector Name | Web File Upload, USB, Cloud Sync Folder |
| User > User Name | Web File Upload, USB, Cloud Sync Folder |
| User > Group Names | Web File Upload, USB, Cloud Sync Folder |
| Files/Resources > Classification Label | Web File Upload |
| Files/Resources > File Name | Web File Upload |
| Files/Resources > Resource URL | Web File Upload |
| Files/Resources > Content Type | Web File Upload |
| Files/Resources > Extension | Web File Upload |
| File Resources > Size | Web File Upload, USB, Cloud Sync Folder |
| Files/Resources > Tracking Origin Resource URL | Web File Upload |
| File Resources > Protection Type | USB |
| Process/Application > Executable Name | USB, Cloud Sync Folder |
Creating an Allow Rule
-
From Proofpoint Data Security, select the Administration app. Select Endpoints > Prevention/Endpoint Rules.
-
Click New Rule and from the Prevention Rule area and click Create Rule and the Select Action to Perform panel displays.
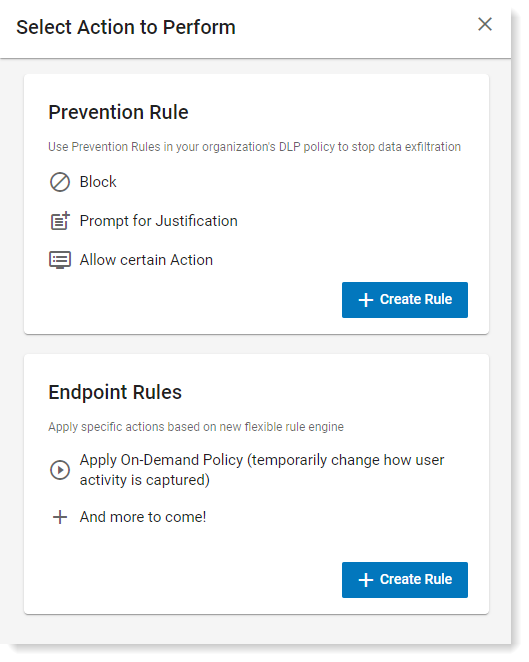
-
In the Prevention Rule area, click Create Rule.
-
In General tab, complete the Name field and Description (optional) field.
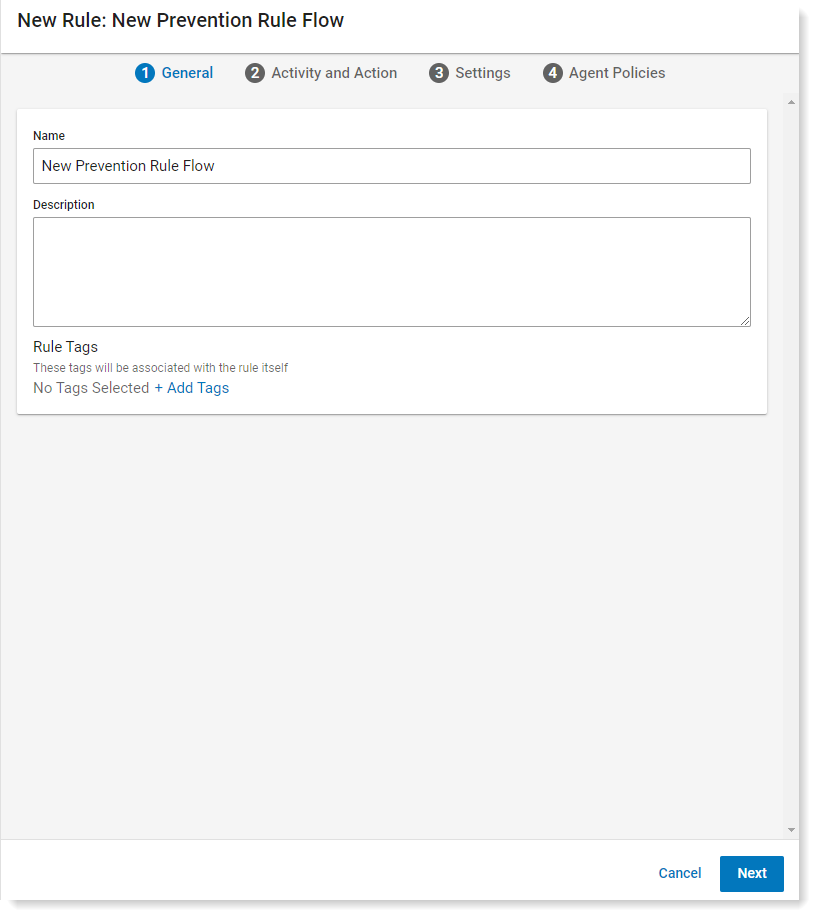
-
Click Next to continue to the Activity and Action tab.
-
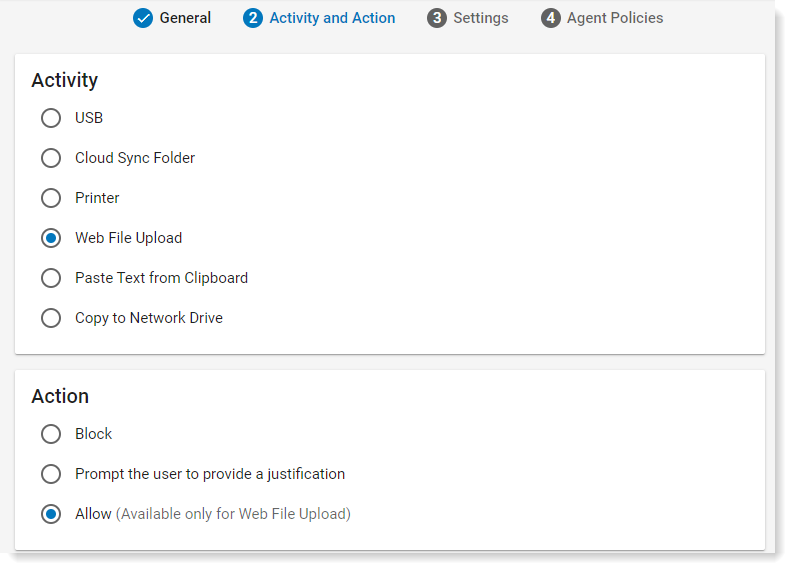
In the Activity area, select Web File Upload and in the Action area, select Allow.
-
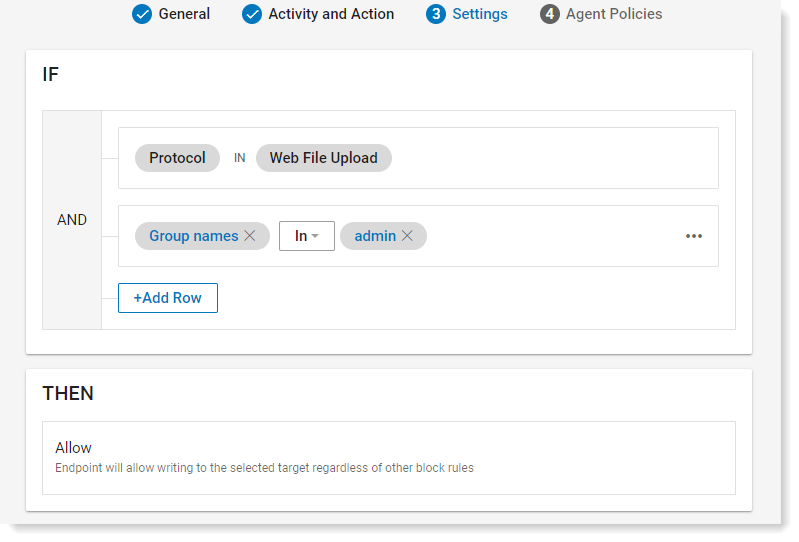
In the Settings tab, the Protocol displays as Web File Upload. Add any other filters. For this example, Select Select Value > User > Group Name and Value > admin.
-
In the Then area, by default Allow is selected. Click Next.
-
From the Agent Policies, select the Agent Policies that the rule applies to. Click Save.
Related Topic: