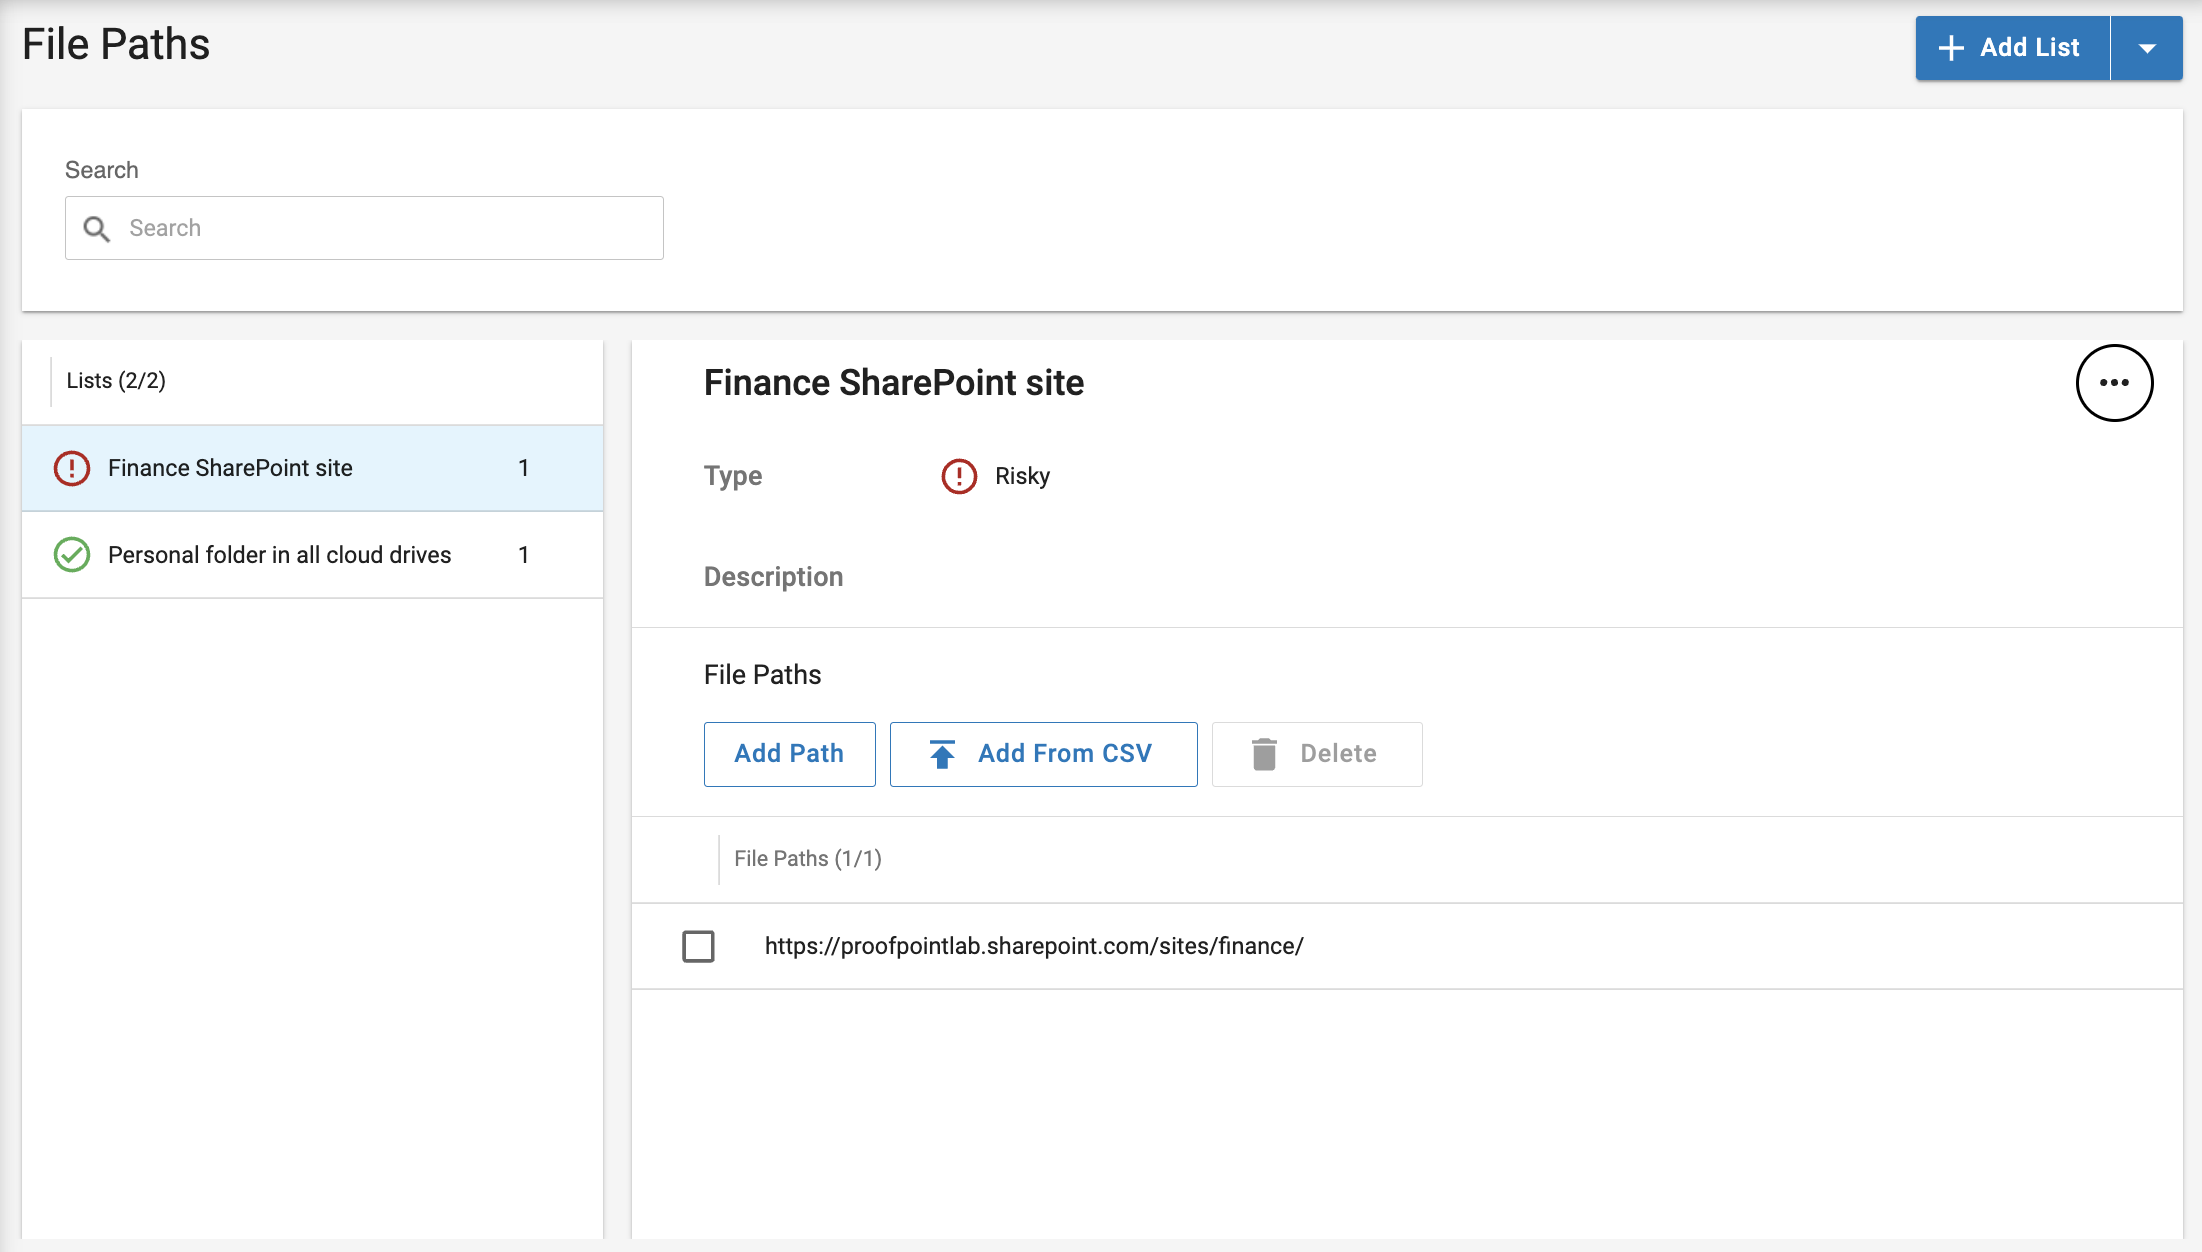
Define and manage lists of file paths unique to your organization in the File Path section. One added, your File Path lists display as items you can select when creating relevant rules (file-sharing policies).
To access the File Paths page, from Administration app, select Cloud > Policy Lists > File Paths.
For example, you can use File Paths to:
-
Generate high severity alerts on file activity for files residing in specific SharePoint sites or folders ("Starts with...")
-
Exclude monitoring of certain folders and subfolders across all user's drives ("personal" folder, apps folders)

File Path Syntax and Use Cases
All files/folders under a defined path (starts with)
-
Syntax: end with "/"
-
Example: https://mycompany.sharepoint.com/personal/username/Documents/
Files and folders under the first level of the defined path
-
Syntax: end with "//"
-
Example: https://mycompany.sharepoint.com/personal/username/Documents//
Specific file/folder
-
Syntax: full file/folder path
-
Example: https://mycompany.sharepoint.com/personal/username/Documents/mydoc.docx
Contains
-
Syntax: start with /
-
Examples
-
/personal - ends with "personal"
-
/personal/ - contains "personal"
-
/personal// - contains "personal", and one level down
-
You can Export and Import a list with its values. When importing a list, make sure it matches the list type.
Import a File Path List
-
Click the dropdown menu next to Add List.
-
Select Import List.
-
Drag and drop your properly formatted .json file into the section.
Or click Browse and select the .json file.
-
Click Add.
Manually Create a File Path List
-
Click Add List.
-
Enter the List Name.
-
Select the Type (Trusted or Risky).
-
Enter a Description for the List.
-
Click Save.
Your new list displays in the left hand menu
-
-
To add individual File Paths to your list:
-
Click Add Path.
-
Under File Paths, enter a File Path.
-
Click the checkmark when done.
-
-
To add a .csv file to your list:
-
Click Add From CSV.
-
Drag and drop your properly formatted .csv file into the section
Or click Browse and select the .csv file.
-
Click Add.
-
Edit Items in a List
-
Select the List from the left-hand menu.
-
Hover your cursor over the extension.
-
Click the pencil icon.
-
Edit the extension.
-
Click the checkmark to save your edits.
Delete Items in a List
-
Select the List from the left-hand menu.
-
Hover your cursor over the extension.
-
Click the trash can icon.
-
Or click the extension checkbox and click Delete.
After a list is created, you can use the controls in the list’s options menu to:
-
Edit a list’s Name, Type, and Description
-
Duplicate a list
-
Export a list
-
Delete a list