Define and set up rule-based operations on the risks detected during scans
This feature ensures that once the DSPM platform is configured for Risk detection (configuration or data risks) that discovered risks are handled as per the Standard Operating Procedures (SOP) defined by your organization.
Create an Automation Rule Set
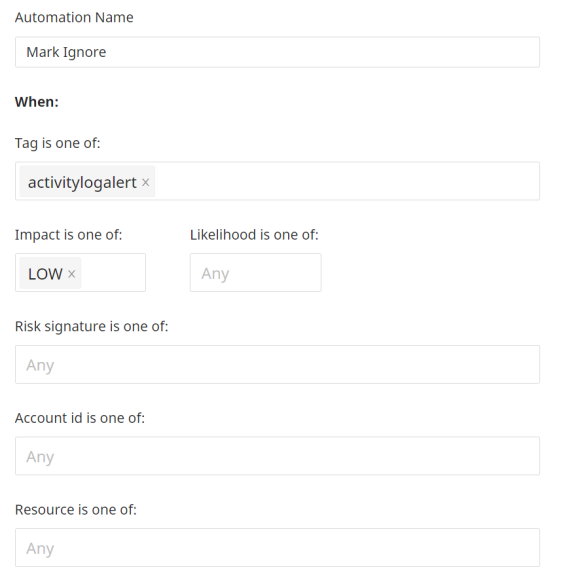
Actionable rule sets can be defined based on the following 5 criteria:
- Tag - Select Tags from the drop-down list. You can select as many as you would like or leave blank for all to be selected.
- Impact - Choose Low, Medium, High or any combination of the three Impact levels. If you leave this blank, all three will be included.
- Risk - Choose Low, Medium, High or any combination of the three Impact levels. If you leave this blank, all three will be included.
- Account ID - This will show all the identifiers (Account ID for AWS, Subscription ID for Azure and Project ID for GCP, Snowflake account name) for accounts that are onboarded and connected successfully from DSPM platform. Select one or more accounts or leave blank to select from all of your accounts.
- Resources - Choose a resource or set of resources - this is also a multi-selection field. Or leave blank for all resources to be included.
Action to Take
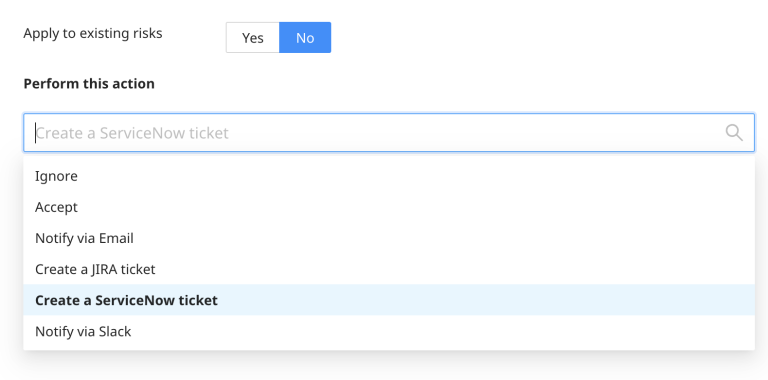
Once the selection criteria is configured for picking up the risks that are detected during the scanning operation, the next step is to set the Action that should be triggered based on the results. This is done from the "Perform this Action" menu option. The list of actions that can be configured are as follows:
- Ignore - Select this action to mark risks which are not a serious security issue for the environment to be passed over. This would most likely include risks which are of Low impact and the security teams are aware of the reason for the risks.
- Accept - Select this action to mark risks which are present on the environment due to some specific, intentional reason.
- Notify via Email - Select this option if the risks meet criteria that indicates someone should be notified through email for information purposes and further action.
- Create a JIRA ticket - Select this option if the risk criteria suggests the need to submit a JIRA ticket to the relevant team.
- Create a ServiceNow ticket - Select this option if the risk criteria suggests the need to submit a ServiceNow ticket to the relevant team.
- Option 4 and 5 makes the overall risk mitigation steps entirely automated since detection of risks, selection of specific risks, and informing the security teams of these risks to mitigate are entirely done by the DSPM.
-
Notify via Slack - Select this option if the risks detected require messages to be sent to team members on slack channels for information or further actions.
The options ‘Create a JIRA ticket’, ‘Notify via Slack’ and "Create a ServiceNow ticket" will be listed in the drop-down only if these Integrations are created and enabled.
The actions can be configured to be applied on already existing set of risks or only one the new ones by toggling the option to Apply to Exisiting Risks.
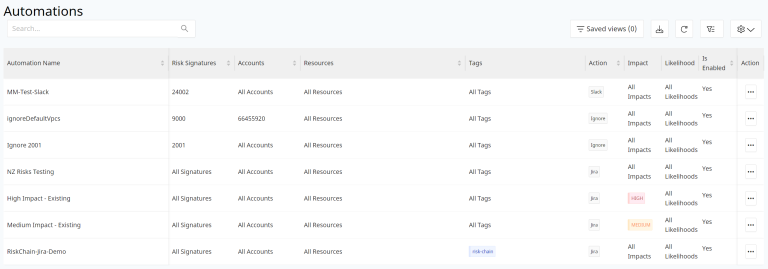
Risks that have been marked by any automation task will have the the "User" column populated with the Automation name under Actions section of the Risks in the All Risks section.
Clone an Automation Rule
You can duplicate an automation instead of having to make all or part of the selections again.
Select the dots menu on the row of the automation you want to copy, then select Clone Automation.
In the form that opens, make any changes and select Submit to finish.
Edit an Automation Rule
To edit an existing Automation rule, select the linked name of the automation.
Make changes in the rules and Submit when done.
Remove an Automation Rule
To remove a rule, select the dots menu for that row in the Automations summary screen. Then select Delete Automation.