DSPM supports the use of Okta for SSO authentication. Use the following steps to configure SSO with Okta.
Step 1. Create a New App Integration
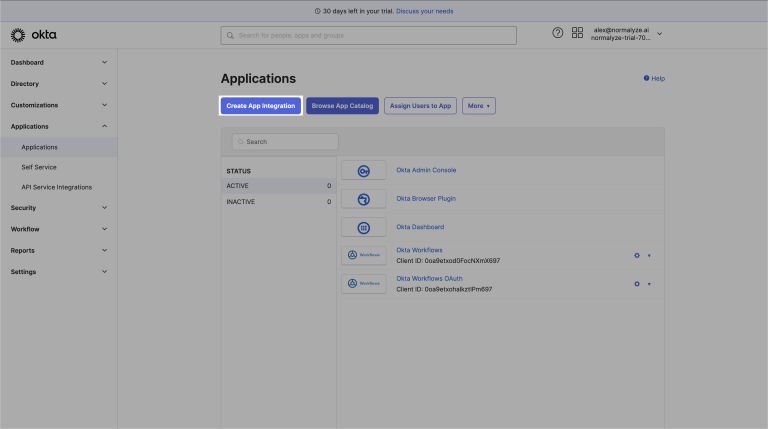
Login to the Okta Admin Dashboard. Select Applications in the left menu, then select Create App Integration.
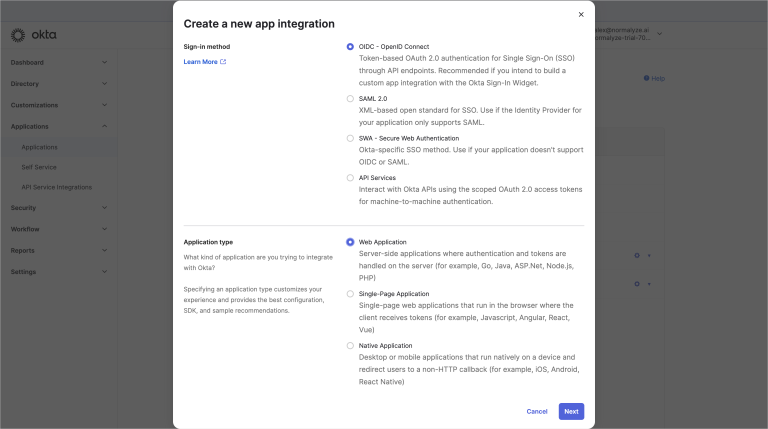
In the Create a new app integration window, complete the following steps:
- In Sign-in method, select OIDC - OpenID Connect.
- In Application type, select Web Application.
- Select Next.
Step 2. Configure the New Web App Integration
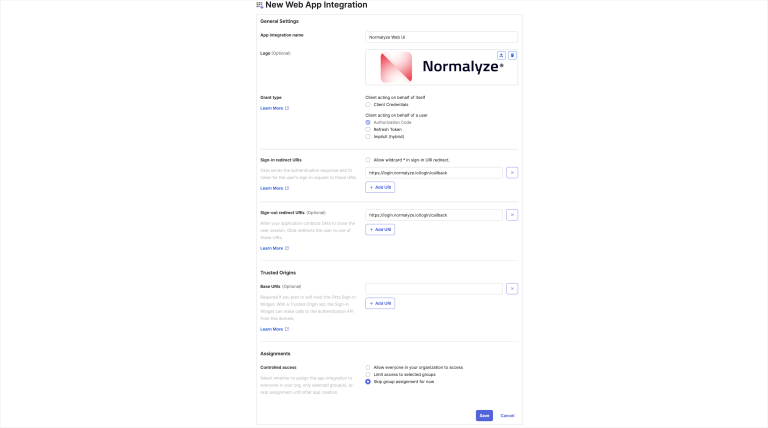
Enter the Web App Integration general settings:
- In App Integration Name, enter a name such as “Proofpoint DSPM”.
-
Upload a logo (optional). Feel free to use the one provided below:

- In Grant Type, select Authorization Code.
- In Sign-in redirect URIs, enter
https://login.normalyze.io/login/callback - In Sign-out redirect URIs, enter
https://login.normalyze.io/login/callback - In Assignment, select Skip group assignment for now.
- Select Save.
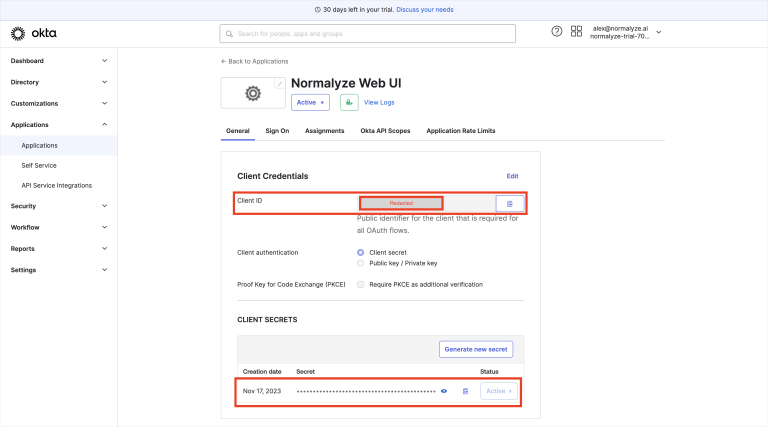
Step 3. Copy the Client Secret Information
Go to the General tab. Copy the Client ID and Client Secret and save them in a file.
You will need these values in the final step.
Step 4. Edit Web App Integration Login Information
In General Settings, select Edit.
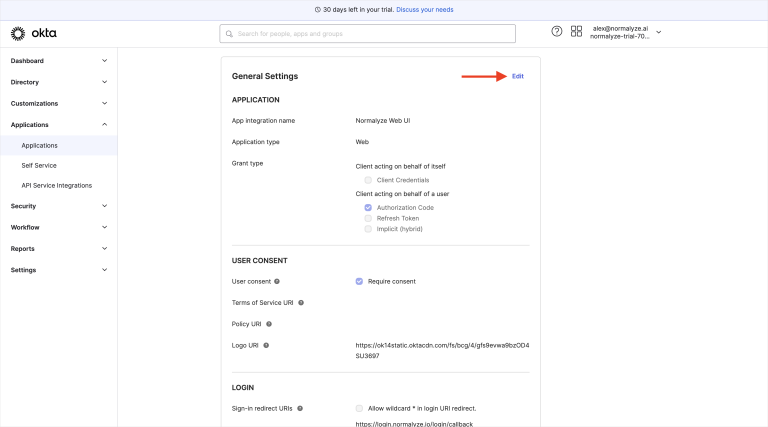
- In Login initiated by, select Either Okta or App.
- In Application visibility, select Display application icon to users.
- In Login flow, select Redirect to app to initiate login (OIDC compliant).
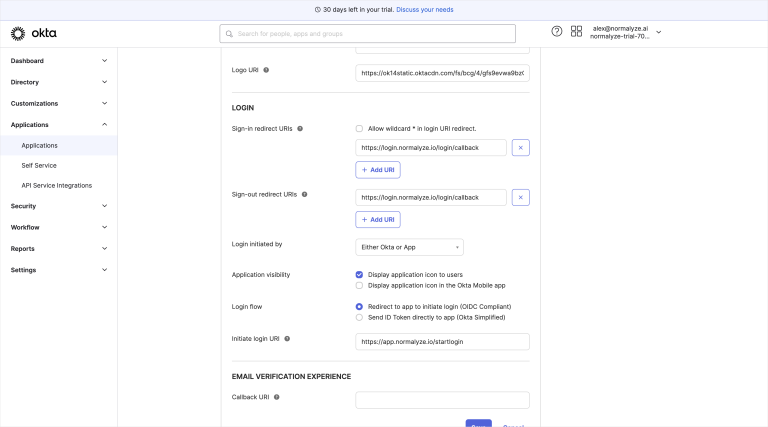
- In Initiate login URI, enter
https://app.normalyze.io/startlogin?connection=<value>Replace
<value>using the following naming convention:Okta-<company_name>-<okta_environment>Examples:
Production Okta environment:
Okta-Proofpoint-ProdNon-Production Okta environment:
Okta-Proofpoint-PreviewCopy the Initiate login URI and save it in a file. You will need this value in the final step.
- Select Save.
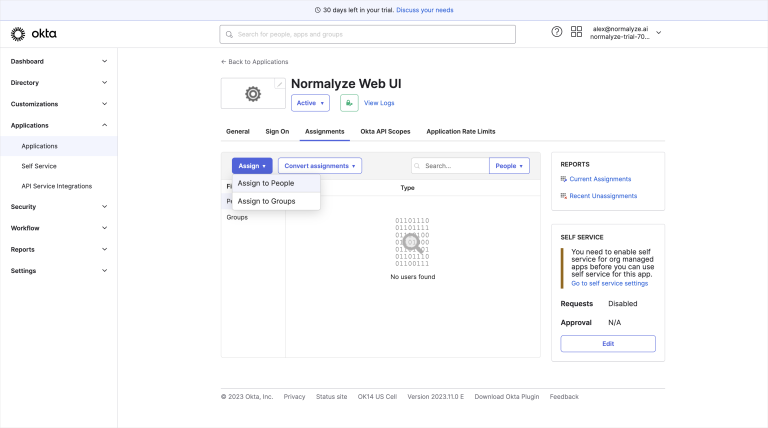
Step 5. Assign Access to the Web App Integration
Go to the Assignments tab and assign people or groups. The assigned users will see this app in their Okta dashboard and will be able to use it to sign into DSPM.
Step 6. Complete the SSO Integration
Open a Support Case
Once you’ve completed all of the previous steps, open a support case at Proofpoint Community to finish the integration. You’ll be able to sign in using SSO once the case is resolved.
Use a subject such as “DSPM SSO Integration” for the support case. In the support case, please state that you have completed the SSO setup steps and have sent the required configuration information via secure file share.
Transfer Configuration Details via Secure File Share
Transfer the following information using secure file share. Do not include this information in the support case.
- Initiate Login URI
- Okta Domain
- Client ID
- Client Secret