AWS and Azure Accounts can be used as a sidecar for on-premises accounts. In this model, Docker related operations are not needed.
The following pre-requisites need to be completed before onboarding the on-premises accounts:
- Connectivity from the cloud provider to the on-premises datacenter should be established. This can be done by using VPN, AWS Direct, Azure ExpressRoute, etc
- Port 443 outbound access to https://api3.normalyze.io should be enabled from the host where the data stores are residing.
Onboarding using AWS or Azure account as sidecar
-
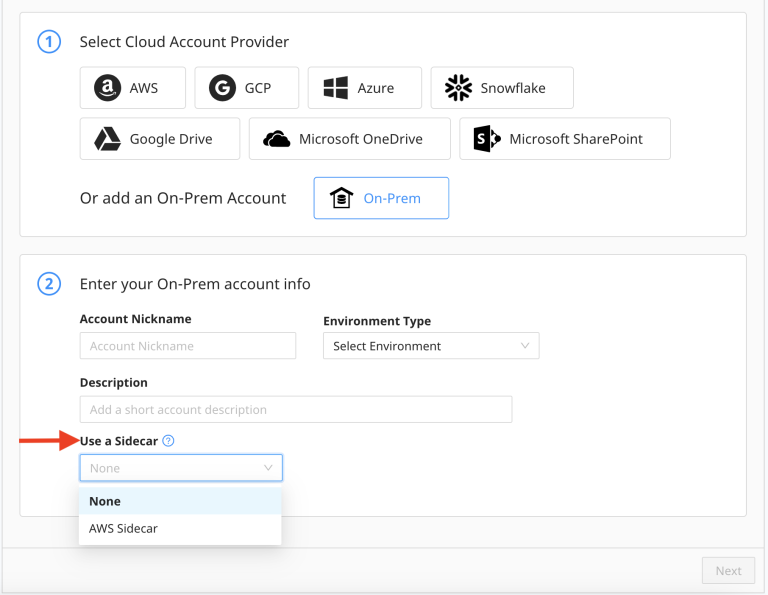
Go to Workspace, then Accounts and select On-Premises

-
Enter your Account Details
Give your account a nickname, select the environment type, and add a description.
-
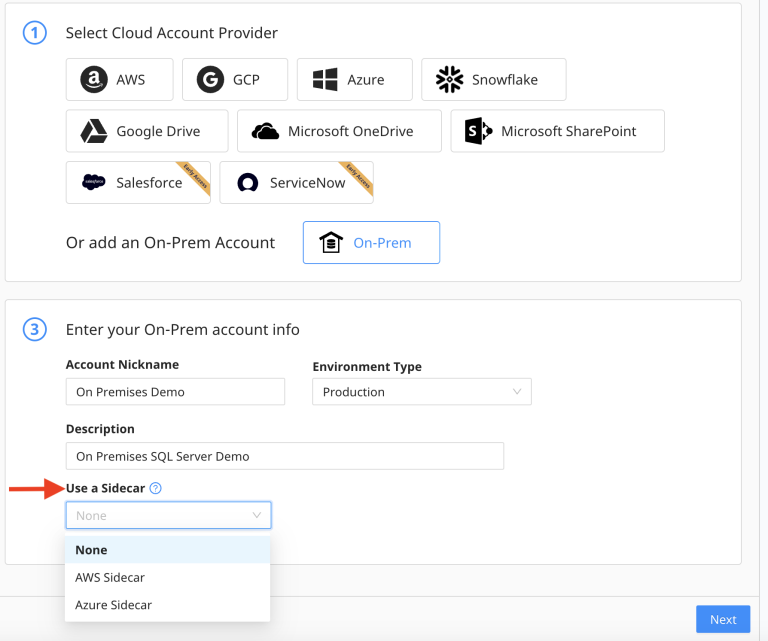
Select Sidecar Account
Select either AWS or Azure as the sidecar account from the drop-down and follow the steps for the respective one based on the selection.
AWS Sidecar
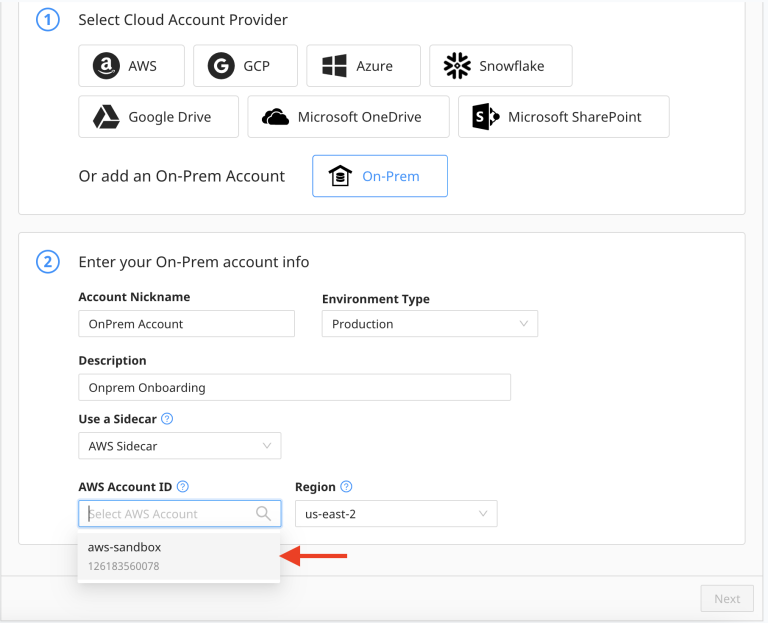
- From the “Use a Sidecar” drop-down select AWS Sidecar. All the onboarded AWS accounts will be listed from the drop-down.
- From the “AWS Account ID” drop-down select any one of the onboarded AWS Accounts to be the sidecar.
- From the “Region” drop-down select the desired region. The data scanner resources will be created in this region for the selected AWS account.
Azure Sidecar
- From the “Use a Sidecar” drop-down select Azure Sidecar. All the onboarded Azure accounts will be listed from the drop-down.
- From the “Azure Account ID” drop-down select any one of the onboarded Azure Accounts to be the sidecar.
- From the “Region” drop-down select the desired region. The data scanner resources will be created in this region for the selected AWS account.

- Select Next.
-
Provide Data Stores Detail
Input the details for the data stores that need to be scanned in the corresponding template displayed on the screen.
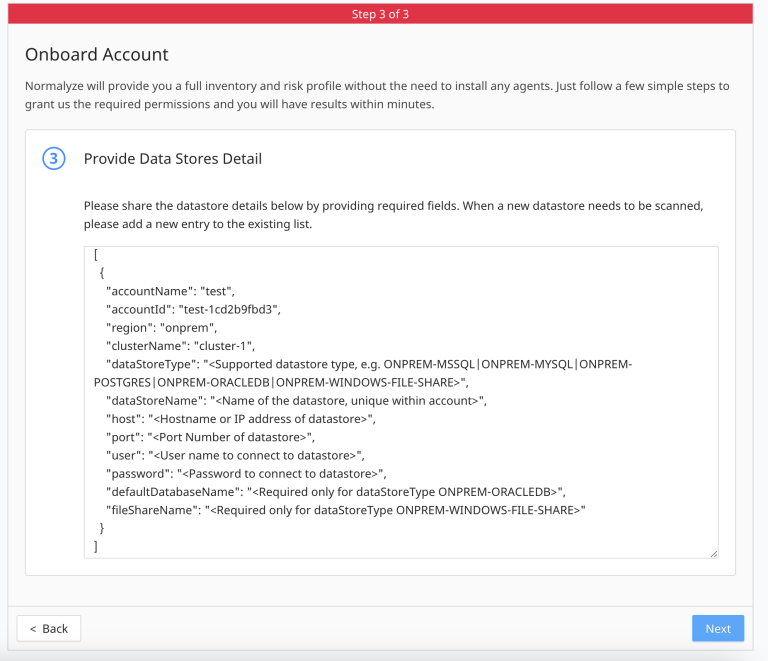
- If there are multiple data stores that need to be scanned, add additional blocks of the data store details as comma separated entries. The examples in On-Premises Data Store Configuration Examples show the structure for the values in the templates for both structured and unstructured scenarios.
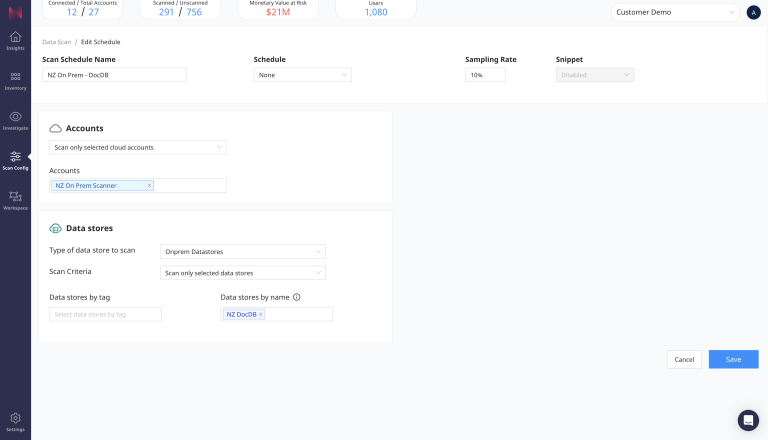
- Create A New Data Scan Schedule
- Go to Scan Config and then select Scan Scheduler
- Select the New Schedule button
- In the Accounts section, choose Scan only selected cloud accounts
- Next, select the on-premises data scanner Account that you have just onboarded with sidecar.
- Then select On-premises Data Stores as the type of data store to scan.
- Finally select the data store name which you supplied in the template file for dataStoreName.
- Optionally you can set a schedule for the scan to run or skip this.
-
Select Save.
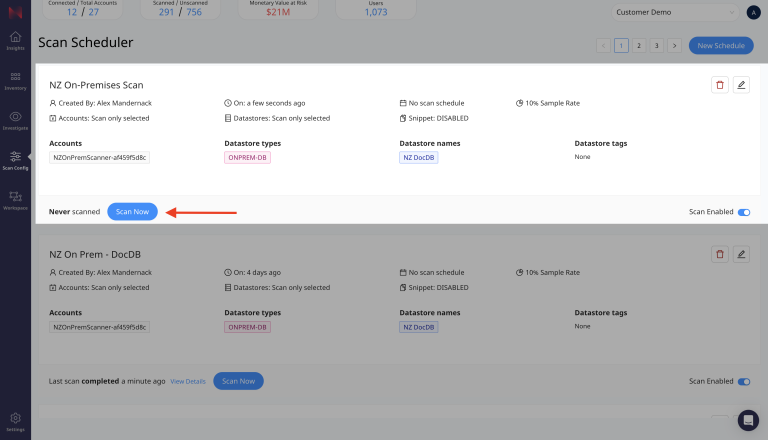
- Scan Now
Navigate to the Scan Scheduler page again, find the scan profile that you just created and select Scan Now. This will immediately start a data scan on the on-premises data store that you have specified.
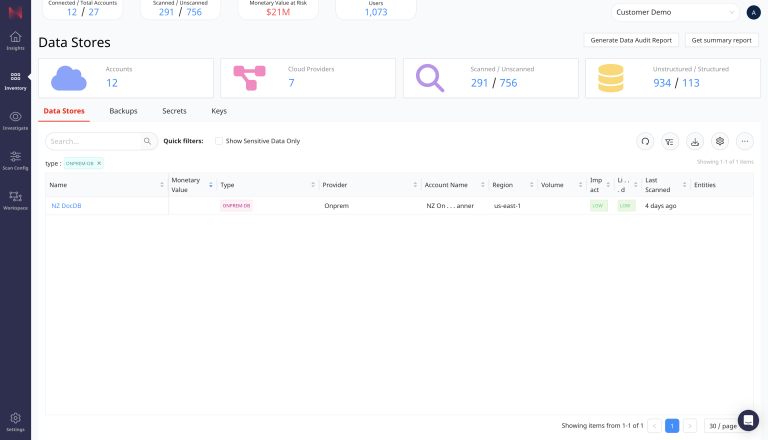
- View the Results
Once the scan completes, navigate to the Data Stores Inventory page and enter into the search bar
type: ONPREM-DB. This will filter the results to just on-premises data stores. You can further filter by name or other values of your choosing.