Overview
Azure Budgets help you monitor Azure spending and set up alerts when costs reach specific thresholds. This guide shows you how to create budgets to track costs for DSPM resources using resource groups and tags.
Azure Budgets provide monitoring and alerts only. They do not prevent spending from exceeding the budget amount. Resources will continue to run and accrue costs even after budget thresholds are reached.
Key Features
- Cost Monitoring: Track spending against defined budgets.
- Alerts: Email notifications at configurable thresholds (50%, 75%, 90%, 100%).
- Forecasting: View projected costs based on historical data.
- Filters: Apply filters by resource groups, tags, and services.
Prerequisites
- Cost Management Contributor role on your Azure subscription
- 24-48 hours of cost data (for new subscriptions)
If you don’t have permissions, contact your Azure administrator to request the Cost Management Contributor role.
DSPM Resource Identification
All DSPM resources in Azure can be identified and tracked using two primary methods: resource groups and resource tags.
Method 1: Resource Group (Recommended)
All DSPM resources for a specific account are created within a dedicated resource group. This is the recommended method for tracking costs as it captures all resources including parent and child resources.
- Format: normalyze-{onboarding_id}-{region}
- Examples: normalyze-m56dfw879mjwpk6kplqz-westus, normalyze-abc123xyz-eastus
Method 2: Resource Tags
DSPM resources are tagged for granular cost tracking. Use tags when you need to filter by specific resource types or services.
| Tag Name | Purpose | Example Values |
|---|---|---|
|
normalyze-{onboarding_id} |
Track parent DSPM resources |
normalyze-m34dsi715lwkpk9kmogz |
|
containerapp_name |
Track specific container app costs |
nmlz-saas-microsoftsharepoint, nmlz-saas-microsoftonedrive |
|
vnet_name |
Track network costs |
normalyze-saas-crawler-vnet |
|
nz_snippet_azure_blob_container_name |
Track storage costs |
normalyze-storage-123-678cf92fc325-westus |
The normalyze-{onboarding_id} tag is applied only to parent resources. Child resources are not tagged but are included when filtering by resource group.
Creating a Budget
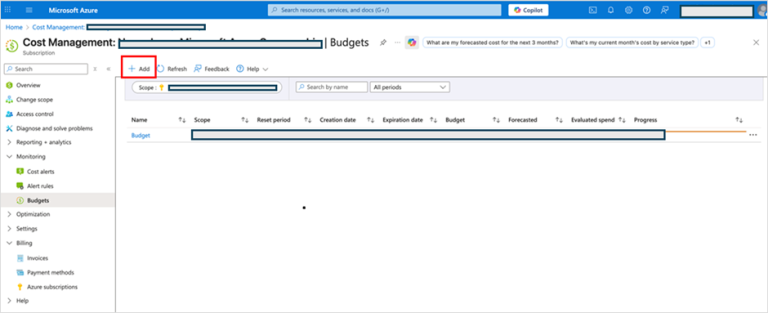
Step 1: Navigate to Budgets
- Log into Azure Portal.
- Search for Budgets in the top search bar.
- Click + Add.
Step 2: Select Budget Scope
The budget scope defines which resources will be tracked. For DSPM resources, you have two options: resource group or subscription scope.
Option A (Recommended): Select the DSPM Resource Group
- In the Budget scoping section, click the Scope dropdown.
- Select Resource Group.
- Choose your subscription.
- Select the resource group normalyze-{onboarding_id}-{region}.
- Click Select.
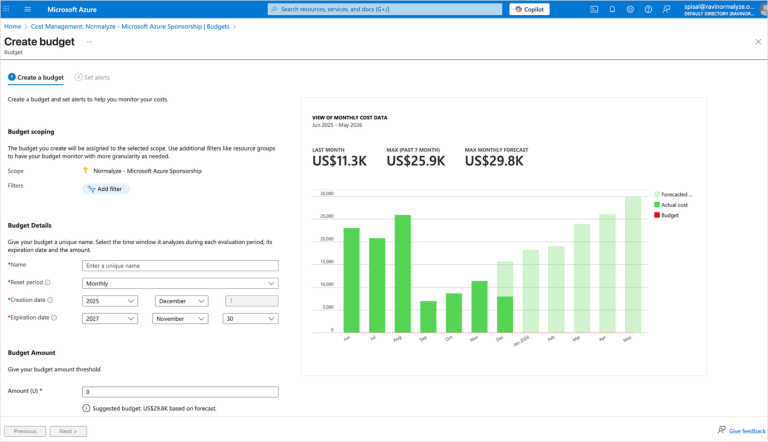
Option B: Select the Subscription Scope
For this option, you'll add filters in the next step.
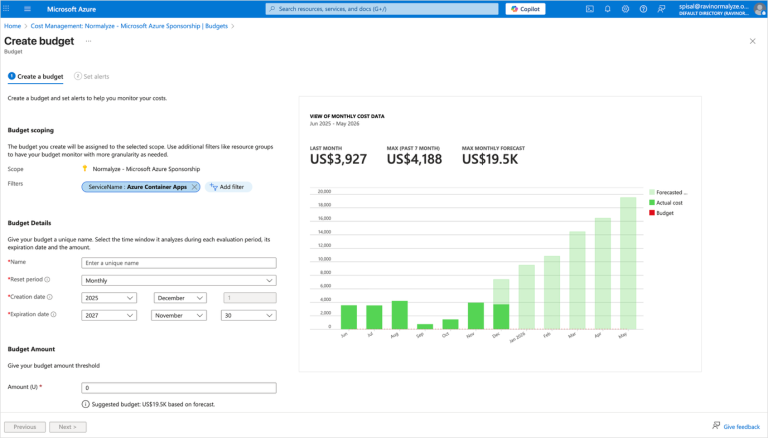
Step 3: Apply Filters (Optional)
If you selected a resource group in Step 2, you can skip this step.
If you want to track costs across multiple resource groups or filter by specific services, add tag filters. Several common filter scenarios are described below.
You can combine multiple filters to track specific services within a specific account.
Example: Track All Costs for a DSPM Account
- In the Budget scoping section, click Add filter.
- Select the following values:
- Filter type: Tag
- Tag name: Select the normalyze-{onboarding_id} tag (example: normalyze-m34dfw715lkwpk6kmugy)
- Operator: Exists
Example: Track Specific Service Costs
- In the Budget scoping section, click Add filter.
- Select the following values:
- Filter type: Tag
- Tag name: containerapp_name
- Operator: In
- Values: Enter the app name (example: nmlz-saas-microsoftsharepoint)
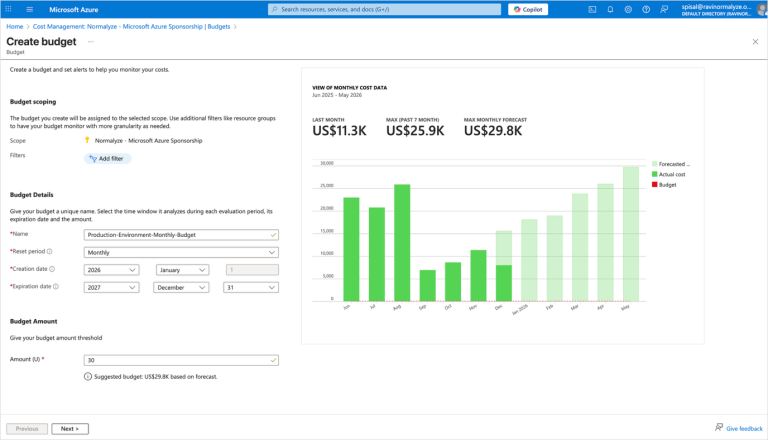
Step 4: Configure Budget Details and Amount
Enter the following information in the Budget Details and Budget Amount sections.
- Name: Enter a unique, descriptive name (example: DSPM-Production-Monthly).
- Reset period: Monthly (recommended).
- Creation date: Select when the budget starts.
- Expiration date: Select when the budget ends.
- Amount: Enter your budget threshold in USD (adjust after 1-2 months based on actual usage).
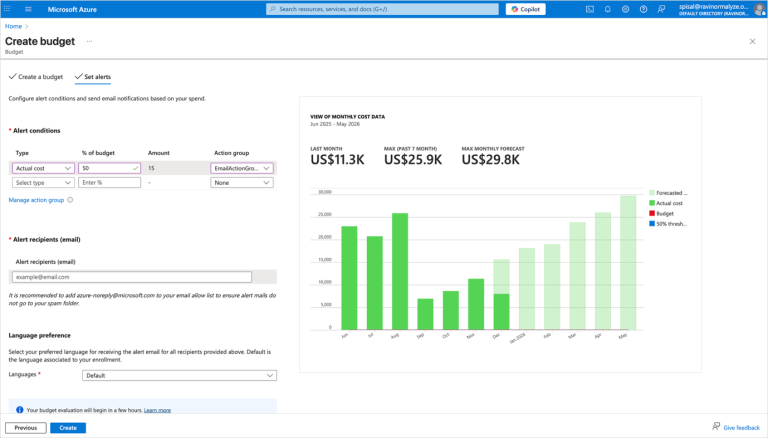
Review the cost visualization graph showing historical and forecasted costs, then click Next.
Step 5: Set Budget Alerts
Configure alerts to receive notifications when spending reaches specific thresholds:
- On the Create budget page, click Set alerts.
- Create the following alert conditions (recommended thresholds):
- Alert 1: Type = Actual, % of Budget = 50
- Alert 2: Type = Actual, % of Budget = 75
- Alert 3: Type = Actual, % of Budget = 90
- Alert 4: Type = Forecasted, % of Budget = 100
- In the Alert recipients section, enter the email addresses that will receive notifications.
- In the Language preference section, select the language to use for notifications.
- Click Next.
Step 6: Review and Create
- Review all of the budget settings: scope, filters, budget details, and alert conditions.
- Click Create. You will receive a confirmation message once the budget has been created.
Monitoring Your Budgets
Use Azure Portal to monitor your budgets.
View Budget Status
- Search for Budgets.
- Check the status indicator: Green (OK), Yellow (Monitor), Red (Action Required).
Analyze Cost Breakdown
- Search for Cost Management. Click Cost Analysis.
- Filter costs by:
- Resource group: normalyze-{onboarding_id}-{region}
OR
Tag: normalyze-{onboarding_id}
- Resource group: normalyze-{onboarding_id}-{region}
When You Receive a Budget Alert
- Note the onboarding_id in the alert.
- Search for Cost Management. Click Cost Analysis.
- Filter by the appropriate resource group or tag.
- Review the cost breakdown by service.
- Check if DSPM scans are currently running.
- Decide whether to manually stop resources or allow scans to complete.
Troubleshooting
Issue: Unable to load some of the filter values
Possible causes:
- No subscription access or insufficient permissions.
- No cost data available yet (new subscriptions need 24-48 hours).
- Scope not selected before adding filters.
Solutions:
- Verify you have the Cost Management Contributor role (Subscription > Access control IAM).
- Always select the scope before adding filters.
- Wait 24-48 hours for cost data to populate in new subscriptions.
Issue: No Subscriptions Error
Solution:
- Click your profile icon (top right), then select Switch directory.
- Choose a directory with active subscriptions and verify subscription status.
Additional Resources
Microsoft Documentation:
Azure Tools: