Setting up Okta SAML Account Identity Provider
This topic describes how to set up Okta SAML as an account identity provider (IdP).
Prerequisites:
- Okta account
-
Proofpoint Data Security ITM account
-
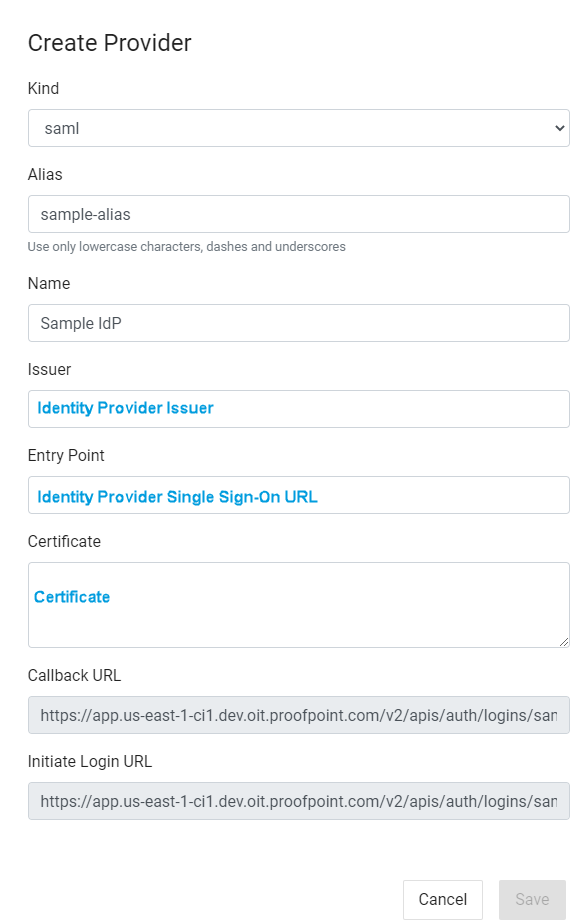
From Proofpoint Data Security, select the Administration app. Select Settings and complete the following settings (see IdP Configuration):
-
Kind: Select saml
-
Alias: Choose an Alias. You'll use this when you setup Okta SAML.
-
Name: Choose a Name. This will appear in the Proofpoint Data Security login page.
-
-
Open both Proofpoint Data Security and Okta dashboard so you will be able to copy/paste between them.
This document was last updated February 2021 and is accurate to that date.
Setting up from the Okta dashboard
-
Log in to your Okta account.
-
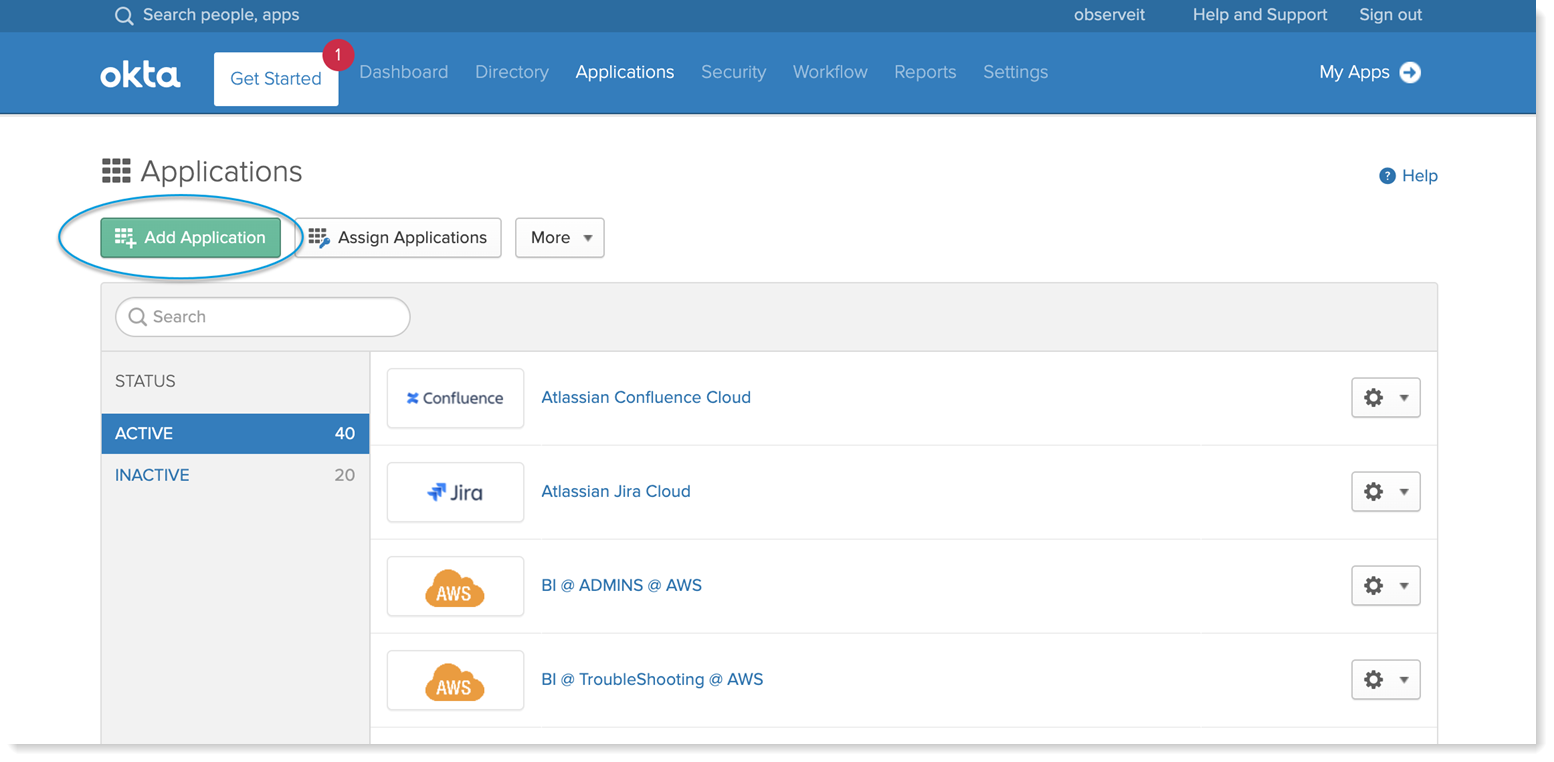
Select the Applications tab and in the Applications screen, click Add Application.
-
In the Add Application screen, select Create New App.
-
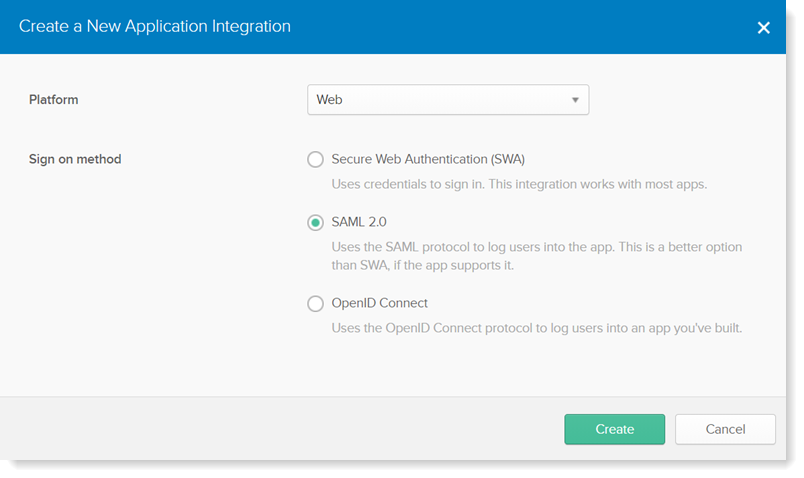
In the Create a New Application Integration dialog box, do the following:
- In the Platform field, select Web from the dropdown.
- In the Sign on method, select SAML 2.0.
- Click Create.
-
In the Create SAML Integration screen, in General Settings tab provide an App name and optionally set up an App logo. Click Next.
-
In Configure SAML tab, fill in the following fields as shown:
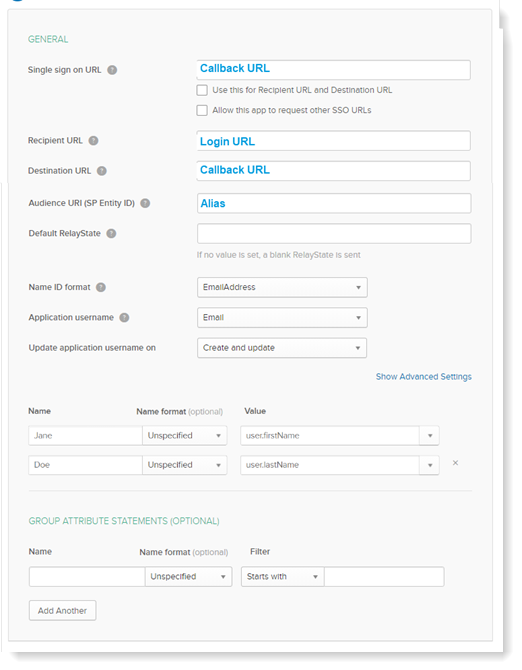
- Single sign on URL: Copy Callback URL from the Create Provider dialog box in Proofpoint Data Security. Leave the check boxes blank.
- Recipient URL: Copy Login URL from the Create Provider dialog box in Proofpoint Data Security. (This field appears only after you have filled in the Single sign on URL.)
- Destination URL: Copy Callback URL from the Create Provider dialog box in Proofpoint Data Security. (This field appears only after you have filled in the Single sign on URL.)
- Audience URI: Copy the Alias you provided in the Create Provider dialog box in tProofpoint Data Security.
- Name ID format: Select EmailAdress from the dropdown.
- Application username: Select Email from the dropdown.
- Name: Complete the user firstName and user lastName values.
- Click Next
-
Provide the required feedback and click Finish.
-
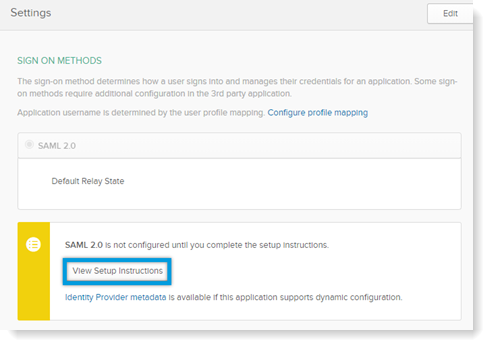
From the Sign On tab, in the Settings, click View Setup Instructions.
-
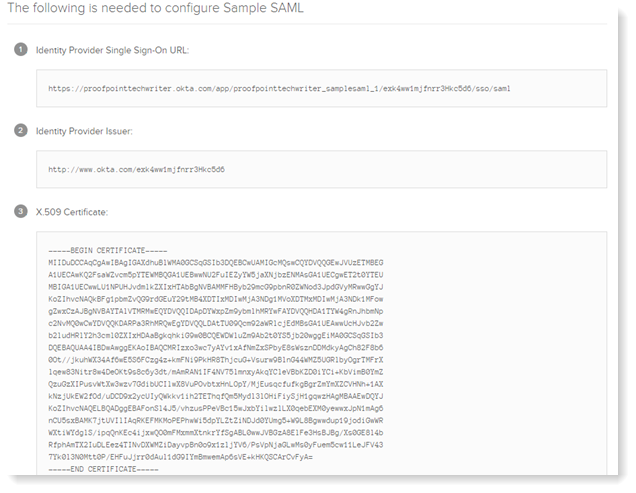
Scroll down and you can see the fields you will need to copy.
-
Complete the following fields in the Create Provider dialog box in Proofpoint Data Security from the Okta Settings as shown:
-
Issuer: Copy Identity Provider Issuer.
-
Entry Point: Copy Identity Provider Single Sign-On URL.
-
Certificate: Copy the Certificate.
-
-
Click Save.