Justifications prompts offer the user the option of continuing an action prevented by a rule by selecting a response.
To minimize productivity impact on monitored users, once a user provides a Justification during a file upload, any subsequent upload of the exact same file to the exact same website will be allowed. The agent will not perform content scanning again and will not prompt the user to provide Justification for this operation.
Justifications are assigned to notification policies for prevention rules. When a justification is configured in the notification, it appears in a pop-up when the user attempts a blocked action. The user selects a justification to proceed.
The justification displays in the Data Security Workbench > Exploration, when you select the relevant activity. The justification displays in the right-hand panel.
Default vs Rule Level Justifications
Justifications at the Realm Level (Default)
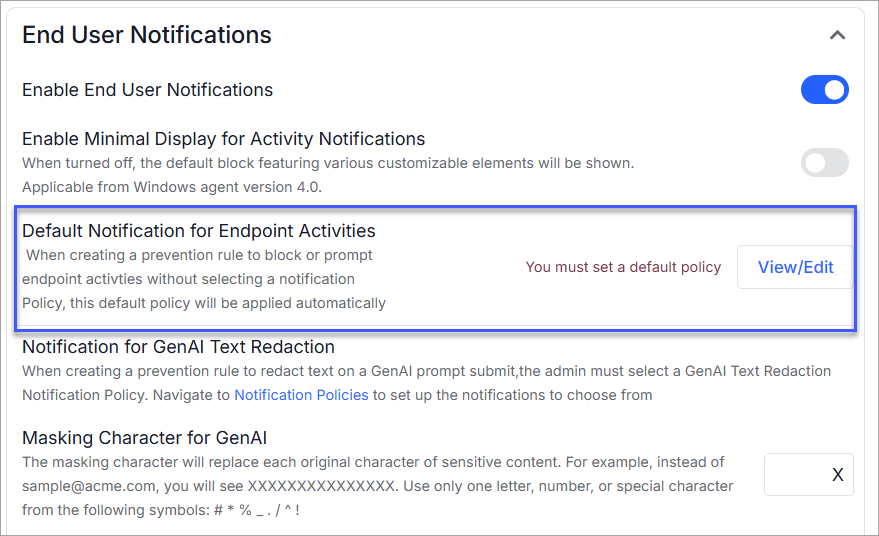
When you enable endpoint notifications at the Agent Realm level, you must configure a default notification policy in the Default Notifications for Endpoint Activities option.
The default notification policy includes a message and a justification.
You can customize the justification text or use the system-defined ones.
To access this:
-
Go to Admin application > Endpoints > Agent Realms > Advanced Settings > End User Notifications,
-
Click View/Edit in Default Notifications for Endpoint Activities option.
-
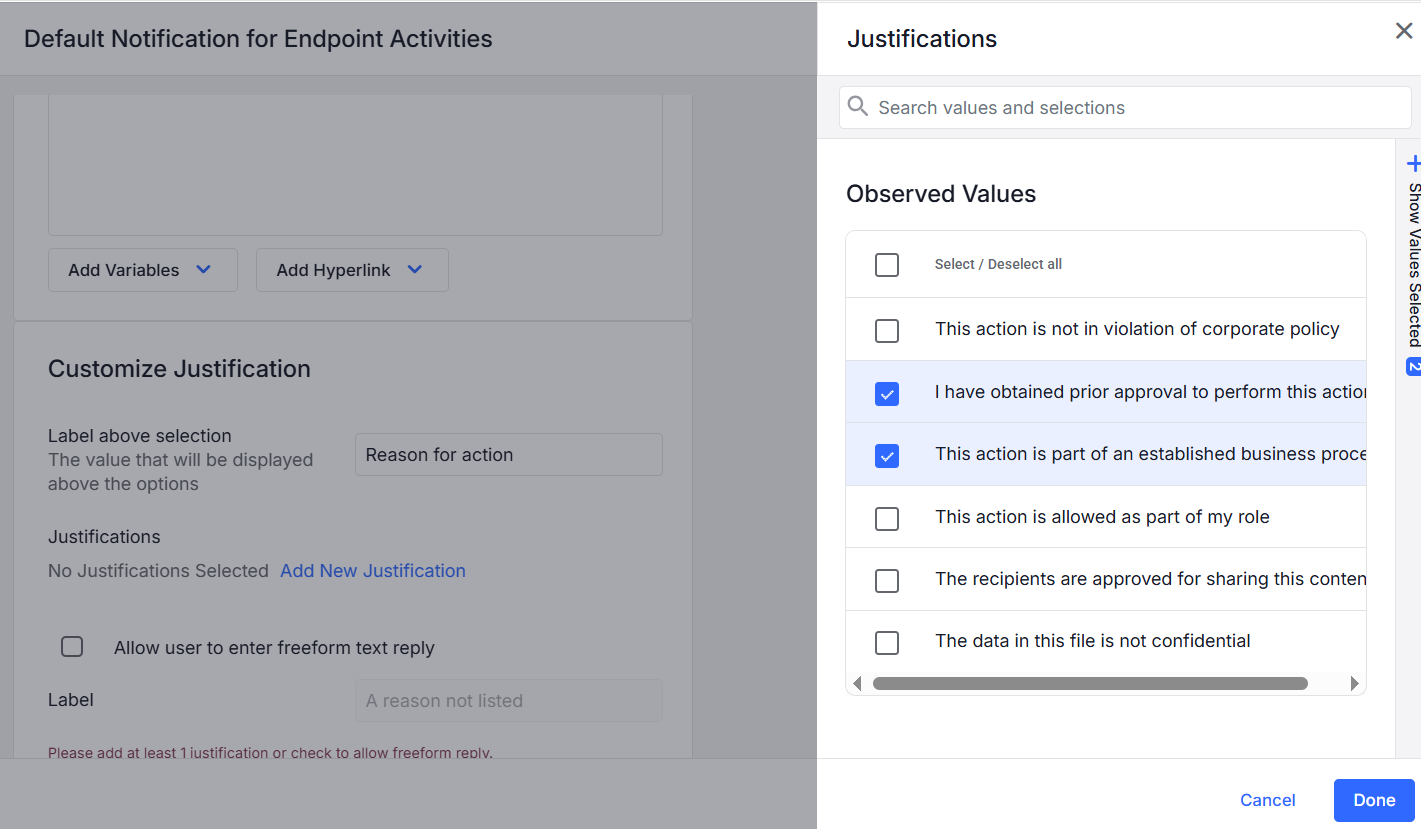
In the Customize Message displays, scroll to Customize Justification.
-
Click Add New Justification and select justification(s) from the Observed Values. These are all Proofpoint created justifications.
Justification at the Rule Level
You can define justifications at the rule level. By creating a notification policy and assigning it to specific prevention rules, you can override the default notification set at the Agent Realm level. (If you do not set up notifications at the rule level, the Agent Realm notifications are used as the default.)
Justification for prevention rules is available for Windows only.
-
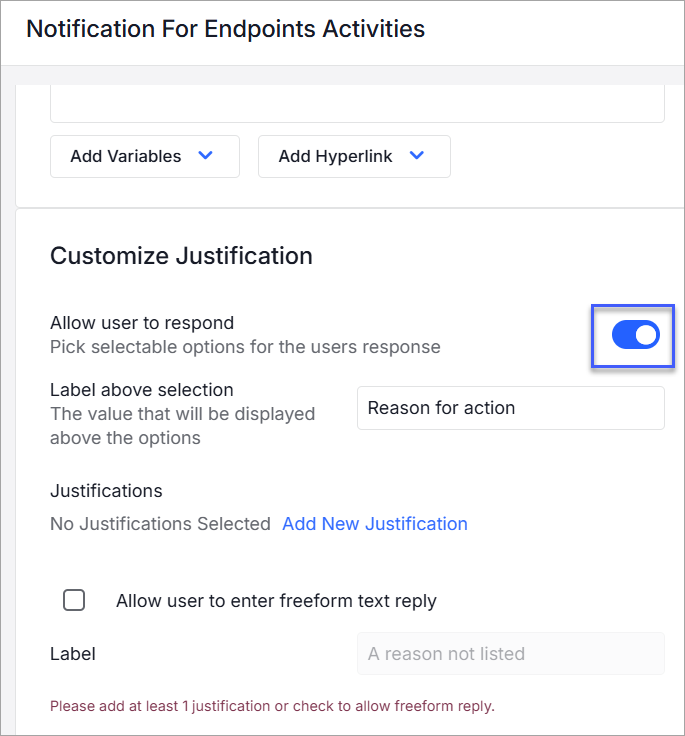
Assign the justification to an end user notification, select Integrations > Notifications Policies. Justifications are used with For Endpoint Activities.
-
In the Customize Justification area, enable Allow user to respond.
-
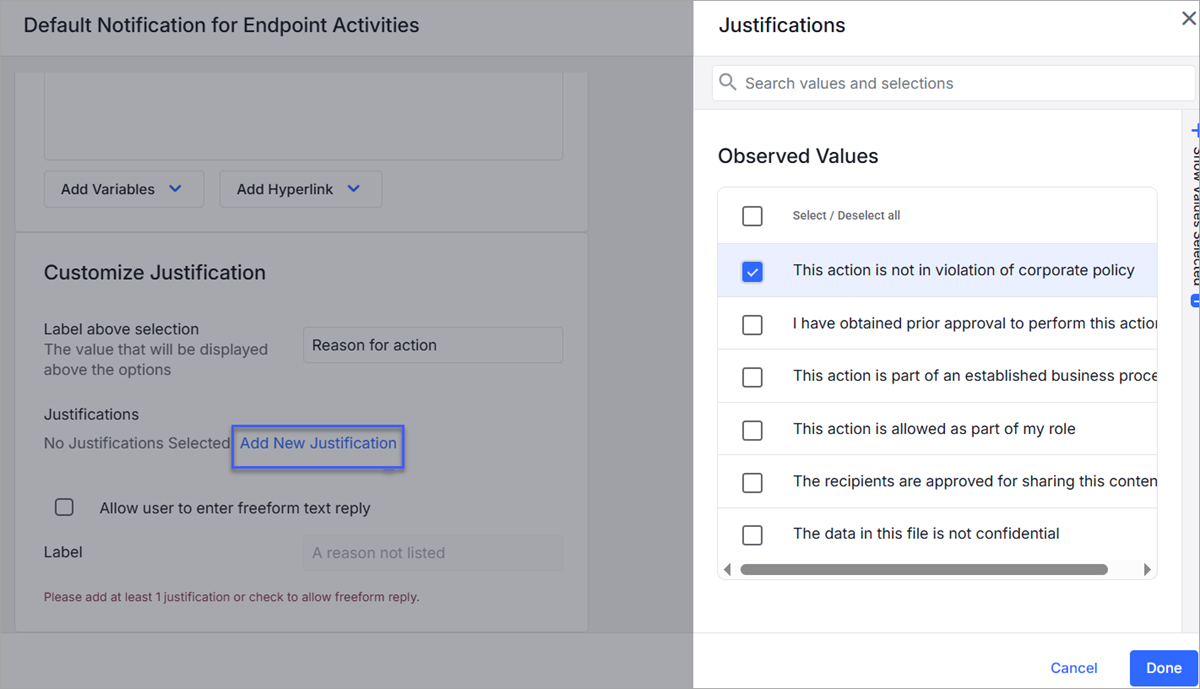
In the Justifications area, click Add New Justification. The list of Observed Values displays.
-
Select the justification from the list Observed Values and click Done.
-
Complete the steps for the end user notification and use it in a prevention rule.
Managing Justification
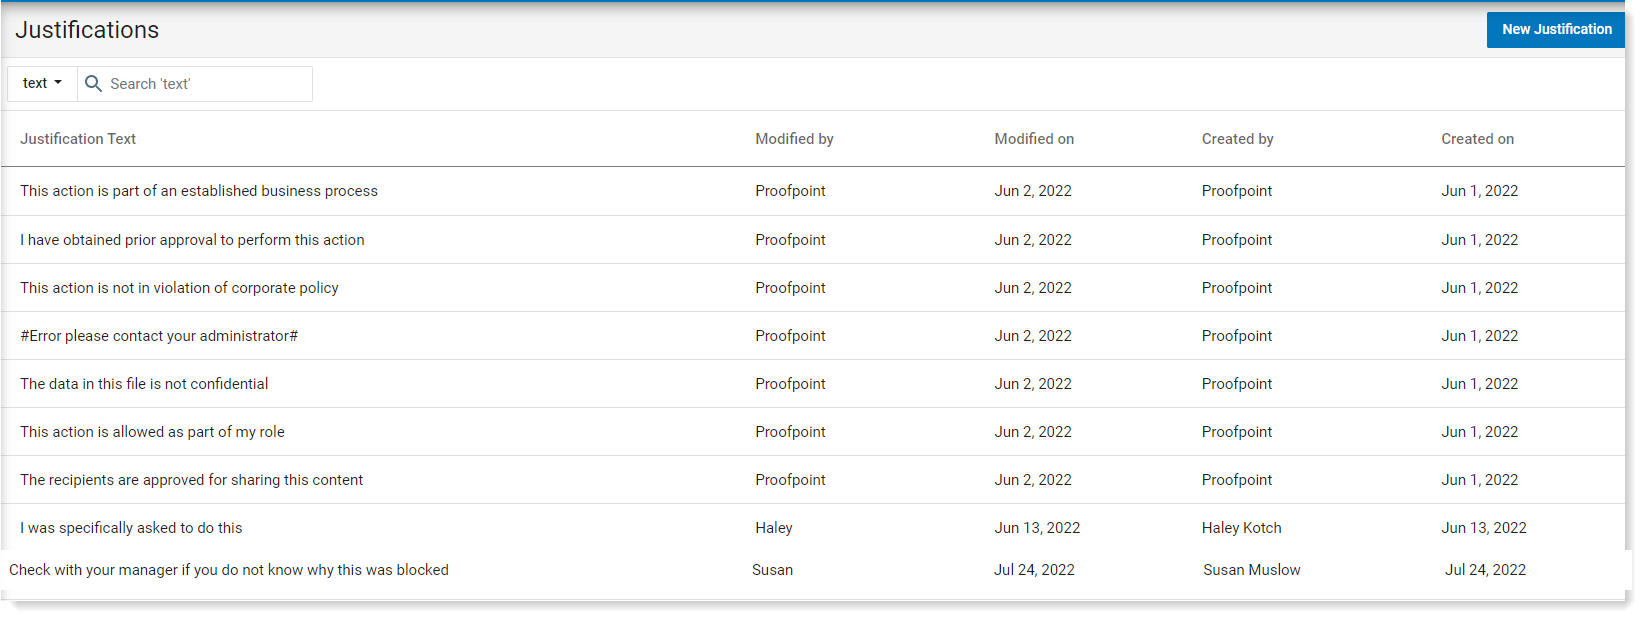
Justifications Page
The Justifications page contains justifications you create and maintain. The list also includes justification predefined by Proofpoint that you can use. (Proofpoint justifications cannot be changed.)
Since all justifications are listed in the Justification page, it is easy to reuse the same text in more than one end user notification.
From the Justifications page, administrators can create, modify, access and review justifications.
You can use the customized justification values and assign them to an end user notification for a prevention rule. This is useful if you want to assign the same justification to more than one end user notification.
The page includes a list of all the justifications, the text, who modified and created the justification and the date it was created and modified. You can search for a justification by all or part of its text. You can reuse the same customized responses for multiple prevention rules.
Adding a Custom Justification
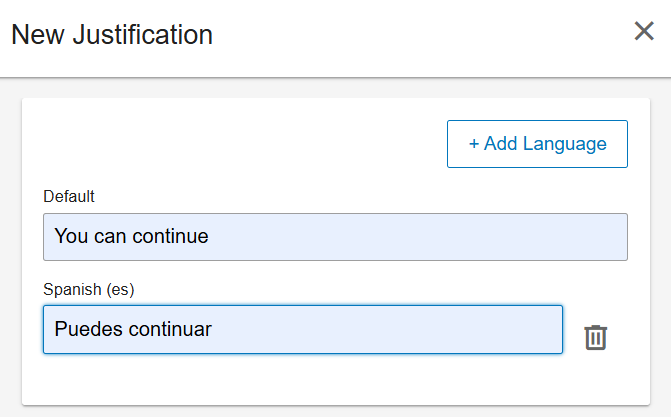
You can create a justification in the justification page.
-
From the Administration application, select Definitions > Justifications.
-
From the Justifications page, click New Justification.
-
In the Default text box, enter the text you want.
-
If you want to add language variants of the Justification, click Add Language.
-
Select the language from the list.
-
Add the justification in the relevant language text box.
-
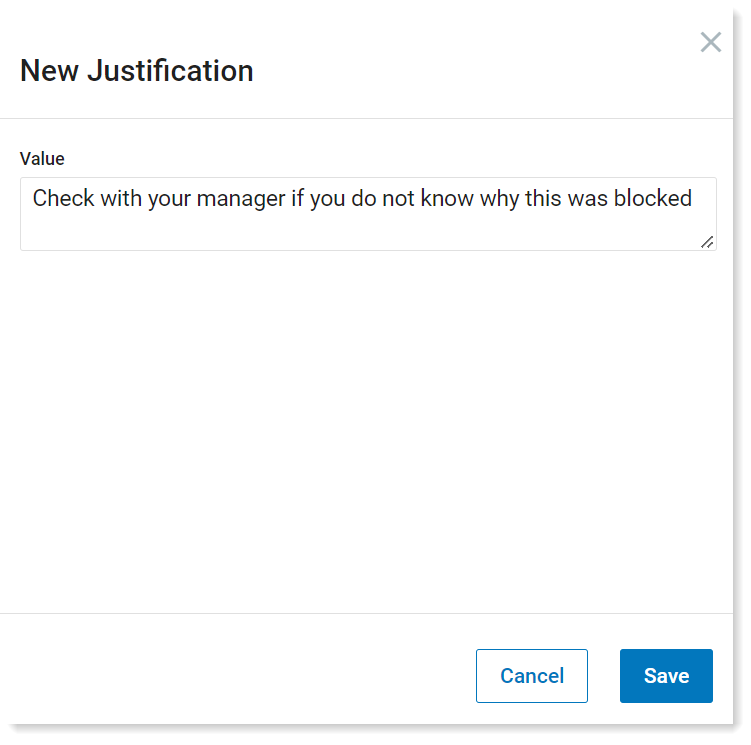
In the New Justification panel, enter the text you want in the Value field and click Save.
Related Topic:
ITM / Endpoint DLP Prevention Rules